
Main Courses
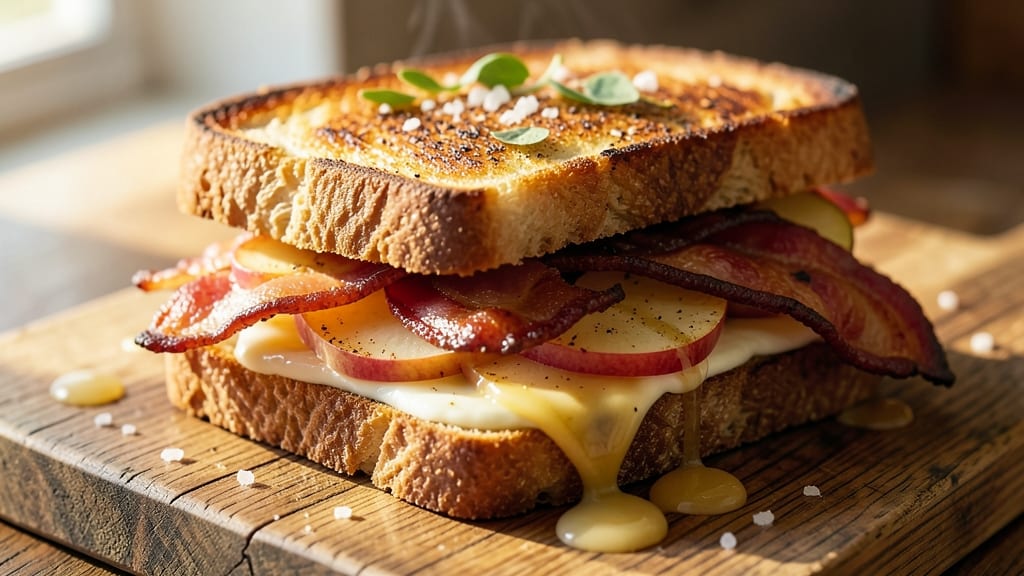
This apple bacon grilled cheese recipe transforms a classic comfort food into a symphony of smoky, sweet, and creamy flavors that’ll have you reaching for seconds. 🔥 The secret lies in caramelizing crisp apple slices and crisping bacon until golden—two simple techniques that elevate this sandwich from ordinary to extraordinary.
I perfected this recipe after years of experimenting with sweet-savory combos, and it’s now a staple in my kitchen when I crave something both nostalgic and exciting.
The magic happens in the balance: tender bread, melty cheese, sweet caramelized apples, and smoky bacon create a perfect harmony of textures and tastes. You’ll need just 10 minutes of active prep—slicing apples, cooking bacon, and assembling the sandwich—before the real magic unfolds in the pan.
The key is medium heat and a well-buttered skillet to create those golden, crispy edges while keeping the inside creamy and warm.
What you end up with is a sandwich that’s crispy on the outside, gooey in the middle, and packed with layers of flavor—sweet from the apples, salty from the bacon, and rich from the melted cheese.
It’s the kind of meal that feels indulgent yet satisfying, perfect for a quick lunch or a cozy dinner. The best part? Every bite delivers that perfect balance of textures and flavors that keep you coming back for more.
Serve it with a side of tangy apple slices or a simple green salad to cut through the richness. This recipe is foolproof, but I’ll share my tips for avoiding soggy bread and ensuring the apples stay caramelized—not mushy—in the next section. Let’s get started!
Ingredients for apple bacon grilled cheese
Sweet apples, smoky bacon, and melty cheese—this grilled cheese has it all.
| Ingredient | Amount | Notes |
|---|---|---|
| Bread 🍞 | 8 slices | Sourdough or Texas toast preferred |
| Honeycrisp Apples 🍎 | 1 medium | Cored and thinly sliced |
| Bacon 🥓 | 6 oz | Thick-cut, chopped into bite-sized pieces |
| Cheddar Cheese 🧀 | 1 ½ cups | Sharp cheddar, freshly shredded |
| Butter 🧈 | 4 tbsp | Unsalted, melted for brushing |
| Mayonnaise 🥫 | 1 tbsp | For extra creaminess (optional) |
| Salt 🧂 | ½ tsp | Kosher or sea salt |
| Black Pepper 🌶️ | ¼ tsp | Freshly ground for best flavor |
| Garlic Powder 🧄 | ¼ tsp | For extra depth (optional) |
| Olive Oil 🫒 | 1 tbsp | For skillet coating |
| Lemon Juice 🍋 | 1 tsp | Freshly squeezed for brightness |
| Maple Syrup 🍁 | 1 tsp | For caramelizing apples (optional) |
The apples are the star here—Honeycrisp is my go-to, but Fuji or Gala work too. Grab pre-sliced apples at Whole Foods if you're short on time, but slicing them yourself ensures they caramelize perfectly. Thick-cut bacon (like Oscar Mayer Thick Cuts) gives the best crunch, but any bacon works in a pinch. For the bread, sourdough or Texas toast holds up best to the heat—no flimsy white bread here. The cheese? Sharp cheddar melts beautifully, but Gouda or pepper jack add fun twists if you're feeling adventurous.
No Honeycrisp apples? Granny Smith adds tanginess, or Pink Lady for extra sweetness. Bacon too fatty? Pat it dry with paper towels before cooking. The maple syrup is optional but worth it—just a teaspoon brushed on the apple slices before they hit the pan turns them into little caramelized gems. Short on mayo? Greek yogurt or cream cheese works for that creamy layer. And if you’re out of olive oil, butter or bacon fat from cooking the bacon will do the trick—just don’t skip it!
This sandwich reheats like a dream—wrap leftovers in foil and pop them in a skillet for 2-3 minutes per side. Keeps for 3 days in the fridge, but honestly, it’s best fresh. For make-ahead prep, cook the bacon and caramelize the apples in advance, then assemble when ready to eat. The apples soften fast, so store them separately until sandwich time. Pro tip: Double the recipe—these disappear faster than you can say ‘golden edges.’
Why You'll Love This Recipe
- Five-Ingredient Magic: I swear by this combo—crispy bacon, sweet Honeycrisp apples, and sharp cheddar melt together like they were always meant to. No fancy prep, just slice, layer, and press.
- Crunchy Sweet Crunch: The apples stay just firm enough to bite into while the cheese gets that perfect gooey pull. Honestly, the first time I tried this, I ate it straight from the pan.
- Lunchbox Hero: Between us, this is my go-to for school lunches or office meals. Wrap the leftovers in foil, and they stay warm and delicious for hours—no sad soggy sandwiches here.
- Budget Power Move: Bacon and apples stretch this into two full meals for the price of one. I’ll often double the batch and freeze half—because why not? It’s basically a $5 gourmet sandwich.
Step-by-step instructions for apple bacon grilled cheese
Here's how to build the ultimate smoky-sweet sandwich with caramelized edges!
🔥 Step 1: Cook the Bacon to Perfect Crispiness
Line a baking sheet with parchment paper and arrange the 6 oz bacon pieces in a single layer. Cook in a cold skillet over medium heat for 12-15 minutes, flipping occasionally, until the bacon is deep golden brown and crispy. Real talk: don't rush this—you want that fat rendered out and those edges perfectly crisp.
Transfer the cooked bacon to paper towels to drain excess fat, but leave it on the baking sheet for now. We'll use it again in the next step. The bacon should be crisp enough to hold its shape when you press it between your fingers—this ensures maximum crunch in every bite.
🍳 Step 2: Caramelize the Apples with Sweet-Smoky Flavor
In the same skillet (don't wash it—those bacon bits are flavor gold), add 1 tablespoon olive oil over medium heat. Toss in the thinly sliced Honeycrisp apples and cook for 4-5 minutes until they begin to soften slightly but still retain some bite.
Add 1 teaspoon maple syrup and 1 teaspoon lemon juice, stirring to coat. Cook for another 2-3 minutes until the apples release their juices and develop a beautiful caramelized sheen. Here's the thing—you want them tender but still holding their shape so they don't turn to mush in the sandwich. Sprinkle with ½ teaspoon salt and ¼ teaspoon black pepper, then remove from heat.
👨🍳 Step 3: Assemble the Ultimate Grilled Cheese Layers
Lay out 4 slices of bread on a clean surface. Spread each with 1 tablespoon mayonnaise—this adds that extra creaminess we're going for. On half the slices, sprinkle ⅓ cup cheddar cheese and divide the caramelized apples evenly between them. Top with the remaining cheese and bread slices.
Here's where it gets fun—add the crispy bacon pieces to the outside of each sandwich. The bacon should be evenly distributed so every bite delivers that smoky crunch. Press down gently on each sandwich to help the cheese melt and the layers adhere. I like to make them slightly overlapping for maximum surface area when grilling.
🔥 Step 4: Grill to Golden Perfection with Buttery Crust
Heat a clean skillet over medium heat until it's hot but not smoking. Add 2 tablespoons melted butter to each sandwich and place them in the pan. Cook for 3-4 minutes per side until the bread is deep golden brown with crispy edges and the cheese is fully melted.
Watch for those beautiful caramelized spots forming on the bread—this is your signal the sandwich is ready. The edges should be crisp enough to hold their shape when you lift the sandwich, but still have that gooey pull-apart texture in the center. If the bacon isn't quite crispy enough, you can pop the sandwiches under the broiler for 30 seconds to finish.
⏰ Step 5: Rest and Serve with Maximum Crunch
Transfer the grilled cheese sandwiches to a cutting board and let them rest for 2 minutes. This gives the cheese time to set slightly and makes cutting easier. Cut each sandwich diagonally into 2 equal triangles—this is the only way to eat them, trust me.
Serve immediately while the bread is still crispy and the cheese is melty. The combination of smoky bacon, sweet caramelized apples, and sharp cheddar creates the perfect balance of flavors in every bite. Don't forget to wipe up any extra cheese that might have escaped—it's worth the mess!
Pro Tips For Making Apple Bacon Grilled Cheese
- CRISP THE BACON FIRST: Cook your bacon until it’s just crispy—not well-done, not rubbery, but that perfect snap when you fold it into the sandwich. Overcooked bacon turns limp and soggy when sandwiched between melty cheese and apples. Save the extra slices for salads or breakfast—this recipe only needs 2-3 pieces per sandwich.
- TOAST THE BREAD HARD: Don’t skimp on the butter—slather both slices generously, then toast them in the same pan until deep golden brown with visible grill marks. Cold bread soaks up cheese like a sponge, killing the texture. A quick 1-2 minutes per side on medium-high heat makes all the difference.
- THIN THE APPLE SLICES: Honeycrisp apples get mushy fast. Slice them paper-thin (⅛-inch or less) and toss with a pinch of salt to draw out moisture before assembling. Let them sit on a paper towel for 5 minutes—this keeps your sandwich from turning into a wet, sad mess.
- PRESS THE SANDWICH FIRM: Once assembled, don’t just slap it in the pan. Press down with a spatula or small plate for 10 seconds to help the cheese melt evenly and the bread absorb flavor. I used to rush this, and the apples would steam instead of caramelize. A little patience = a better bite.
Troubleshooting this dish
Soggy Bread Fix
If your bread turns out soggy instead of crispy, it’s usually from too much moisture in the filling. I’ve found that overloading the sandwich with wet ingredients like raw apples or excess mayo is the #1 culprit.
Always caramelize your apples first—they’ll release moisture during cooking, so keep them tender but not mushy. Also, press the sandwiches firmly together before grilling to help the layers bond.
Another trick: pat your bread dry with a paper towel before assembling. Even slightly damp bread can lead to sogginess. And if you’re using a very soft bread like brioche, reduce the mayo to just ½ tablespoon per slice—it’s already packed with moisture. 🔥
Cheese Not Melting?
If your cheese stays stubbornly solid, it’s likely because the heat wasn’t consistent or the sandwiches weren’t pressed tightly enough. First, make sure your skillet is hot enough—it should be sizzling when you add the butter.
I use a 10-inch cast iron skillet for even heat distribution. Second, press the sandwiches down gently but firmly with a spatula during cooking to help the cheese melt into a gooey blanket.
For extra insurance, sprinkle a pinch of garlic powder on the cheese layer—it helps break down the proteins faster. And if you’re using a low-fat cheese, add a thin layer of cream cheese between the slices to help bind everything together.
The goal is 165°F internal temperature—use an instant-read thermometer to check!
Apples Turning Mushy
Overcooking the apples is the fastest way to turn them into a sad, watery mess. I’ve ruined more than a few batches by letting them sit too long in the skillet.
The key is timing: cook them for no more than 5-6 minutes total—just until they soften slightly but still hold their shape. If they’re releasing too much liquid, drain them on a paper towel-lined plate for 1 minute before assembling the sandwich.
For extra stability, toss the sliced apples in ½ teaspoon lemon juice right after slicing to slow oxidation. This keeps them from browning too quickly while you prep the rest of the sandwich.
And if you’re worried about them getting soggy, pat them dry before adding them to the bread—this makes all the difference. 🍎
Bacon Too Greasy
Excess bacon fat can make your sandwich greasy and heavy, especially if it pools in the pan. To avoid this, drain the cooked bacon on paper towels for 2-3 minutes before assembling.
I also like to blot the skillet with a fresh paper towel after cooking the bacon but before caramelizing the apples—this removes most of the residual fat.
For an even lighter touch, skip the mayo and use Greek yogurt instead—it’s tangy and still creamy but won’t add extra grease. And if you’re using a nonstick skillet, you might need to reduce the butter to 1 tablespoon per sandwich to avoid an overly oily crust.
The goal is crispy, not greasy!
Uneven Grilling
Uneven browning usually means your heat isn’t distributed evenly. I’ve had this happen when using a small skillet or when the sandwiches are too large. First, make sure your skillet is big enough—a 10-inch cast iron is ideal for two sandwiches at a time.
If your skillet is too small, the edges will cook faster than the center.
For even cooking, rotate the sandwiches halfway through the grilling time. And if you’re using a nonstick pan, add a tiny bit of olive oil to the butter to help create a better crust.
The edges should be golden brown while the center stays soft—this is the sweet spot for texture. If one side browns too fast, reduce the heat to medium-low for the second side. ✨
Nutrition facts
Frequently asked questions
Can I make this sandwich ahead of time?
Prep the bacon and caramelized apples in advance, then store them separately in the fridge for up to 2 days. Assemble the sandwiches just before cooking to keep the bread crispy. For make-ahead convenience, cook the bacon and apples the night before, then assemble and grill fresh in the morning. The flavors actually improve overnight as the apples soften further!
What's the best bread for this recipe?
For maximum crispiness, use sourdough or Texas toast—they hold up best to the heat. Avoid soft breads like brioche unless you reduce the mayo to ½ tablespoon per slice to prevent sogginess. Pro tip: Toast your bread lightly before assembling for extra crunch!
How do I keep the apples from getting mushy?
Caramelize them just until tender (5-6 minutes total) and pat dry with paper towels before assembling. Toss sliced apples with ½ teaspoon lemon juice right after cutting to slow browning. If they release too much liquid, drain them on a towel-lined plate for 1 minute before adding to the sandwich.
Can I use different cheeses?
Yes! While sharp cheddar works best, try Gouda for extra creaminess or pepper jack for heat. For a smoky twist, add ½ cup smoked gouda to the mix. Avoid pre-shredded cheese—it contains anti-caking agents that prevent proper melting. Always use freshly shredded for that perfect gooey texture!
What's the secret to crispy edges?
Use medium heat and a well-buttered 10-inch cast iron skillet for even cooking. Press the sandwiches gently with a spatula while grilling to help the cheese melt evenly. For extra crispiness, add 1 teaspoon olive oil to the butter when grilling. The edges should be golden brown while the center stays soft!