
Main Courses
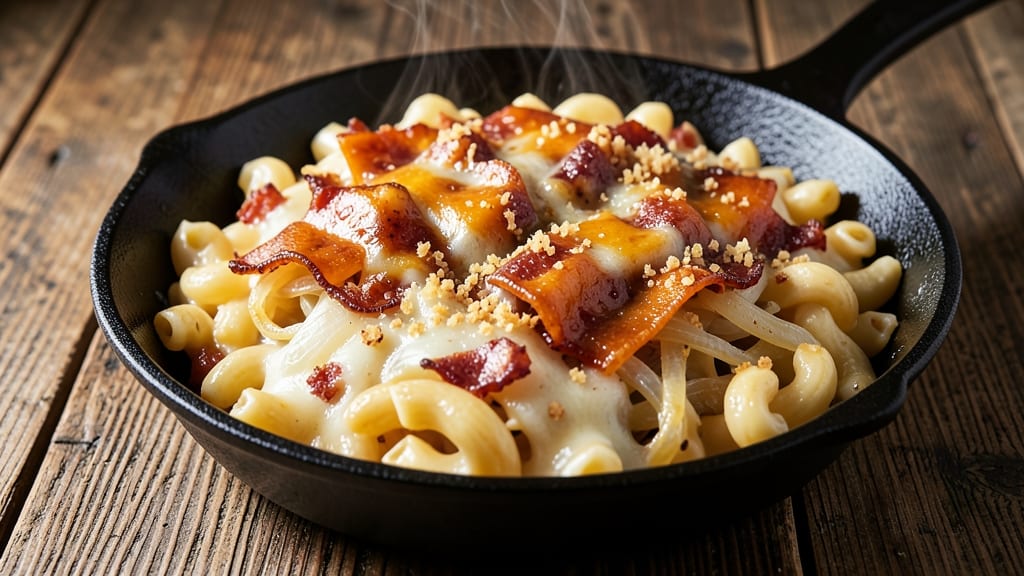
This African American baked mac and cheese recipe delivers the perfect marriage of crispy golden breadcrumbs and a gooey, cheesy core that's been passed down through generations. 🔥 The secret lies in using a blend of sharp cheddar, smoked gouda, and a touch of mustard for depth—creating a sauce so rich it practically melts in your mouth.
I first tasted this version at a family gathering where the aroma alone had everyone gathering around the table before the timer even rang.
The magic happens in two stages: first, crafting a velvety cheese sauce that coats every elbow macaroni perfectly, then topping it with a buttery breadcrumb crust that turns crispy under the broiler.
This isn't your basic mac and cheese—it's a soulful dish that carries the warmth of tradition while being simple enough for weeknight dinners. The cayenne pepper adds just the right kick, balancing the richness without overpowering.
What you'll end up with is a casserole that's impossible to resist—golden on top, creamy in the middle, and packed with that unmistakable cheesy flavor that makes every bite satisfying. The breadcrumb topping stays crispy even when sliced, while the pasta underneath remains tender.
This recipe serves 6-8 generously, making it perfect for family gatherings or when you want to bring comfort food to the table.
Pair it with collard greens and cornbread for a full Southern-inspired meal, or serve it alongside grilled chicken for a hearty dinner. The beauty of this dish is its versatility—it's rich enough to feel special but simple enough to make regularly.
Let's get started on creating this classic comfort food masterpiece.
Ingredients for african american baked mac and cheese
Pantry staples meet Southern soul in this cheesy, crispy masterpiece.
| Ingredient | Amount | Notes |
|---|---|---|
| Elbow Macaroni 🍝 | 1 ½ lbs | Medium or elbow shape preferred |
| Sharp Cheddar Cheese 🧀 | 2 cups | Shredded, block preferred |
| Smoked Gouda Cheese 🧀 | 1 cup | Shredded, for depth of flavor |
| Butter 🧈 | ½ cup | Unsalted, melted for sauce |
| All-Purpose Flour 🌾 | ¼ cup | For roux base |
| Whole Milk 🥛 | 2 cups | Full-fat for creaminess |
| Yellow Mustard 🥬 | 1 tbsp | For tangy depth |
| Cayenne Pepper 🌶️ | ¼ tsp | Adjust for heat preference |
| Salt 🧂 | 1 ½ tsp | Kosher or sea salt |
| Black Pepper 🌶️ | ½ tsp | Freshly ground preferred |
| Panko Breadcrumbs 🍞 | 1 cup | For crispy topping |
| Garlic Powder 🧄 | 1 tsp | For extra flavor |
| Dried Parsley 🌿 | 1 tbsp | For garnish |
The cheeses are non-negotiable here. Sharp cheddar for that classic tang and smoked gouda for depth—both need to be freshly shredded (pre-shredded gets clumpy). I grab mine from Whole Foods or the deli section at Kroger, where they shred it fresh. For the macaroni, elbow shape is traditional, but any short pasta works. The mustard might seem odd, but it cuts through the richness beautifully—French's yellow is my go-to, but any good-quality mustard does the trick.
No smoked gouda? Smoked cheddar works in a pinch, though it won’t have the same caramelized flavor. Short on panko? Toasted breadcrumbs from a loaf (pulverized in a food processor) work just as well. The cayenne is optional but recommended—start with 1/4 tsp and adjust to taste. For extra crispiness, I mix 1 tbsp melted butter into the breadcrumbs before topping. And if you’re feeling fancy, add a sprinkle of paprika for color.
This casserole reheats beautifully—actually tastes better the next day. Store leftovers covered in the fridge for up to 4 days, or freeze portions for 3 months. I always make a double batch because it disappears fast. The breadcrumb topping stays crispy if you reheat it covered with foil for 10 minutes, then uncover to crisp up under the broiler for another 2 minutes.
Why You'll Love This Recipe
- One-Pot Magic: I swear by this recipe for lazy nights—just boil pasta, mix in the roux, and bake. No extra bowls, no fuss, and that golden crust? Worth every minute.
- Smoky Cheese Dream: Sharp cheddar meets smoked gouda—it’s like a hug in cheesy form. The smokiness lingers, but the meltiness? Absolute perfection.
- Game for Any Gathering: Bring this to potlucks, game days, or family dinners. It’s hearty enough for a crowd but simple enough to throw together when unexpected guests show up.
- Budget Baked Bliss: Cheese stretches far, pasta’s cheap, and leftovers reheat like a dream. Honestly, I make this twice a month just to save money—and my taste buds.
Step-by-step instructions for soul-warming crispy top and gooey core mac and cheese
Here's how to create that perfect balance of crispy golden crust and creamy cheese goodness.
🍳 Step 1: Cook the Elbow Macaroni Al Dente
Bring a large pot of water to a rolling boil and add 1.5 lbs elbow macaroni. Stir immediately to prevent sticking. Cook until 1 minute before the package instructions for al dente—this ensures it finishes cooking in the oven without turning mushy. Drain the pasta in a colander, shaking it gently to remove excess water, and return it to the pot.
I like to give the pasta a quick toss with a splash of the pasta water to help distribute the cheese later. This step is crucial—don't skip it! The residual starch helps create that creamy texture we all love. Keep the pot warm while you prepare the cheese sauce.
👨🍳 Step 2: Make the Creamy Cheese Sauce
In a separate large bowl, combine 2 cups sharp cheddar cheese and 1 cup smoked gouda cheese with 1 tbsp yellow mustard, 0.25 tsp cayenne pepper, 1.5 tsp salt, and 0.5 tsp black pepper. Mix well to distribute the spices evenly through the cheese.
In a medium saucepan, melt 0.5 cup butter over medium heat. Whisk in 0.25 cup all-purpose flour and cook for 1-2 minutes until the mixture turns a light golden color. Slowly whisk in 2 cups whole milk until smooth. Bring to a gentle simmer and cook for 3-5 minutes until the sauce thickens enough to coat the back of a spoon.
🥘 Step 3: Combine Pasta and Cheese
Pour the hot cheese sauce over the warm macaroni in the pot. Stir gently but thoroughly to coat every strand of pasta with the creamy mixture. If the sauce seems too thick, add a splash of warm water or milk to loosen it. Here's the thing—you want it thick enough to cling to the pasta but still spreadable.
Once fully combined, transfer the macaroni mixture to a greased 9x13-inch baking dish. Spread it out evenly, pressing down gently to help it set up properly. This step ensures your mac and cheese holds its shape when it bakes and doesn't slide around in the oven.
🔥 Step 4: Prepare the Crispy Topping
In a small bowl, mix together 1 cup panko breadcrumbs, 1 tsp garlic powder, and 1 tbsp dried parsley. Sprinkle this mixture evenly over the top of the macaroni in the baking dish. The panko will create that perfect crispy crust we're after.
For extra crispiness, I like to melt a little more butter and brush it over the breadcrumb topping right before baking. This gives you that golden, crunchy finish that makes this dish so special. Don't skip this step—it's what makes your baked mac and cheese restaurant-quality!
🔥 Step 5: Bake to Golden Perfection
Preheat your oven to 375°F. Bake the mac and cheese for 20-25 minutes until the top is golden brown and the edges are bubbling. You'll know it's ready when you see that beautiful crispy crust forming and the cheese is fully melted throughout.
Let the mac and cheese rest for 5-10 minutes before serving. This resting time allows the cheese to set slightly, making it easier to slice and serve without losing all that creamy goodness. The crispy topping will stay crunchy, and the center will be perfectly gooey—just the way we like it!
Pro Tips For Making African American Baked Mac And Cheese
- Cook the Pasta Al Dente: This isn’t just about taste—it’s about texture. Elbow macaroni should have a slight bite, not turn to mush when baked. Taste it 30 seconds before the package says "done," then drain immediately and toss with a splash of cold water. (Yes, even if you’re impatient like me.)
- Shred Cheese Like a Pro: Skip the food processor—it makes cheese greasy. Use a box grater and work in batches, pressing the cheese through with a spoon to break up any clumps. Smoked Gouda should be shredded finer than sharp cheddar for even melting. (I learned this the hard way after a lumpy disaster.)
- Don’t Rush the Roux: Whisk that butter and flour over medium heat until it’s a rich, golden paste—about 3-4 minutes. Too hot, and it’ll burn; too cool, and the sauce won’t thicken right. If it smells nutty, you’re golden. (Sounds weird, but it works.)
- Bake in Two Stages: First, bake at 375°F (190°C) until the top is bubbly and starting to brown—about 15 minutes. Then, crank to 425°F (220°C) for the last 5 minutes to get that deep, crispy crust. (Your future self will thank you.)
Perfect pairings for this recipe
Classic Southern Sides
This mac and cheese pairs beautifully with collard greens cooked with smoked turkey and a splash of apple cider vinegar. I like to serve them alongside a cornbread loaf with honey butter glaze—it soaks up every bit of the cheesy goodness.
The smoky flavors of the cornbread complement the smoked gouda in the mac and cheese perfectly. 🥗
Protein Pairings
For a heartier meal, serve this mac and cheese with grilled chicken thighs marinated in lemon and garlic. The juicy chicken balances the richness of the cheese sauce. Alternatively, pulled pork with a tangy BBQ sauce adds a smoky depth that enhances the dish.
I often make a double batch of mac and cheese to serve alongside these proteins for a full Southern feast.
Vegetable Accompaniments
Add some freshness to the meal with a simple green salad dressed with a light vinaigrette. I toss mixed greens with cherry tomatoes, cucumber slices, and a drizzle of balsamic vinaigrette.
The crisp textures and bright flavors cut through the richness of the mac and cheese beautifully. Another great option is roasted Brussels sprouts with a sprinkle of bacon bits for added crunch.
Beverage Matchups
A crisp sweet tea is a classic pairing with this dish—its slight sweetness balances the richness of the cheese. For a non-alcoholic option, try a sparkling lemonade with a hint of mint.
If you prefer beer, a light lager like Bud Light or a wheat beer like Blue Moon complements the dish without overpowering it. For wine lovers, a dry Riesling or Chardonnay works wonderfully.
Breakfast Twist
For a breakfast or brunch version, serve this mac and cheese alongside scrambled eggs and crispy bacon. The salty, smoky flavors of the bacon and eggs pair perfectly with the creamy cheese.
Top the dish with a fried egg for added richness and a runny yolk that ties everything together. This combination is a crowd-pleaser and perfect for a hearty morning meal.
Holiday Feast Addition
This mac and cheese is a staple at holiday gatherings. Serve it as part of a Thanksgiving or Christmas dinner alongside roasted turkey, mashed sweet potatoes, and stuffing. The cheesy casserole adds a comforting element to the meal and is always a hit with guests.
You can even make it ahead of time and reheat it before serving—it tastes even better the next day! 🎄
Nutrition facts
Frequently asked questions
Can I make this mac and cheese without smoked gouda?
For a similar smoky flavor, substitute with smoked cheddar or add 1/2 teaspoon smoked paprika to the cheese sauce. The mustard and cayenne will still provide that signature tangy kick, but smoked gouda gives the dish its signature depth that's hard to replicate.
How do I make this dish extra crispy?
For maximum crispiness, mix 1 tablespoon melted butter with the breadcrumbs before topping. Broil for 2-3 minutes at the end of baking—watch closely to avoid burning. Another trick: spread the mac and cheese in a thin layer in the baking dish to maximize surface area for browning.
Can I use a different type of pasta?
Elbow macaroni is traditional, but cavatappi or penne work beautifully too. Avoid long pasta like spaghetti—it won't hold together well in the casserole. If using cavatappi, you might need slightly more cheese sauce to coat all the nooks and crannies properly.
Why did my mac and cheese get watery?
Overcooking the pasta or adding too much liquid during assembly causes wateriness. Always cook pasta 1 minute less than package instructions and drain well. For the sauce, thicken it properly by simmering until it coats the back of a spoon before combining with pasta.
How long can I store leftovers?
Store covered in the fridge for up to 4 days or freeze portions for 3 months. Reheat covered with foil for 10 minutes, then uncover and broil for 2 minutes to restore crispiness. The flavor actually improves after resting overnight!