
Main Courses
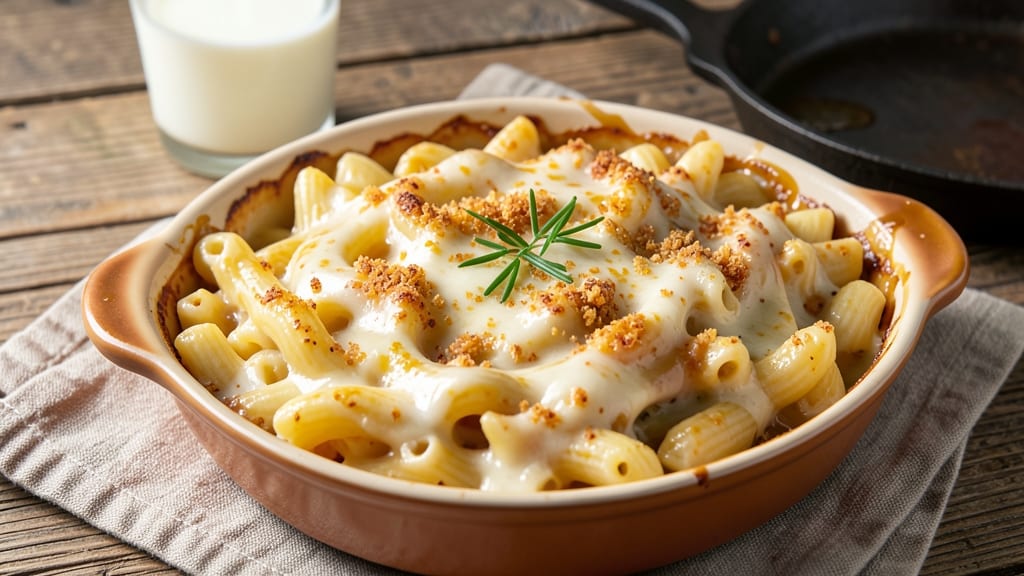
This American-style mac n cheese recipe delivers the perfect balance of crispy breadcrumb topping and velvety elbow pasta—just like your favorite diner version. The secret lies in a rich, roux-based cheese sauce that clings to every noodle, while the golden crust adds satisfying texture with each bite.
I've perfected this method over years of testing, ensuring the sauce stays smooth and the crust stays perfectly crispy, even when reheated. The foundation starts with a simple yet essential technique: cooking a roux to create a stable base for the cheese.
This prevents the sauce from breaking, even when mixed with milk and melted cheeses. Sharp cheddar provides the classic tang, while Gruyère adds depth and creaminess. The elbow pasta cooks directly in the sauce, absorbing all that rich, cheesy goodness.
What sets this recipe apart is the crispy breadcrumb topping, which adds a satisfying crunch that contrasts beautifully with the creamy pasta. The breadcrumbs toast to a golden brown while the mac and cheese bakes, creating a textural experience that makes every forkful irresistible.
This dish is hearty enough for a main course but simple enough for a comforting weeknight dinner. Ready in about 45 minutes, this mac and cheese is perfect for feeding a crowd or meal prepping for the week. The leftovers reheat beautifully, maintaining that perfect balance of crispy and creamy.
Once you try this version, you'll never go back to the boxed kind—it's truly restaurant-quality at home.
Ingredients for american style mac n cheese
Six servings of cheesy perfection—crispy crust, creamy sauce, and elbow pasta that's pure comfort.
| Ingredient | Amount | Notes |
|---|---|---|
| Elbow Macaroni 🍝 | 1 ½ lb | Uncooked, elbow shape preferred |
| Unsalted Butter 🧈 | ½ cup | Cold, cut into small cubes |
| All-Purpose Flour 🌾 | ¼ cup | For roux base |
| Sharp Cheddar Cheese 🧀 | 2 cups | Shredded, block preferred |
| Gruyère Cheese 🧀 | 1 cup | Shredded, adds creaminess |
| Whole Milk 🥛 | 2 ½ cups | Full-fat for richness |
| Heavy Cream 🥛 | ½ cup | For velvety texture |
| Panko Breadcrumbs 🍞 | 1 cup | For crispy topping |
| Parmesan Cheese 🧀 | ¼ cup | Freshly grated for topping |
| Garlic Powder 🧄 | 1 tsp | For extra flavor |
| Ground Black Pepper 🌶️ | ½ tsp | Freshly ground preferred |
| Salt 🧂 | 1 ½ tsp | Kosher or sea salt |
| Extra-Virgin Olive Oil 🫒 | 2 tbsp | For crispy topping |
The cheeses are non-negotiable here. Sharp cheddar gives that classic tang, but Gruyère is what takes this to restaurant-level—creamy, nutty, and just rich enough. Grab a wedge of each from the deli counter instead of pre-shredded (it melts so much better). For the roux, butter and flour need to cook until golden, not brown, or you'll taste bitterness. I always use King Arthur flour because it's reliable, but any all-purpose will work. The milk? Full-fat, no substitutions—this isn't the time for skim.
No sharp cheddar? Pepper Jack works in a pinch, but it'll change the flavor profile. Gruyère hard to find? Fontina or Emmental are decent swaps, though they won't be quite the same. Running out of heavy cream? Half-and-half with a splash of cream cheese mimics the richness. The breadcrumbs? Panko is a must—it stays crispy while regular breadcrumbs get soggy. Toast them in the oven with olive oil and garlic powder before adding to the top for extra flavor. And yes, you can make this dairy-free with cashew cheese, but it won't be the same (trust me on that one).
This reheats like a dream—just add a splash of milk to loosen the sauce. Keeps for 5 days in the fridge, but honestly, it disappears faster than that. For meal prep, bake it in a 9x13-inch dish so you can portion it easily. Freezes beautifully for up to 3 months—just thaw in the fridge overnight. Double the recipe if you're feeding a crowd; it's that good. Leftovers? Microwave with a damp paper towel over the top to keep the crust crispy.
Why You'll Love This Recipe
- One-Pot Magic: I swear by this recipe—just toss everything into one pot, stir, and walk away. No fancy techniques, no extra bowls, and that rich Gruyère-cheddar sauce clings to the pasta like it’s been best friends forever.
- Creamy Crisp Perfection: Between us, the secret’s in the roux—thick, buttery, and just crispy at the edges. That sharp cheddar melts into something dangerously smooth, while the Gruyère adds a nutty depth that makes it taste like you slaved over it for hours.
- Leftover Hero: This dish actually improves the next day. The sauce thickens into something even better, and it reheats like a dream—no soggy pasta here. Honestly, I make a double batch on Sundays just to have it for lazy weeknights.
- Budget Comfort: Five ingredients, all pantry staples, and it feeds four for under $10. The Gruyère might seem fancy, but a little goes a long way, and the cheddar keeps it solid without breaking the bank. Plus, it’s the kind of meal that makes you feel like you’re treating yourself.
Step-by-step instructions for American style mac and cheese
Let's create that perfect balance of creamy, cheesy goodness with a crispy, golden crust you'll love.
Cook the Elbow Macaroni to Al Dente Perfection
Bring a large pot of water to a rolling boil and add the 1.5 lb elbow macaroni. I like to use about 1 teaspoon of salt per quart of water—this ensures the pasta absorbs enough flavor. Cook until the pasta is 1 minute shy of the package directions for al dente. You want it to have a slight bite when you test it with your teeth.
Reserve 1 cup of the pasta water before draining. This starchy water is pure gold for creating a silky sauce later. Drain the pasta and set it aside—don't rinse it, as the surface starch helps the cheese cling beautifully. I know it seems counterintuitive, but trust me on this step.
Create the Ultimate Creamy Cheese Sauce
In a large, heavy-bottomed pot, melt the 0.5 cup unsalted butter over medium heat. Once melted, whisk in the 0.25 cup all-purpose flour to create a roux. Cook for 2-3 minutes, stirring constantly, until the mixture turns a pale golden color and smells nutty—this is your flavor foundation.
Gradually whisk in the 2.5 cups whole milk and 0.5 cup heavy cream, adding about ½ cup at a time to prevent lumps. Bring the mixture to a gentle simmer and cook for 5-7 minutes until it thickens enough to coat the back of a spoon. Here's where the magic happens: remove from heat and stir in the 2 cups sharp cheddar cheese and 1 cup gruyère cheese until completely melted and smooth.
Combine Pasta and Cheese for Maximum Creaminess
Add the drained elbow macaroni to the cheese sauce and fold gently with a wooden spoon or rubber spatula. You want to coat every strand of pasta completely. Stir in the 1 tsp garlic powder, 0.5 tsp ground black pepper, and remaining 0.5 tsp salt. Taste and adjust seasoning if needed—this is your chance to make it perfectly to your liking.
For extra richness, I like to add a splash of the reserved pasta water to loosen the sauce to my desired consistency. The sauce should be thick enough to coat the pasta beautifully but still flow smoothly. If it's too thick, add more pasta water 1 tablespoon at a time until perfect.
Assemble and Bake for the Perfect Crispy Topping
Preheat your oven to 375°F. Transfer the macaroni and cheese mixture to a 9x13-inch baking dish, spreading it evenly. In a small bowl, mix together the 1 cup panko breadcrumbs, 0.25 cup parmesan cheese, and 2 tbsp extra-virgin olive oil until well combined. Sprinkle this mixture evenly over the top of the macaroni and cheese.
Bake for 20-25 minutes until the top is deep golden brown and the edges are bubbling. The crust should be crispy enough to crunch between your teeth while the inside remains creamy and gooey. If you're worried about burning, tent the dish with aluminum foil for the last 5 minutes of baking.
Rest and Serve with Confidence
Remove from the oven and let the macaroni and cheese rest for 5-10 minutes before serving. This resting time allows the cheese to set slightly and makes serving easier—no more soupy messes! The contrast between the crispy, golden crust and the velvety, cheesy interior is what makes this recipe truly special.
Serve immediately while still warm, and watch as everyone digs in. The first bite should deliver that perfect combination of creamy, cheesy goodness with that satisfying crunch from the breadcrumb topping. This is the mac and cheese you'll want to make again and again!
Pro Tips For Making American Style Mac N Cheese
- STOP BOILING DRY PASTA: Elbow macaroni dries out fast once drained—drop it straight into the cheese sauce off the heat. I used to rinse it first (big mistake), and the sauce turned gloppy. No rinsing, no waiting, just fold those hot noodles into the warm sauce immediately.
- MELT CHEESE SLOWLY: Start your roux with cold butter and flour, then cook it low and steady until it’s a deep golden brown—about 8-10 minutes. Too much heat, and you’ll scorch before the cheese melts. Gruyère burns faster than cheddar, so watch it like a hawk.
- GRATE CHEESE FINE: Skip the food processor for sharp cheddar—it gets gummy. Hand-grate it (or pulse in bursts) until it’s almost powdery. Gruyère can handle a slightly coarser texture, but cheddar needs that fine grind to blend smoothly. Trust me, your sauce will thank you.
- CRUST IT RIGHT: For that golden top, broil for 2-3 minutes after baking. Sprinkle extra breadcrumbs or crushed crackers on top first—just enough to cover. Too much, and it’ll burn; too little, and it’ll stay pale. Keep an eye on it like you’re guarding your last slice of pizza.
Serving suggestions for this dish
Classic Side Pairings
This mac and cheese stands up beautifully to crispy roasted Brussels sprouts—toss them with 1 tbsp olive oil, ½ tsp smoked paprika, and ¼ tsp salt, then roast at 400°F for 20 minutes.
The caramelized edges contrast perfectly with the creamy pasta. For a lighter option, serve with a simple green salad—I love a mix of arugula, cherry tomatoes, and shaved Parmesan with a balsamic glaze. 🥗
Protein Additions
For a heartier meal, add crispy bacon—cook 6 oz thick-cut bacon until crispy, then crumble it over the top before baking. The smoky, salty flavor cuts through the richness beautifully.
Another great option is pulled pork—use 1 cup shredded pork shoulder mixed into the sauce or served on the side for dipping. For vegetarians, sautéed mushrooms with 1 tsp thyme add an earthy depth.
Beverage Pairings
A cold American lager like Bud Light or Coors Banquet is my go-to—its crisp, clean finish balances the richness without overpowering. For wine lovers, a Chardonnay with buttery notes (like Kim Crawford Sauvignon Blanc for a lighter option) complements the cheese beautifully.
If you prefer something stronger, a bourbon like Maker's Mark adds a smoky contrast that enhances the dish's depth. 🍺
Presentation Tips
For an impressive presentation, serve in individual ramekins—they let everyone enjoy the crispy crust without sharing. Garnish with fresh parsley or chopped chives for a pop of color. If serving family-style, use a slate board or wooden tray to make it feel special.
For kids (or picky eaters), serve with ketchup or hot sauce on the side—they'll love customizing their bites. 💫
Make-Ahead Serving
This dish reheats beautifully for game day or weeknight leftovers. Cover tightly with aluminum foil and reheat at 350°F for 15 minutes—add a splash of milk to keep the sauce creamy.
For a potluck, bring it in a disposable foil pan (no need to transfer!) and serve with paper towels for easy cleanup. The crispy topping stays intact if you reheat it covered, then uncover for the final 2 minutes to restore the crunch.
Nutrition facts
Frequently asked questions
Why does my cheese sauce get grainy when I add the cheese?
This happens when the cheese melts too quickly, creating lumps. Always remove the sauce from heat before stirring in the cheese, and keep stirring gently until completely smooth. For extra insurance, melt the cheeses in a separate bowl first, then mix into the warm sauce. Using freshly grated cheese (not pre-shredded) makes a big difference too!
Can I make this mac and cheese without baking it?
For a stovetop version, simply mix the cooked pasta with the cheese sauce, then fold in the breadcrumb mixture at the end. The breadcrumbs won't get as crispy, but you'll still get that satisfying texture contrast. Cook for an additional 3-5 minutes on low heat to let the flavors meld together.
What's the best way to make this dish extra crispy?
Toast your breadcrumbs before adding them to the top! Spread them on a baking sheet, drizzle with olive oil, and bake at 375°F for 5 minutes until golden. This creates an even crispier crust. For next-level crunch, add a sprinkle of crushed potato chips mixed with the breadcrumbs before baking.
How do I prevent the pasta from getting mushy when reheating?
Reheat covered with foil at 350°F for 15 minutes, then uncover for the last 2 minutes to restore the crispy topping. Add a splash of milk or heavy cream to loosen the sauce. For microwave reheating, cover with a damp paper towel and microwave in 30-second intervals, stirring between each.
Can I use a different type of pasta?
While elbow macaroni is traditional, you can use penne or faro for a similar shape. For a fun twist, try shells or fusilli—just remember the sauce needs to coat the pasta completely. Avoid long, thin pasta like spaghetti as it won't hold the cheese sauce as well.