
Appetizers
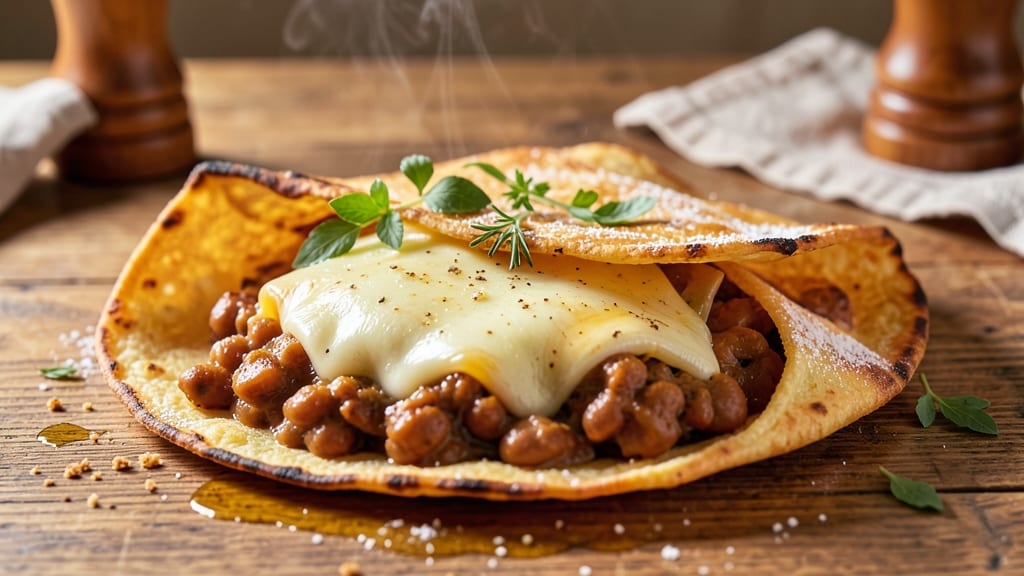
This bean and cheese chimichanga recipe delivers the perfect balance of crispy tortilla crunch and melty, pull-apart cheese that begs to be shared. 🔥 The secret lies in a well-seasoned bean filling wrapped in a sturdy tortilla, then fried to golden perfection—transforming a simple appetizer into an irresistible crowd-pleaser.
What sets this recipe apart is the layer of melted cheese that oozes out with every bite, creating a satisfying texture contrast that's impossible to resist.
Mastering crispiness is all about technique: using flour tortillas that hold up to frying and ensuring the filling is packed tightly to prevent leaks.
The combination of refried beans, melted cheese, and a touch of spices creates a flavorful filling that's hearty enough to stand alone or pair beautifully with salsa and sour cream. This recipe is designed to be beginner-friendly, with clear steps that guarantee restaurant-quality results every time.
By the time you take that first bite, you'll understand why this chimichanga becomes an instant favorite. The exterior remains crispy and golden, while the inside stays warm and gooey with melted cheese that stretches between each layer.
The aroma alone will have everyone gathering around the table, and the satisfying crunch with every bite makes it impossible to stop at just one.
Perfect for game day, parties, or a cozy weeknight dinner, these chimichangas are versatile enough to suit any occasion. Serve them with your favorite dipping sauces or as a hearty main dish with a side of rice and beans. Let's get started on creating this crispy, cheesy masterpiece!
Ingredients for bean and cheese chimichanga
Six tortillas, two kinds of cheese, and a few pantry staples—this recipe delivers crispy, cheesy perfection every time.
| Ingredient | Amount | Notes |
|---|---|---|
| Large Flour Tortillas 🌯 | 6 whole | 10-inch size, burrito-style preferred |
| Refried Beans 🫘 | 2 cups | Canned or homemade, warmed |
| Shredded Monterey Jack Cheese 🧀 | 3 cups | Medium shred size for meltability |
| Cheddar Cheese 🧀 | 1 cup | Sharp variety for extra flavor |
| Vegetable Oil 🫒 | 3 cups | For deep frying, high smoke point |
| All-Purpose Flour 🌾 | ½ cup | For dredging tortillas |
| Ground Cumin 🌿 | 1 tsp | Toasted for deeper flavor |
| Chili Powder 🌶️ | 1 tsp | Mild or medium heat |
| Garlic Powder 🧄 | ½ tsp | Freshly ground preferred |
| Salt 🧂 | ½ tsp | Kosher or sea salt |
| Sour Cream 🥛 | ½ cup | For serving, full-fat preferred |
| Salsa 🍅 | 1 cup | Mild or medium heat, for serving |
| Fresh Cilantro 🌿 | ¼ cup | Chopped, for garnish |
| Lime Wedges 🍋 | 2 whole | For serving, freshly cut |
The tortillas are non-negotiable here. Mission brand burrito-style holds up best during frying—they're sturdy enough to stay together but still flexible enough to wrap. Grab the 10-inch size at Walmart or Target (they're usually in the Mexican food aisle), or any store with a decent tortilla selection. The cheese blend is where the magic happens: Monterey Jack melts smoothly while sharp cheddar adds that tangy kick. Pre-shredded is fine, but if you've got a block of cheddar, grate it yourself—it makes a difference. The refried beans should be warm and spreadable, not dry or chunky. Canned works great if you add a splash of water or broth to loosen them up.
No sour cream? Greek yogurt at full-fat is a solid swap—it's tangier and thicker. Short on cumin? Smoked paprika at half the amount gives you that smoky depth. The oil matters here—vegetable or canola oil works best for frying (high smoke point), but if you've only got olive oil, use light olive oil and keep the temperature lower. The salsa can be store-bought or homemade—just make sure it's not watery. If you're feeling fancy, add a pinch of cayenne pepper to the filling for a little kick. And if cilantro isn't your thing, fresh parsley works just as well for garnish.
Keep the tortillas wrapped in a dry towel until ready to use—they stay fresh longer that way. The cheese? Store in an airtight container for up to 2 weeks in the fridge. These chimichangas reheat beautifully—350°F for 10-12 minutes until crispy again. I always make a double batch and freeze half. Portion them individually on parchment paper, then wrap in foil. They keep for 3 months frozen and reheat like a dream. The best part? They're even better the next day once the cheese has fully melted and everything's had time to meld together.
Why You'll Love This Recipe
- No-Fuss Assembly: I swear by this recipe because it’s the kind of meal where you don’t need a degree in folding. Just spread refried beans, sprinkle cheese, wrap, and fry—no fancy pleats required. My kids think they’re helping (they’re not), but the result is always golden and crispy.
- Cheesy Crunch Magic: That first bite? Chef’s kiss. The Monterey Jack melts into gooey perfection while the cheddar adds a sharp, salty punch—plus, the tortilla gets that addictive crunch. Honestly, I’ll take this over takeout any day.
- Lunchbox Hero: Between us, these are my go-to for packed lunches or game-day snacks. They reheat beautifully (or don’t—cold ones are fine too), and the leftovers actually taste better the next day. My office coworkers still ask where I get them.
- Budget Win: Five ingredients, zero guilt. Flour tortillas and canned refried beans stretch this meal into a full week’s worth of lunches, and the cheese stretches even further when melted. It’s the kind of recipe that makes me feel like I’m feeding a crowd without breaking the bank.
Step-by-step instructions for bean and cheese chimichangas
Here's how to make crispy, cheesy chimichangas that'll have everyone begging for seconds.
👨🍳 Step 1: Warm and Season the Refried Beans
In a small microwave-safe bowl, warm the 2 cups refried beans for 45-60 seconds until they're heated through and spreadable. I like to add a pinch of salt and a sprinkle of chili powder to the beans while they're warm—this gives them a little extra kick before they get wrapped up. Stir well so the spices distribute evenly throughout the beans.
Here's the thing—warm beans spread better and stick together more when you roll them in the tortillas. If your beans are too thick, add a splash of warm water to loosen them up slightly. The perfect consistency should be like thick mashed potatoes, not doughy or runny. This ensures your chimichangas stay packed together while frying.
🥘 Step 2: Assemble the Chimichanga Filling
Lay out the 6 whole large flour tortillas on a clean work surface. Divide the warm beans evenly among them, spreading about ⅓ cup per tortilla. Then sprinkle ½ cup of the shredded Monterey Jack cheese and ⅙ cup of the cheddar cheese (about 1 tablespoon cheddar per tortilla) over each bean layer.
I like to add a pinch of ground cumin and garlic powder directly to each cheese layer—this adds that extra depth of flavor that makes these chimichangas taste restaurant-quality. Fold each tortilla in half, then fold it in thirds like you're making a burrito. Press gently but firmly to seal the edges—you want them tight enough to hold together during frying but not so tight that the filling can't expand.
🍳 Step 3: Dredge and Fry for Maximum Crispiness
In a large bowl, combine the 0.5 cup all-purpose flour with the remaining 0.5 tsp salt. Set up a station where you can dip each chimichanga into the flour mixture, coating both sides thoroughly. This step is crucial for that golden, crispy exterior we're after.
Heat the 3 cups vegetable oil in a deep skillet or Dutch oven to 350°F. You'll want about 2 inches of oil—enough to submerge the chimichangas halfway. Fry 2 chimichangas at a time, turning occasionally, for 3-4 minutes per side until they're deep golden brown and crispy. I know it's tempting to rush, but don't walk away—they'll burn if you're not paying attention. The oil should be hot enough that small bubbles form around the chimichangas when you add them.
⏰ Step 4: Drain and Keep Warm
Transfer the fried chimichangas to a paper towel-lined plate to drain excess oil. Here's where it gets fun—let them rest for 2-3 minutes before serving. This resting period helps the cheese set slightly and prevents them from getting soggy when you cut into them. The outside should still be crispy, but the inside will be warm and gooey.
While they're resting, I like to sprinkle them with a little extra chili powder and ground cumin right out of the fryer. This adds that smoky, spicy crust that makes these chimichangas irresistible. Keep them warm in a 200°F oven if you need to hold them while you finish the toppings.
🍽️ Step 5: Serve with Classic Toppings
Slice each chimichanga into 1-inch thick pieces and arrange on a serving platter. Drizzle with the 0.5 cup sour cream and spoon over the 1 cup salsa. Garnish with the 0.25 cup chopped fresh cilantro and serve with the 2 whole lime wedges on the side.
Here's the pro move: serve these chimichangas immediately while they're still crispy on the outside and melty on the inside. The contrast of temperatures and textures—crunchy tortilla, creamy cheese, cool sour cream, and fresh salsa—is what makes this dish so addictive. And trust me, the first bite will have everyone reaching for seconds.
Pro Tips For Making Bean And Cheese Chimichanga
- Preheat the Oil Right: I learned this the hard way—cold oil makes soggy chimichangas. Heat your vegetable oil in a deep skillet until it registers 350°F (175°C) on an instant-read thermometer. Too cool, and the tortillas absorb grease like a sponge; too hot, and they burn before the filling cooks.
- Layer Cheese Strategically: Skip dumping all the cheese on top—it’ll melt into a greasy sludge. Instead, sprinkle half the Monterey Jack inside the folded tortilla, then add the refried beans, and finish with the remaining cheese on top. The trapped cheese stays creamy, not runny.
- Seal the Edges Tight: Wet your fingers and press the tortilla’s edges hard before folding—this prevents leaks during frying. I used to slap them together, but now I give each fold a firm squeeze, especially the corners. A little water makes the dough stick better than dry hands ever could.
- Don’t Overcrowd the Pan: Two chimichangas at a time is the magic number. I know, I know—you’re eager to feed everyone. But cramming too many drops the oil temp, turning your crispy dream into a greasy mess. Wait for bubbles to form before adding the next batch. Patience here saves cleanup later.
Pro cooking tips for bean and cheese chimichanga
Perfect Frying Temp
Your oil temperature is the single most important factor for crispy chimichangas. Use a deep-fry thermometer to maintain 350°F—any hotter and the outside burns before the inside cooks, any cooler and you'll get greasy, soggy results.
I've learned the hard way that vegetable oil is your best bet here—it has a high smoke point and neutral flavor that won't overpower the dish. 🔥
Pro tip: If you don't have a thermometer, test the oil by dropping in a small piece of tortilla. If it sizzles and floats immediately, it's ready. If it sinks slowly, let it heat up another 2-3 minutes.
Remember, the oil loses heat every time you add a chimichanga, so keep it hot between batches.
Tight Wrapping Secrets
The key to preventing filling leaks during frying is proper wrapping technique. After spreading your beans and cheese, fold the tortilla in half first, then fold it in thirds like a burrito. Press firmly along the edges with your fingers—this creates a tight seal.
For extra security, I like to use a tiny bit of water on the edges before sealing, which helps them stick together during frying. 💪
Don't overstuff your chimichangas—each one should be about 1-inch thick when wrapped. Overfilling makes them difficult to handle and increases the risk of leaks. If your filling is too thick, spread it thinner or use slightly larger tortillas (12-inch works too).
The goal is a compact package that stays together while frying.
Double-Fry Method
For restaurant-quality crispiness, try the double-fry technique. First fry at 350°F for 2-3 minutes per side until golden brown. Then increase the oil temperature to 375°F and fry for another 1 minute per side.
This second fry crisps up any soft spots and gives you that perfect crunch. The higher temperature works because the chimichangas are already cooked through from the first fry.
This method takes a little more time but makes a noticeable difference in texture. If you're short on time, just stick with the single fry at 350°F for 3-4 minutes per side—it still yields great results.
The double-fry is especially useful when making ahead and reheating, as it helps maintain crispiness.
Cheese Melting Hacks
For that perfect melty cheese pull-apart texture, use a 50/50 blend of Monterey Jack and sharp cheddar. The Monterey Jack melts smoothly while the cheddar adds flavor. Here's my secret: sprinkle a pinch of cornstarch (about ½ teaspoon per chimichanga) over the cheese before wrapping.
This helps the cheese melt more evenly and creates that perfect stretchy texture. 🧀
Another pro trick is to warm your cheese slightly before assembling. Microwave the shredded cheese for 20-30 seconds** while covered to soften it up. This makes it easier to distribute evenly and helps it melt more completely during frying.
Just be careful not to overheat it—you don't want it to turn into a gluey mess.
Nutrition facts
Frequently asked questions
Can I make these chimichangas without frying?
For a lighter version, bake them at 400°F for 15-20 minutes on a parchment-lined tray, flipping halfway. Brush with a little oil first for crispiness. The cheese will still melt beautifully, though the exterior won't be as crispy as fried. Perfect for a healthier option that's just as delicious!
What if my chimichangas aren't crispy?
Check your oil temperature—it should be 350°F. If it's too cool, the exterior will absorb oil instead of crisping. Also, ensure you're dredging thoroughly in flour and not overcrowding the pan. For extra crunch, try the double-fry method: fry once at 350°F, then again at 375°F for 1 minute per side.
Can I make chimichangas ahead of time?
Yes! Assemble them completely (before frying), wrap tightly in plastic wrap, and refrigerate for up to 24 hours. Fry from cold—just add 1-2 extra minutes per side to ensure they're fully cooked through. For freezing, fry them first, then store in an airtight container for up to 3 months. Reheat in a 350°F oven for 10-12 minutes until crispy again.
What's the best cheese substitute if I don't have Monterey Jack?
Use a mix of sharp cheddar and pepper jack for similar meltability. Another great option is Oaxaca or Chihuahua cheese—both stretch beautifully. If you only have mild cheddar, add ½ teaspoon cornstarch per cup of cheese to improve melting. Avoid pre-shredded cheese with anti-caking agents, as it won't melt as smoothly.
How do I prevent leaks during frying?
Wrap tightly using the "burrito fold" method (fold in half, then thirds) and press edges firmly. For extra security, dampen the edges slightly with water before sealing. Avoid overfilling—each chimichanga should be about 1-inch thick. If leaks happen, it's usually from improper wrapping or filling that's too loose. A tight seal is key to keeping everything contained!