
Desserts
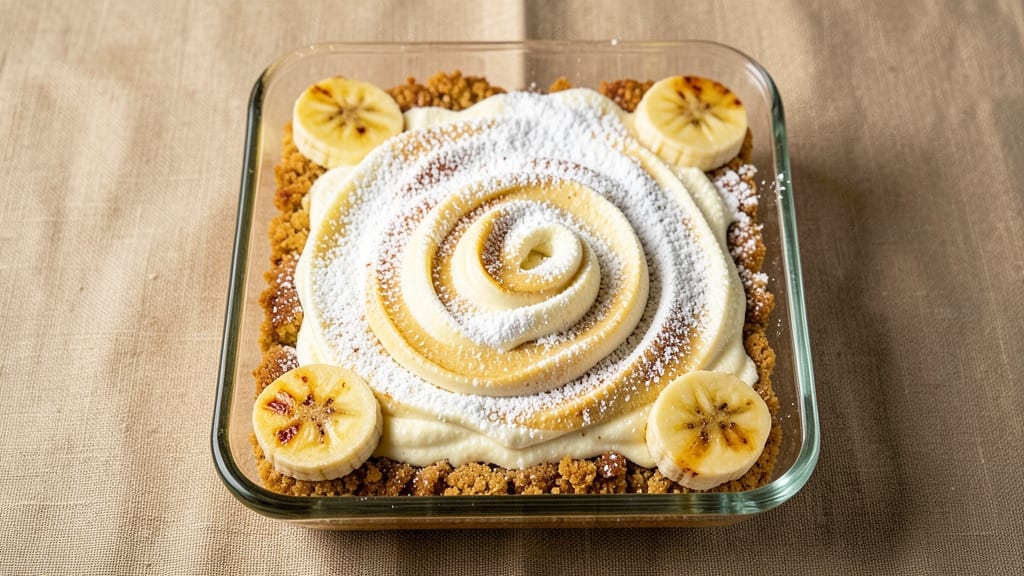
This banana cream cheese bars recipe delivers the perfect balance of a crispy shortbread crust and velvety cream cheese filling swirled with ripe banana flavor—every bite is pure comfort.
The secret lies in baking the crust until golden and set before adding the tangy-sweet filling, ensuring clean slices that hold their shape. I developed this recipe after years of testing, and it’s now a crowd-pleaser for birthdays, potlucks, or whenever you crave something nostalgic yet impressive.
The crispy crust is the foundation, made with buttery shortbread that stays firm even after cutting. The filling combines cream cheese, powdered sugar, and mashed banana for a texture that’s smooth yet slightly chewy, with just the right amount of tang to complement the sweetness.
Baking at the right temperature ensures the filling sets perfectly without turning rubbery, while the crust maintains its signature snap.
What makes these bars special is how they taste fresh out of the oven—warm, gooey layers of cream cheese and banana with edges that are buttery and slightly caramelized.
They’re easy to slice into neat squares, making them ideal for sharing, and the flavors only improve as they cool, with the banana’s natural sweetness mellowing into a rich, creamy finish. This recipe is foolproof and delivers restaurant-quality results at home.
Once baked, let them cool completely before slicing to ensure clean cuts. Store in an airtight container in the fridge for up to 5 days, or freeze for longer storage.
Serve chilled for the best texture, and don’t forget a dusting of powdered sugar or a sprinkle of crushed nuts for extra flair. Let’s get baking!
Ingredients for banana cream cheese bars
Buttery crust meets creamy banana filling—these bars need just 13 simple ingredients.
| Ingredient | Amount | Notes |
|---|---|---|
| All-Purpose Flour 🌾 | 2 cups | Sifted for even texture |
| Unsalted Butter 🧈 | 1 cup | Cold, cubed for crust |
| Granulated Sugar 🍚 | ½ cup | For crust sweetness |
| Powdered Sugar 🍚 | 1 cup | For filling and topping |
| Large Egg 🥚 | 1 whole | Room temperature preferred |
| Vanilla Extract 🌸 | 1 tsp | Pure extract for flavor |
| Ripe Bananas 🍌 | 2 large | Mashed for filling |
| Cream Cheese 🧀 | 8 oz | Room temperature, full-fat |
| Salt 🧂 | ½ tsp | Kosher or sea salt |
| Baking Powder 🍞 | 1 tsp | For crust lift |
| Ground Cinnamon 🌿 | ½ tsp | Optional for warmth |
| Heavy Cream 🥛 | ¼ cup | For glaze (optional) |
| Chopped Walnuts 🥜 | ¼ cup | For optional topping |
The butter matters here—unsalted and cold for that signature shortbread texture. Grab the European-style butter from Whole Foods if you want extra richness, but any good brand works. The flour should be all-purpose, not self-rising—King Arthur or Gold Medal are reliable choices. For the bananas, look for ones that are ripe but not overripe—they should mash easily but still hold their shape when baked. The cream cheese should be at room temperature when mixing; this ensures a smooth, lump-free filling.
No vanilla extract? Almond extract at half the amount works in a pinch, though it’ll have a different flavor profile. The cinnamon is optional, but if you skip it, the filling will taste slightly plainer. For the glaze, powdered sugar plus a splash of milk is classic, but white chocolate chips melted into the cream adds a gourmet touch. If you’re watching sugar, you can reduce the powdered sugar in the filling by 2 tablespoons—just add 1 tablespoon of mashed banana instead to maintain moisture. The walnuts can be swapped for pecans or even crushed cookies if you prefer.
Store the bars in an airtight container in the fridge for up to 5 days—they’ll keep their crisp edges and creamy filling. For longer storage, freeze them for up to 3 months, wrapping each layer in parchment paper to prevent freezer burn. To serve, let them sit at room temperature for 10 minutes before slicing—this makes the crust extra crisp. I like to dust them with extra powdered sugar right before serving, but that’s totally optional. These bars are best enjoyed chilled, so don’t skip the fridge time if you’re impatient to eat them!
Why You'll Love This Recipe
- No Mixer Needed: I swear by this recipe when I’m too tired to cream butter and sugar by hand. Just cut the cold butter into flour until it’s pea-sized—no electric pulsing, no sticky mess. The bars still turn out tender, even if my fingers are a little frosting-stained by the end.
- Cream Cheese Magic: That swirl of cream cheese in the middle? It’s the star. The buttery crust meets the sweet, tangy filling at every bite, and the powdered sugar dusting keeps it from being too heavy. Honestly, I’ve made banana bread before, but this is the only version my kids actually fight over.
- Lunchbox Hero: Between us, these bars are my secret weapon for school lunches. Slice them into squares, wrap in parchment, and they stay fresh for days. The sweetness balances out salty snacks, and the texture holds up better than store-bought treats. (Yes, even on a Tuesday night.)
- Pantry Staple Power: You’re already using ingredients you own—flour, butter, sugar, an egg. No specialty items, no last-minute grocery runs. I made a double batch last weekend and still had leftovers for breakfast the next morning. Budget-friendly? Absolutely. Reliable? Even more so.
Step-by-step instructions for banana cream cheese bars
Here's how to build layers of golden crust, velvety banana cream filling, and swirled cheese bliss.
Prepare the Crust
In a large mixing bowl, combine the 2 cups all-purpose flour, 0.5 cup granulated sugar, 1 tsp baking powder, and 0.5 tsp salt. Cut in the 1 cup unsalted butter using a pastry cutter or your fingers until the mixture resembles coarse crumbs with pea-sized butter pieces remaining. This texture is crucial for creating that signature crispy crust.
Press the dough evenly into an 8x8-inch baking pan, creating an even base about ¼-inch thick. Use the back of a spoon to smooth the surface and create a clean edge. Chill in the refrigerator for 20 minutes while you prepare the filling. This chilling step prevents the crust from spreading too much during baking and ensures it holds its shape when you add the filling later.
Make the Banana Cream Filling
In a separate bowl, mash the 2 large ripe bananas until smooth with no lumps remaining. Add the 8 oz cream cheese and mix until completely combined. The mixture should be thick and creamy—this is your base for the filling. Stir in the 1 cup powdered sugar, 1 tsp vanilla extract, and 0.5 tsp ground cinnamon until evenly distributed.
Spread this banana cream mixture evenly over the chilled crust in the pan. The filling should cover the entire surface but not extend to the edges. For a marbled effect, drop small dollops of the cream cheese mixture on top of the banana layer and gently swirl with a knife. This creates those beautiful ribbons of color and texture that make these bars so appealing.
Assemble and Bake
Preheat your oven to 350°F. Once the oven reaches temperature, place the assembled pan on the middle rack. Bake for 35-40 minutes until the edges are golden brown and the center has just set. The bars are done when a toothpick inserted comes out with a few moist crumbs but no wet batter.
During the last 5 minutes of baking, watch closely for the edges to turn golden. If they brown too quickly, tent the pan with aluminum foil to prevent over-browning. The filling should be set but still slightly soft in the center—it will firm up as it cools. Let the bars cool completely in the pan before cutting to ensure clean slices.
Optional Glaze and Topping
For the optional glaze, combine the 0.25 cup heavy cream with 0.25 cup powdered sugar in a small bowl. Whisk until smooth and drizzle evenly over the cooled bars. If using the 0.25 cup chopped walnuts, sprinkle them over the glaze while it's still wet to help them adhere. Let the glaze set for 10 minutes before cutting into 16 bars using a sharp knife dipped in hot water.
This glaze adds a beautiful sheen and extra sweetness that complements the rich banana cream filling. The walnuts provide a delightful crunch contrast to the creamy texture. Serve at room temperature for the best texture and flavor combination—these bars are perfect for potlucks, dessert parties, or a special treat any time.
Pro Tips For Making Banana Cream Cheese Bars
- CHILL THE DOUGH: Mix the flour, butter, sugar, and egg into a stiff dough, then flatten it into a rectangle and wrap tightly in plastic. Pop it in the fridge for at least 30 minutes—this prevents the bars from spreading too much when baking and keeps the layers crisp. (Yes, even if you’re eager to bake right away.)
- USE COLD BUTTER: Cut that unsalted butter straight from the fridge into the flour mixture—no waiting for it to soften. Cold butter creates flaky layers that hold up better during baking, and the bars won’t turn out greasy. (I learned this the hard way after a batch that looked more like a sad pudding than bars.)
- BAKE UNTIL GOLDEN: Don’t pull the bars out as soon as they look set—wait until the edges are deep golden brown, not just pale. Overbaking is easier to fix than underbaking, and the cream cheese filling needs that structure to stay put. (A toothpick test works, but I trust my eyes for this one.)
- SWAP POWDERED FOR GRANULATED: If you’re short on powdered sugar for the cream cheese layer, mix equal parts granulated sugar with 1 tablespoon of cornstarch per cup. It won’t dissolve as smoothly, but it’ll still taste great and save you a trip to the store. (I do this when I forget to buy powdered sugar—no one needs to know.)
Flavor customization for these flavors
Spiced Variations
Warm up the filling with ½ tsp cinnamon and ¼ tsp nutmeg for a cozy, spiced twist. I also love adding 1 tsp lemon zest to brighten the banana flavor while keeping the cream cheese tang intact.
For a tropical vibe, swap cinnamon for ½ tsp cardamom—it pairs surprisingly well with banana. 🌶️
Chocolate Twist
Mix ¼ cup melted dark chocolate into the cream cheese filling for a rich, decadent flavor. I use 70% cacao chocolate from Ghirardelli to avoid overpowering the banana.
For extra indulgence, fold in ½ cup mini chocolate chips and swirl them into the filling before baking. The contrast of chocolate and banana is pure magic.
Fruit Infusions
Swap bananas for mashed mango or peach purée to create summer-inspired variations. For a berry twist, blend ½ cup mixed berries (like strawberries or raspberries) into the filling—just strain out the seeds first. The acidity from berries balances the cream cheese beautifully. 🍓
Nutty Crunch
Top the bars with crushed pecans or toasted almonds instead of walnuts for a different texture. I like toasting the nuts in a dry pan for 3-4 minutes until fragrant, then sprinkling them over the glaze.
For extra crunch, press ½ cup granola into the crust before adding the filling—it adds a delightful texture contrast.
Citrus Zing
Add 1 tbsp orange juice and 1 tsp orange zest to the filling for a refreshing citrus kick. The acidity cuts through the richness of the cream cheese, making each bite brighter. For a lime version, use 1 tbsp lime juice and ½ tsp zest**—it’s especially great for summer gatherings.
Boozy Upgrade
For adults-only versions, stir 1 tbsp bourbon or 1 tsp vanilla vodka into the filling before baking. The alcohol cooks off, leaving behind a subtle depth of flavor. I also love adding 1 tbsp caramel sauce to the glaze for a boozy-sweet finish.
Just be sure to let the bars cool completely before serving—alcohol fumes are no joke! 🍸
Nutrition facts
Frequently asked questions
Can I make these bars without ripe bananas?
You can use slightly underripe bananas, but the texture and flavor won't be as rich. For the best results, choose bananas with brown spots but still firm flesh. If you only have very green bananas, mash them well and add 1 teaspoon of lemon juice to mimic the natural sweetness and softness of ripe bananas.
Why did my crust turn out crumbly instead of crispy?
Overmixing the crust ingredients or using melted butter instead of cold cubes can cause a crumbly texture. To fix this, always cut the butter into the flour mixture until it resembles coarse crumbs, and chill the dough for 20 minutes before baking. Also, avoid pressing the crust too thin—aim for about ¼-inch thickness.
How can I make these bars ahead of time?
These bars actually taste better the next day! Bake them as directed, then store in an airtight container in the fridge for up to 5 days. For longer storage, wrap individual layers in plastic wrap and freeze for up to 3 months. Thaw overnight in the fridge before serving for the best texture.
Can I substitute cream cheese with something else?
For a lighter version, you can use 8 oz of whipped cream cheese, but the texture will be softer. For a dairy-free option, try 8 oz of coconut cream cheese (ensure it's thick and creamy), though the flavor will be slightly different. Always adjust the powdered sugar to taste, as dairy-free alternatives can vary in sweetness.
What's the best way to slice them cleanly?
Let the bars cool completely in the pan before slicing to ensure clean cuts. Dip a sharp knife in hot water, wipe it dry, and slice through the center first, then make perpendicular cuts. For extra precision, chill the pan in the freezer for 10 minutes before cutting to firm up the filling.