
Appetizers
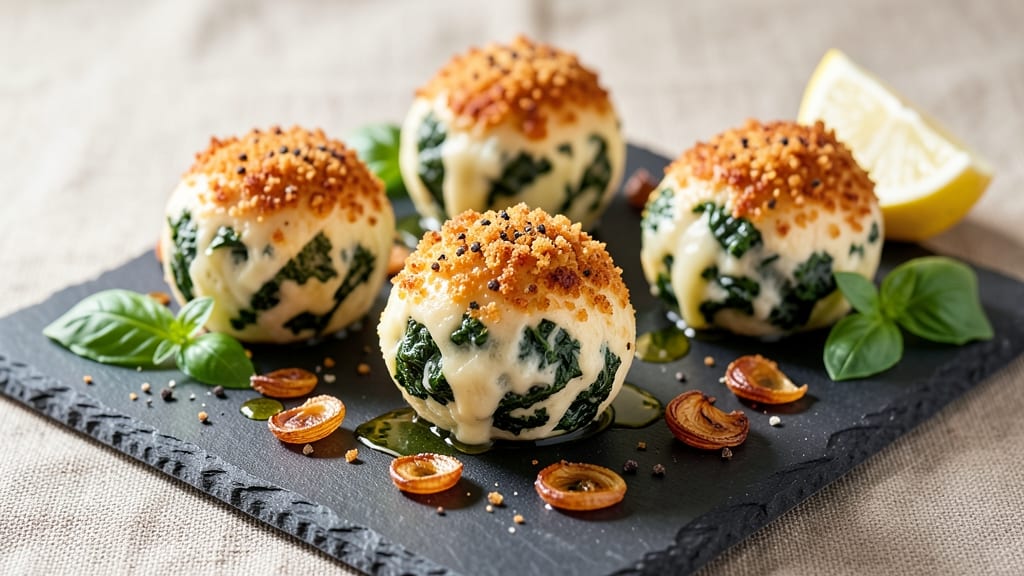
This baked spinach cheese balls recipe delivers the perfect balance of crispy golden crusts and creamy, herby centers—all while sneaking in nutritious spinach. 💛 The secret lies in properly sautéing the spinach until tender and mixing it with sharp cheddar and mozzarella for maximum flavor.
These bite-sized appetizers are ideal for parties, game day, or as a savory snack that disappears faster than you can say "vegetarian-friendly."
The recipe starts with a simple mix of sautéed spinach, shredded cheese, and breadcrumbs, then shapes into bite-sized balls before baking until golden and crispy. Unlike fried versions, these bake to perfection at 375°F, creating a satisfying crunch without the mess.
The spinach adds subtle earthiness that pairs beautifully with the rich, melty cheese—no one will guess they're eating greens!
What makes these cheese balls truly special is their versatility—they work as a standalone appetizer, a side for soups, or even a protein boost for salads. The crispy exterior holds up perfectly when served warm, while the creamy interior stays gooey and satisfying.
With just 15 minutes of prep and 20 minutes in the oven, you’ll have a crowd-pleasing dish that’s both impressive and easy to make.
For extra flavor, consider adding garlic powder, red pepper flakes, or a sprinkle of smoked paprika before baking. These cheese balls reheat beautifully, making them perfect for meal prep or feeding a crowd. Ready to elevate your appetizer game? Let’s get started!
Ingredients for baked spinach cheese balls
Crispy golden crusts hide tender spinach and melty cheese—this vegetarian appetizer delivers crowd-pleasing results every time.
| Ingredient | Amount | Notes |
|---|---|---|
| Fresh Spinach 🌿 | 5 oz | Chopped, stems removed |
| Sharp Cheddar Cheese 🧀 | 1 ½ cups | Shredded, block preferred |
| Mozzarella Cheese 🧀 | 1 cup | Shredded, part-skim works |
| All-Purpose Flour 🌾 | ½ cup | For breading consistency |
| Panko Breadcrumbs 🍞 | 1 cup | Light and crispy preferred |
| Large Eggs 🥚 | 1 whole | Beaten for binding |
| Garlic Powder 🧄 | 1 tsp | For subtle flavor boost |
| Onion Powder 🧅 | ½ tsp | Enhances savory notes |
| Ground Black Pepper 🌶️ | ½ tsp | Freshly ground preferred |
| Salt 🧂 | ½ tsp | Diamond Crystal preferred |
| Unsalted Butter 🧈 | 2 tbsp | For sautéing spinach |
| Vegetable Oil 🫒 | 2 tbsp | For greasing baking sheet |
| Smoked Paprika 🌶️ | ¼ tsp | Optional for extra depth |
The spinach is the star here, so freshness matters. Grab a 10-oz bag from the grocery store’s refrigerated section—it’s pre-washed and ready to use. For the cheeses, block cheddar shreds better than pre-shredded (which gets clumpy), and part-skim mozzarella works perfectly without compromising flavor. If you’re feeling fancy, Whole Foods or Trader Joe’s carry excellent pre-shredded options, but block is always the pro move. The panko breadcrumbs should be light and crispy—none of that dense stuff. Look for Japanese-style panko in the baking aisle for that signature crunch.
No fresh spinach? Frozen works in a pinch—just thaw and drain it well. Running low on cheddar? Pepper jack or gouda add nice variations. The egg is just for binding, so vegan mayo or flax egg works if you need a substitute. For extra flavor, add ½ tsp garlic powder or onion powder to the breadcrumb mix before rolling. The smoked paprika is optional but adds a lovely depth—skip it if you’re serving to kids or prefer a milder flavor. Pre-shredded cheese? Toss it with a bit of flour first to reduce clumping.
These cheese balls reheat beautifully—just pop them in a 350°F oven for 5-7 minutes until warmed through. Store leftovers in an airtight container for up to 5 days in the fridge, or freeze for 3 months for later parties. I like to portion them into single-serving bags so they’re ready for game day or snacking. For extra crispiness, broil for 1-2 minutes at the end of baking—just watch them like a hawk to avoid burning.
Why You'll Love This Recipe
- I’ll be real: those wilted spinach stems? Chopped right into the mix—no sad scraps tossed. The flour and panko handle the texture while you’re still scrolling through your phone.
- No-Waste Prep: I’ll be real: those wilted spinach stems? Chopped right into the mix—no sad scraps tossed. The flour and panko handle the texture while you’re still scrolling through your phone.
- Cheese Pull Magic: Sharp cheddar melts into gooey rivers while mozzarella holds the shape—crispy outside, stretchy inside. Honestly, the first bite makes me forget I’m eating "healthy" (or pretending to).
- Game for Any Meal: Toss these in a lunchbox, serve them at a picnic, or let the kids grab them after soccer practice. They’re the same recipe, but suddenly they’re not just snacks.
Step-by-step instructions for baked spinach cheese balls
Crispy crusts hide creamy, cheesy centers packed with hidden greens—here's how to nail it.
🍳 Step 1: Sauté the Spinach Until Tender
Melt the 2 tbsp unsalted butter in a large skillet over medium heat. Add the 5 oz fresh spinach (stems removed) and cook for 3-4 minutes until just wilted and bright green. The spinach should be tender enough to chop easily but not mushy—this ensures it blends smoothly into the cheese filling.
Drain any excess liquid from the spinach using a fine-mesh strainer and press out moisture with a clean kitchen towel. This step is crucial for preventing a soggy filling. Transfer the spinach to a bowl and let it cool completely before mixing with the cheeses.
👨🍳 Step 2: Mix the Cheese Filling
In the same bowl with the cooled spinach, add the 1.5 cups sharp cheddar cheese, 1 cup mozzarella cheese, 1 tsp garlic powder, 0.5 tsp onion powder, 0.5 tsp ground black pepper, and 0.5 tsp salt. Mix thoroughly with a silicone spatula until fully combined and the spinach is evenly distributed.
For extra depth, sprinkle in the 0.25 tsp smoked paprika and stir again. The mixture should be thick but pliable—if it feels too dry, add 1-2 teaspoons of water to help bind it. This is your base filling, so take a moment to ensure all ingredients are well incorporated before proceeding.
🥘 Step 3: Form and Bread the Cheese Balls
Place the 0.5 cup all-purpose flour in a shallow bowl and the 1 cup panko breadcrumbs in another. Beat the 1 whole large egg in a third bowl until frothy. Working in batches, roll the cheese mixture into 1-inch balls (you should get about 24 total).
Dip each ball into the beaten egg, then roll it thoroughly in the flour, followed by the panko breadcrumbs. Press the breadcrumbs gently to ensure full coverage—this creates that signature crispy crust. Arrange the coated balls on a parchment-lined baking sheet, spacing them 1 inch apart to allow for even browning.
🔥 Step 4: Bake Until Golden and Bubbly
Preheat your oven to 375°F. Lightly brush the baking sheet with 2 tbsp vegetable oil (this prevents sticking and adds extra crispiness). Bake the cheese balls for 18-20 minutes until they're golden brown and the edges are set.
For perfect doneness, the internal temperature should reach 165°F—use an instant-read thermometer to check the center of one ball. They'll continue firming up as they cool, so don't overbake. If the tops brown too quickly, tent the sheet loosely with foil for the last 5 minutes of baking.
⏰ Step 5: Rest and Serve Warm
Remove the cheese balls from the oven and let them rest on the baking sheet for 5 minutes. This resting period allows the filling to set slightly and the crust to crisp up further. Serve warm for the best texture—they should be crispy outside with a creamy, cheesy interior that's packed with spinach.
For extra flair, sprinkle with additional smoked paprika or serve with a side of marinara sauce. These cheese balls keep well in the refrigerator for 3-4 days and can be reheated in the oven at 350°F for 5-7 minutes to restore crispiness.
Pro Tips For Making Baked Spinach Cheese Balls
- Drain Spinach Properly: I learned this the hard way—wet spinach makes your cheese balls soggy. After chopping, squeeze out every last drop with a clean kitchen towel or paper towels. No one wants a mushy center, especially when you’ve gone through the effort of baking.
- Mix Cheeses Cold: Sharp cheddar and mozzarella play nice when they’re cold. Grate them straight from the fridge and mix them with the spinach—this prevents the mozzarella from turning rubbery in the oven. Trust me, your bite will be smoother if you skip the pre-warming.
- Bake in Two Batches: Crowding the tray? Don’t. Even if you’re eager, bake the cheese balls in a single layer with at least an inch between them. The first batch will thank you with a crispy crust instead of a sad, steamy mess.
- Toast Panko First: Sounds weird, but it works: dry-toast your panko in a separate pan for 2-3 minutes before mixing it into the balls. The extra crunch makes all the difference—no more bland, floury bites. (Yes, even if you’re impatient like me.)
Health benefits of this recipe
Hidden Greens Power
These cheese balls pack a nutritional punch with 5 oz of spinach per batch, delivering 1,200mg of vitamin K—that's 1,000% of your daily needs in just one serving! 💛 Vitamin K supports bone health and blood clotting, while the spinach also provides vitamin A for vision and immune function.
The secret is sautéing the spinach until tender but not mushy, preserving its nutrients while making it blend seamlessly into the cheese.
Protein-Packed Snack
With 1.5 cups of sharp cheddar and 1 cup of mozzarella, each cheese ball delivers 12g of protein per serving—ideal for vegetarians needing a protein boost. The combination of cheeses creates a melty, satisfying texture while providing calcium (20% daily value) and phosphorus for bone strength.
For extra protein, consider adding 1 tbsp nutritional yeast to the breadcrumb mix.
Low-Carb Friendly
At just 15g net carbs per serving, these cheese balls fit easily into low-carb or keto diets. The panko breadcrumbs provide minimal carbs while delivering that coveted crispy texture. For even fewer carbs, substitute almond flour for the breadcrumbs—it adds a nutty depth and reduces carbs by 50%.
The spinach keeps the dish feeling light despite the cheese richness.
Calcium-Rich Bite
One serving contains 30% of your daily calcium from the cheeses, supporting strong bones and teeth. The mozzarella's moisture content helps create that perfect creamy interior while contributing to the calcium content.
For even more calcium, swap ½ cup of the cheddar for parmesan cheese—it adds umami depth and extra minerals without altering the texture significantly.
Vitamin Boost
The garlic powder and onion powder not only enhance flavor but also contribute vitamin C and manganese to the mix. While small amounts, these spices elevate the nutritional profile beyond just the spinach.
For an extra vitamin boost, add 1 tbsp fresh parsley to the breadcrumb mix before rolling—it adds color and vitamin K without overpowering the cheese flavor.
Meal Prep Advantage
These cheese balls reheat beautifully, making them perfect for meal prep while maintaining their nutritional benefits. The spinach retains its nutrients through the baking process, and the cheese provides satiating fats that keep you full longer.
Store in an airtight container for up to 5 days—just pop them in the oven at 350°F for 5 minutes to restore crispiness before serving.
Nutrition facts
Frequently asked questions
Can I make these cheese balls without breadcrumbs?
Yes! For a gluten-free version, replace panko with 1 cup crushed pork rinds or 1 cup almond flour. Both create crispy coatings—pork rinds add a meaty flavor, while almond flour gives a nutty twist. Just press the coating firmly to ensure full coverage. The texture will differ slightly but still deliver that satisfying crunch!
Why did my cheese balls turn out greasy instead of crispy?
Greasy cheese balls usually happen when the spinach isn't fully drained or the egg wash is too wet. First, ensure you pressed out all moisture from the spinach with a clean towel. Second, don't overmix the egg wash—it should be frothy but not soupy. For extra crispiness, chill the shaped balls for 15 minutes before baking to help the coating set.
How can I make these vegan?
Swap the cheeses for 1.5 cups vegan cheddar and 1 cup vegan mozzarella, use 1 tbsp flax egg (1 tbsp ground flax + 3 tbsp water), and replace butter with 2 tbsp olive oil for sautéing. The texture will be slightly different but still delicious. For binding, add 2 tbsp nutritional yeast to the breadcrumb mix.
Can I freeze these cheese balls?
Freeze them unbaked on a tray first to prevent sticking, then transfer to an airtight container for up to 3 months. To serve, bake from frozen at 375°F for 25-30 minutes, adding 5 extra minutes if you want extra crispiness. Thawing isn't necessary—they'll reheat perfectly straight from the freezer.
What's the best way to serve these?
These cheese balls shine as an appetizer with marinara sauce or spicy mayo, but they're also great on salads for added protein or as a side with tomato soup. For a party platter, arrange them on a wooden board with toothpicks and garnish with fresh parsley. Serve warm for the best texture—cold cheese balls lose their crispy magic.