
Appetizers
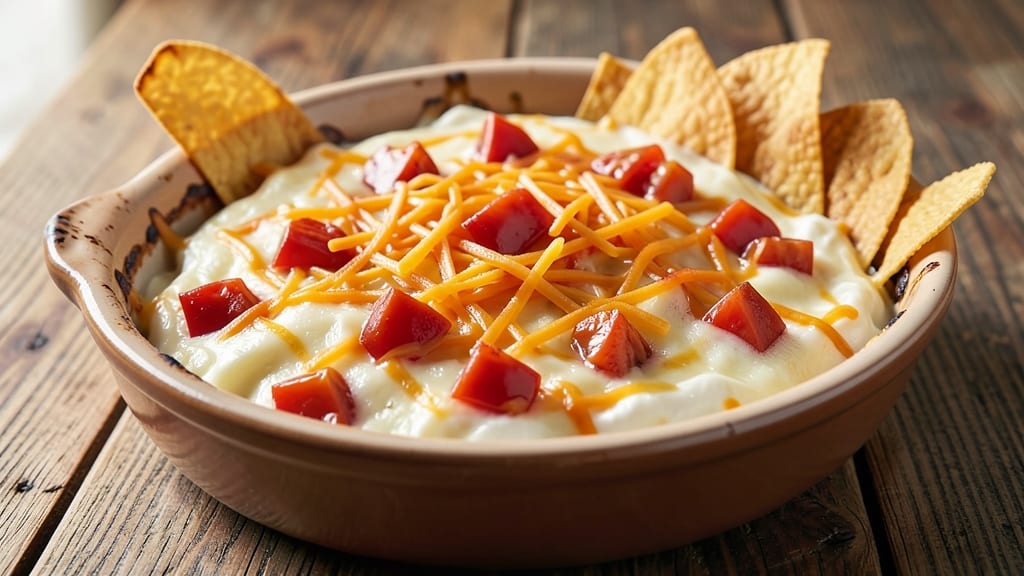
This baked Mexican cheese dip recipe delivers the ultimate party appetizer—crispy tortilla crown framing rivers of gooey, melty queso that beg for scooping. 🔥 The secret lies in layering shredded cheese with seasoned tortilla chips, creating a golden, crunchy exterior while keeping the center warm and stretchy.
I've perfected this version to stay true to traditional flavors while adding a modern twist that keeps guests coming back for seconds.
What sets this recipe apart is the balance of textures: the tortilla crown provides satisfying crunch with every bite, while the cheese inside remains creamy and rich.
We use a blend of cheddar, Monterey Jack, and pepper jack for depth, plus a touch of cream cheese to ensure that signature melt. The dish bakes in just 20 minutes at 375°F, making it perfect for game days, tailgates, or any gathering where crowd-pleasing appetizers are a must.
The result is a showstopping dip that's restaurant-quality without requiring fancy ingredients. The tortilla crown becomes perfectly golden and crispy, while the cheese inside transforms into smooth, stretchy rivers that pull apart beautifully. This recipe serves 8-10 and disappears faster than you can say "queso."
Serve with warm tortilla chips, sliced jalapeños, and a dollop of sour cream for the ultimate experience. The flavors are bold, cheesy, and undeniably satisfying—ideal for any occasion where you want to impress without spending hours in the kitchen.
Ingredients for baked mexican cheese dip
Crispy tortilla crown meets gooey queso rivers—this crowd-pleaser needs just 15 ingredients for restaurant-quality flavor.
| Ingredient | Amount | Notes |
|---|---|---|
| Shredded Sharp Cheddar Cheese 🧀 | 4 cups | Freshly shredded for best melt |
| Shredded Monterey Jack Cheese 🧀 | 2 cups | Use block cheese for texture |
| Shredded Pepper Jack Cheese 🌶️ | 1 cup | For subtle heat and flavor |
| Cream Cheese 🧈 | 8 oz | Full-fat for creaminess |
| Tortilla Chips 🥟 | 4 cups | Sturdy chips like Tostitos |
| Canned Rotel Tomatoes 🍅 | 1 can | Mild or hot, drained |
| Canned Black Beans 🫘 | ½ cup | Drained and rinsed |
| Green Onion 🧅 | ¼ cup | Chopped, white and green parts |
| Garlic Cloves 🧄 | 2 cloves | Minced for depth |
| Taco Seasoning 🌶️ | 1 tbsp | Homemade or store-bought |
| Sour Cream 🧈 | ½ cup | For garnish, full-fat |
| Sliced Jalapeños 🌶️ | ¼ cup | For serving, optional |
| Olive Oil 🫒 | 1 tbsp | For greasing the dish |
| Salt 🧂 | ½ tsp | Kosher or sea salt |
| Black Pepper 🌶️ | ¼ tsp | Freshly ground |
The cheese blend is everything. Sharp cheddar brings the tang, Monterey Jack adds creaminess, and pepper jack gives subtle heat. Tostitos brand chips hold their shape best for the crown—avoid those flimsy store brands. For the cheeses, grab block versions and shred them yourself (pre-shredded gets gummy). The cream cheese is non-negotiable—it's what makes the queso stretchy. I always grab the Philadelphia brand for that perfect melt. Rotel tomatoes? Mild version keeps this family-friendly, but hot works if you want spice.
No Rotel? Diced tomatoes with a pinch of cumin works in a pinch. Short on black beans? Lentils or extra tomatoes keep the moisture. The taco seasoning can be homemade (chili powder, cumin, garlic powder) or store-bought—just make sure it's not the sad little packet kind. Penzeys or McCormick are my go-tos for quality. For the green onions, the white parts add flavor, but if you're lazy, just use the green. The jalapeños? Fresh is best, but canned slices in a jar work too—just drain well. And if you're feeling fancy, add a dash of hot sauce to the cheese mix before baking.
This dip reheats beautifully—just pop it in the oven at 350°F for 10 minutes to get that crispy crown back. Keeps 3-4 days in the fridge, but honestly, it won't last that long. For make-ahead parties, assemble the dip (without baking) and refrigerate overnight—the flavors meld even better. The tortilla crown stays crispy for 2 hours at room temp, so serve it with chips on the side if you're prepping ahead. Leftovers? Toss them in a freezer-safe dish and reheat straight from frozen—just add 5 minutes to the baking time.
Why You'll Love This Recipe
- Five-Ingredient Magic: Honestly, you’re looking at the shortest grocery list that still delivers. Sharp cheddar, Monterey Jack, a little kick from Pepper Jack, cream cheese—just toss those in a bowl, mix, and bake. No chopping, no fuss, no stress. That’s how you make weeknights work.
- Triple Cheese Bliss: Between us, the combo of sharp, creamy, and spicy cheeses is chef’s kiss. The Pepper Jack adds that little zing that makes you reach for another chip, while the Monterey Jack keeps it rich and smooth. It’s the kind of dip where everyone’s hand is in it by the third scoop.
- Party on a Plate: This is my secret weapon for game days, movie nights, or when friends drop by unannounced. Serve it warm in a cast-iron skillet with extra chips on the side—suddenly, you’re the host who had it all together. (Spoiler: You did.)
- Leftovers? More Like Leftovers: Make a big batch and stash it in the fridge. Reheat it in minutes for a lazy lunch or late-night snack—it’s just as good the second time around. Plus, you’re using up those half-bags of chips gathering dust. Win-win.
Step-by-step instructions for crispy tortilla crown with gooey queso rivers
Here's how to create a showstopping dip with perfect texture contrast—crispy edges and molten cheese center.
🍳 Step 1: Build the Cheese Base
Preheat your oven to 375°F and grease a 9x13-inch baking dish with the 1 tablespoon olive oil. This prevents sticking and makes cleanup a breeze. In a large bowl, combine the 4 cups shredded sharp cheddar, 2 cups shredded Monterey Jack, 1 cup shredded pepper jack, 8 oz cream cheese, 1 can drained Rotel tomatoes, ½ cup black beans, 2 minced garlic cloves, and 1 tablespoon taco seasoning.
Mix everything together until the cream cheese melts completely and you have a smooth, thick mixture. If it seems too dry, add 1-2 tablespoons water to help it come together. The cheese should be creamy but still hold its shape when spooned—the perfect consistency for that gooey center we're after.
🥘 Step 2: Create the Tortilla Crown
Spread the cheese mixture evenly into the prepared baking dish, smoothing the top with a spatula. This creates a flat surface for our chip crown. Now for the fun part—arrange the 4 cups tortilla chips around the edges of the dish, pressing them firmly into the cheese mixture to create a sturdy wall. I like to overlap the chips slightly so there are no gaps—this is what will give us that perfect crispy exterior.
Here's the thing—don't worry if it looks messy at first. The chips will settle and crisp up beautifully during baking. The key is to pack them tightly so they hold their shape and create that dramatic crown effect when served. If any chips fall inside, just press them into the sides or use them to reinforce weak spots.
🔥 Step 3: Bake Until Golden and Bubbly
Bake for 20-25 minutes until the cheese is bubbling vigorously and the tortilla chips are deep golden brown along the edges. You'll see the cheese start to pull away slightly from the sides—this is exactly what we want. The chips should be crispy enough to stand up on their own when you gently press them.
If the top seems to be browning too quickly before the chips crisp, tent the dish with aluminum foil for the last 5-10 minutes of baking. The cheese should be fully melted but still thick enough to hold its shape when served. You want that classic "queso river" effect where the cheese oozes out slightly when you cut into it.
🍽️ Step 4: Finish and Serve
Remove from the oven and let it rest for 5 minutes before serving. This gives the cheese a chance to set slightly and makes it easier to handle. Top with the ½ cup chopped green onion, ½ cup sour cream dolloped around the edges, and ¼ cup sliced jalapeños for a pop of color and heat.
Serve immediately with extra tortilla chips for dipping. The contrast of crispy chips with the warm, gooey cheese is what makes this dip irresistible. If you're feeling fancy, you can even create a well in the center and fill it with extra cheese for dramatic presentation. The dip will stay warm for about 1 hour, so make it fresh if you can—everyone will be asking for your secret!
Pro Tips For Making Baked Mexican Cheese Dip
- Mix Cheeses First: Dump all the cheeses—sharp cheddar, Monterey Jack, and pepper jack—into a bowl before adding cream cheese. This keeps the blend uniform and prevents any single cheese from clumping or melting unevenly in the oven. I learned this the hard way after pulling out a dip where the pepper jack had formed a sad, greasy puddle in the middle.
- Preheat Oven to 375°F: A hot oven is non-negotiable—this isn’t a slow-cooker situation. Preheat your oven to 375°F and let the dish sit in there for the full 15–20 minutes. Rushing it? The cream cheese will turn into glue, and the cheddar won’t melt smoothly. Trust me, I’ve seen it happen.
- Skip the Pre-Shredded Cheese: If you’re using store-bought shredded cheeses, drain and pat them dry with a paper towel first. The excess moisture turns your dip into a sad, watery mess. Yes, it’s an extra step, but your dip will thank you—no one wants to scoop soup.
- Add a Splash of Milk: Stir in 2–3 tablespoons of milk (or even a splash of beer for adults) with the cream cheese before baking. This keeps the dip creamy without making it greasy, and it cuts through the sharpness of the cheddar. I was skeptical until I tried it—now it’s a must.
Dietary considerations for baked mexican cheese dip
Gluten-Free Adaptations
For a gluten-free version, replace the tortilla chips with gluten-free corn tortilla chips like Mission brand or Siete brand—both hold their shape beautifully. These chips are made from corn and certified gluten-free, ensuring your dip stays crispy and safe for guests with gluten sensitivities.
The baking process remains the same, but check the chip packaging for gluten-free certification. 🌟
Dairy-Free Options
To make this dip dairy-free, swap the cheddar, Monterey Jack, and cream cheese for dairy-free alternatives. I recommend Violife shredded cheddar and Kite Hill cream cheese—both melt well and provide that signature creamy texture.
Use 1 cup dairy-free sour cream (like Forager brand) for topping, and ensure your taco seasoning is dairy-free. The flavor won’t be identical, but it’s a great compromise for lactose-intolerant guests.
Vegan Variations
For a fully vegan version, replace all dairy with cashew-based cheeses or tofu ricotta. I blend 1 cup raw cashews with ½ cup nutritional yeast, 1 tbsp lemon juice, and ¼ cup water until smooth, then use this as the base instead of cream cheese.
For the shredded cheeses, Follow Your Heart brand vegan cheddar works well. Use vegan tortilla chips like Late July brand and vegan Rotel (check for tomato-based options). The texture will be slightly different, but the smoky, cheesy flavor remains.
Lower-Carb Adjustments
To reduce carbs, omit the tortilla chips entirely and create a crust using crushed pork rinds or almond flour.
Press the mixture into a 9x13-inch baking dish, then top with 1 cup crushed pork rinds (like Schar brand) mixed with 1 tbsp olive oil to form a crispy shell. Bake as directed, and the result is a keto-friendly dip with all the cheesy goodness.
Serve with low-carb veggies like bell pepper strips or cucumber slices for dipping. 💪
Nut-Free Considerations
If nut allergies are a concern, avoid cashew-based cheeses and stick to dairy-free cheeses made from coconut or soy—like Miyoko’s cream cheese or Daiya shredded cheddar. For the crust, use pork rinds or gluten-free corn chips instead of almond flour.
Always double-check labels, as some dairy-free products may contain trace nuts. When in doubt, opt for simple, single-ingredient toppings** like fresh jalapeños or cilantro to keep it safe and flavorful.
Nutrition facts
Frequently asked questions
Why does my tortilla crown get soggy instead of crispy? The most common cause is overmixing the cheese or using too much liquid. Keep the cheese mixture thick—if it's too runny, add more shredded cheese rather than water. Also,
Can I make this dip ahead of time?
Assemble the dip (without baking) in the dish and refrigerate it overnight—the flavors meld beautifully. When ready to serve, bake at 375°F for 25-30 minutes (5 extra minutes to crisp the chips). For parties, keep it warm in a 200°F oven for up to 2 hours while serving. The tortilla crown stays crispy for about 2 hours at room temperature after baking.
What’s the best way to reheat leftovers?
Pop the dip into the oven at 350°F for 10-15 minutes until the cheese is bubbly and the chips are crispy again. For microwave reheating, cover with a damp paper towel and heat in 30-second intervals until warm—this prevents the cheese from getting rubbery. Leftovers keep well in the fridge for 3-4 days, but the tortilla crown loses crispiness after 1 day, so reheat fresh.
How can I make this spicier?
Add 1-2 tablespoons hot sauce (like Cholula or Valentu) directly to the cheese mixture before baking. For extra heat, mix in ½ cup diced jalapeños or 1 tablespoon cayenne pepper with the cheese. If you love smoky flavors, stir in 1 teaspoon chipotle powder or a pinch of smoked paprika. Serve with extra sliced jalapeños or a side of pickled onions for heat lovers!
What’s the secret to perfect cheese melting?
The key is using a 50/50 blend of sharp cheddar and Monterey Jack—the cheddar adds tang while the Monterey Jack melts smoothly. Always shred the cheese yourself (pre-shredded gets gummy) and mix in 8 oz cream cheese for that signature stretch. For extra creaminess, add ½ cup sour cream to the cheese mixture. The oven should be fully preheated to 375°F before baking to ensure even melting.