
Main Courses
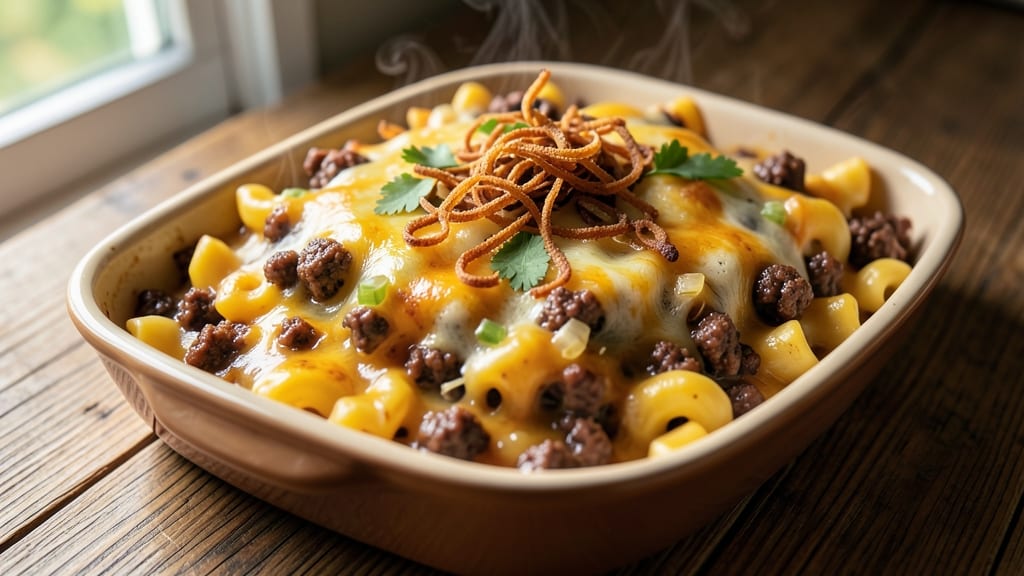
This baked mac and cheese with ground beef recipe transforms a classic comfort dish into a hearty, protein-packed dinner that satisfies every craving. 💛 The secret lies in perfectly seasoned ground beef that adds rich, savory depth while keeping the creamy cheese sauce velvety and golden.
I've tested this recipe countless times to ensure the macaroni stays tender, the cheese melts smoothly, and the beef stays juicy—not dry or greasy.
The beauty of this one-pan meal is its simplicity: no complicated techniques, just foolproof steps that deliver restaurant-quality results at home. You'll start by browning the beef with garlic and onions for maximum flavor, then build the cheese sauce from scratch using a roux for that signature creamy texture.
The baking process ensures everything comes together perfectly—crispy on top, tender inside—without requiring constant monitoring.
What makes this recipe stand out is how well it balances textures and flavors. The ground beef adds heartiness, the cheese sauce brings richness, and the macaroni provides that comforting chew.
It's the kind of dish that feels indulgent but still feels like a balanced meal—perfect for family dinners, game days, or when you need a satisfying weeknight supper.
Serve with a simple side salad or steamed green beans to round out the plate, or keep it as a standalone main course. The leftovers reheat beautifully, making it ideal for meal prep.
Let's get started on this reliable, delicious one-pan wonder that's sure to become a staple in your rotation.
Ingredients for baked mac and cheese with ground beef
Pantry staples plus a few key ingredients for that perfect cheesy, meaty one-pan dinner.
| Ingredient | Amount | Notes |
|---|---|---|
| Elbow Macaroni 🍝 | 12 oz | Dry, medium or jumbo size |
| Ground Beef (80/20) 🥩 | 1 lb | 80% lean, 20% fat preferred |
| Yellow Onion 🧅 | 1 whole | Medium, diced small |
| Garlic Cloves 🧄 | 4 cloves | Fresh, minced fine |
| Unsalted Butter 🧈 | ½ cup | Cold, cubed for roux |
| All-Purpose Flour 🌾 | ½ cup | White, sifted for smooth sauce |
| Whole Milk 🥛 | 2 cups | Room temperature preferred |
| Sharp Cheddar Cheese 🧀 | 2 cups | Shredded, block preferred |
| Monterey Jack Cheese 🧀 | 1 cup | Shredded, mild flavor |
| Parmesan Cheese 🧀 | ½ cup | Freshly grated, fine |
| Kosher Salt 🧂 | 1 ½ tsp | Diamond Crystal preferred |
| Ground Black Pepper 🌶️ | ½ tsp | Freshly cracked |
| Dried Mustard Powder 🌿 | ½ tsp | For subtle depth |
| Beef Broth 💧 | ½ cup | Low-sodium preferred |
| Breadcrumbs 🍞 | ¼ cup | Panko for extra crunch |
The ground beef is where the magic happens—80/20 fat ratio gives you that juicy, flavorful bite. Trader Joe's or Costco usually have the best prices for bulk packs, and you can freeze extras for future meals. Look for bright red color and good marbling when buying. The macaroni? Medium or jumbo elbow stays tender longer than small shapes. I always cook it al dente—it finishes perfectly in the oven. For the cheeses, block cheddar shreds better than pre-shredded (no anti-caking agents), and Parmigiano-Reggiano for the Parmesan adds depth that powdered can't match.
No 80/20 ground beef? 85/15 works but stays drier—just add an extra tablespoon of butter to compensate. Short on Monterey Jack? Extra sharp cheddar gives a similar tang. The beef broth can be swapped for chicken broth in a pinch, but the mustard powder is non-negotiable—it's what gives this sauce that subtle, restaurant-quality depth. For the roux, don't rush the cooking—you want it golden brown, not burnt. And if you're out of panko, regular breadcrumbs toasted in butter work just fine. Fresh garlic is ideal, but garlic powder at half the amount gets you close if you're in a hurry.
This reheats like a dream—best the next day when all the flavors meld. Store leftovers covered in the fridge for up to 5 days, or freeze portions for 3 months. For meal prep, I portion it into individual containers so I can grab and heat just what I need. The breadcrumb topping stays crispy for about 2 days if stored properly, so if you're not baking it right away, skip the topping and add it fresh before serving. The cheese sauce thickens as it cools, so if it looks too thick when reheating, just stir in a splash of milk.
Why You'll Love This Recipe
- One-Pot Magic: I swear by this recipe—just brown the beef with onions and garlic in the same pan you’ll bake it in. No extra dishes, no stress. That rich beef fat? It turns into the most flavorful crust on top.
- Rich, Savory Depth: The 80/20 ground beef adds a meaty, umami punch that regular mac and cheese can’t touch. Brown it well, and you get that caramelized depth that makes every bite feel like a hug.
- Game for Any Night: Between us, this is my go-to for lazy Mondays, potlucks, or when I need to feed a crowd. Double the recipe, pop it in a bigger dish, and suddenly you’re the hero of the dinner table.
- Budget-Buster Meal: Elbow mac, ground beef, and basic pantry staples—this feeds four for under $10. Even better? Leftovers reheat like a dream, so you’re basically getting two meals for the price of one.
Step-by-step instructions for baked mac and cheese with ground beef
Here's how to make this hearty, one-pan wonder with perfect texture and rich flavor.
🍳 Step 1: Brown the Ground Beef and Sauté Aromatics
Heat a large oven-safe skillet over medium-high heat and add the 1 lb ground beef (80/20). Break it up with a wooden spoon as it cooks, letting the fat render out. You want it to brown nicely—about 5-6 minutes—but not burn. Once browned, transfer the beef to a plate and set aside.
In the same skillet, add ½ cup unsalted butter and let it melt completely. Toss in the 1 whole yellow onion and 4 cloves minced garlic, cooking until the onion is translucent and the garlic is fragrant—about 3-4 minutes. Here's the thing—don't walk away. Garlic burns fast, and you want that sweet, nutty aroma.
🍳 Step 2: Build the Creamy Cheese Sauce
Reduce heat to medium and sprinkle in the ½ cup all-purpose flour, whisking constantly for 1-2 minutes until it forms a smooth, pale roux. This is your sauce foundation—don't rush it or you'll get a gritty texture. Slow and steady wins the race.
Gradually pour in the 2 cups whole milk while whisking vigorously to prevent lumps. Let the mixture simmer for 3-4 minutes until it thickens enough to coat the back of a spoon. Now's the time to add the 1.5 tsp kosher salt, ½ tsp ground black pepper, and ½ tsp dried mustard powder, stirring well to combine. This subtle mustard powder adds depth that takes this dish to next-level delicious.
🥘 Step 3: Combine Pasta and Cheese Mixture
Bring a large pot of salted water to a boil and cook the 12 oz elbow macaroni until al dente—about 1 minute less than package instructions. Drain well and add it directly to the skillet with the cheese sauce. Stir everything together, then reduce heat to low and add the 2 cups sharp cheddar cheese, 1 cup monterey jack cheese, and ½ cup freshly grated parmesan cheese.
Stir constantly until all the cheese melts completely—about 2-3 minutes. You'll see the sauce transform into a luscious, velvety blanket coating every strand of pasta. If it looks too thick, add ¼ cup beef broth to loosen it up. The goal is a sauce that clings beautifully without being gluey.
🔥 Step 4: Assemble and Bake to Golden Perfection
Preheat your oven to 375°F. Transfer the mac and cheese mixture to a 9x13-inch baking dish (or your oven-safe skillet if large enough). Sprinkle the ¼ cup panko breadcrumbs evenly over the top, pressing down gently to help them adhere. Here's where the magic happens—those breadcrumbs will create a crispy, crunchy topping while the cheese below stays creamy.
Bake uncovered for 20-25 minutes until the top is deep golden brown and bubbly. The edges should be slightly crispy, and the cheese should be melted through. If you're unsure, check at the 20-minute mark—every oven runs hot or cold. The moment it looks perfect is when you pull it out. Let it rest for 5 minutes before serving to let the top set slightly.
🍽️ Step 5: Serve with Confidence
Slice into squares and serve immediately. Each bite should deliver tender pasta, rich cheese sauce, and savory beef throughout. The crispy breadcrumb topping adds the perfect textural contrast. For extra decadence, drizzle with a little extra beef broth or serve with a side of steamed green beans to balance the richness.
This dish tastes even better the next day, so don't be surprised if you find yourself sneaking seconds—or thirds. The flavors meld beautifully overnight, making it perfect for meal prep too. Just reheat gently in the oven or microwave until warmed through.
Pro Tips For Making Baked Mac And Cheese With Ground Beef
- Brown the Beef Slow: Skip the high-heat sear—cook the ground beef on medium-low for 8-10 minutes instead of rushing it. This renders the fat properly and keeps the meat from turning greasy later, especially when mixed into the cheesy sauce. (Yes, it takes longer, but your mac will taste like it came from a diner, not a shortcut.)
- Pre-Cook the Pasta Al Dente: Boil elbow macaroni one minute less than the package says, then drain and toss it with a splash of pasta water. The starchy water helps bind the cheese sauce, and undercooked pasta finishes cooking in the oven, so it doesn’t turn mushy. I learned this the hard way—overcooked noodles ruin everything.
- Layer Cheese Like a Lasagna: Don’t just dump cheese on top—alternate between a thin layer of the mac and cheese mix and a sprinkle of shredded cheese (cheddar + a little Gruyère if you’re fancy). The top layer gets crispy, but the layers underneath stay creamy. (Pro move: Press a few extra cheese cubes into the top for a golden crust.)
- Salt the Water Like the Ocean: Add two tablespoons of salt to the pasta water—yes, even if your pasta is salted. The beef mixture needs that extra seasoning, and the starchy water carries flavor into the sauce. I used to skim on this, and the dish always tasted flat until I doubled down. (Your taste buds will notice.)
Regional styles of this dish
Southern Comfort Style
In the South, this dish gets a smoky, spicy kick with ½ tsp smoked paprika and ¼ tsp cayenne pepper added to the beef mixture. I like to stir in 1 tbsp Worcestershire sauce with the beef broth for that classic Southern depth.
Serve with pickled jalapeños on top for an extra tangy bite—trust me, it’s a game-changer for flavor lovers. 🌶️
Midwest Meat Lover’s Twist
The Midwest takes this dish up a notch with ½ lb Italian sausage mixed into the ground beef for extra richness. Add 1 tsp Italian seasoning to the cheese sauce and top with ¼ cup grated fontina cheese before baking.
The result? A creamy, herby mac that’s got serious Italian-American vibes without being heavy. Pair it with a simple garlic breadstick for dipping.
New England Cheesy Crunch
Up North, they love their cheese extra crispy! After baking, sprinkle ¼ cup crushed Ritz crackers mixed with 2 tbsp melted butter on top, then broil for 2-3 minutes until golden. Add ½ cup diced ham to the beef mixture for a salty-sweet contrast.
The cracker topping gives that signature New England crunch while keeping the inside gooey. Perfect for cold winter nights!
Tex-Mex Fusion
For a Southwest-inspired version, swap ½ cup of the cheddar for Monterey Jack and stir 1 tsp cumin and ½ tsp chili powder into the beef. Top with ¼ cup black beans and ¼ cup corn kernels before baking.
Serve with sour cream, salsa, and guacamole for dipping. This version turns your mac and cheese into a full Tex-Mex fiesta in one pan!
Classic Italian-Inspired
Skip the breadcrumbs and use ¼ cup grated Pecorino Romano instead for a crispy, cheesy crust. Add 1 tsp dried oregano and ½ tsp red pepper flakes to the cheese sauce, then top with ¼ cup sun-dried tomatoes before baking.
The result? A creamy, herby mac with a Mediterranean twist that’s perfect for a cozy weeknight dinner. 🧀
Nutrition facts
Frequently asked questions
Can I use ground turkey or chicken instead of beef?
Ground turkey (especially dark meat) or chicken works beautifully, but you'll need to adjust the seasoning. Use ½ teaspoon poultry seasoning with the meat and reduce the cooking time by 1-2 minutes since poultry cooks faster. For extra richness, add 1 tablespoon olive oil to the pan when browning. The texture will be slightly lighter but still delicious.
Why did my cheese sauce get grainy?
Grainy cheese usually happens from one of three things: not enough liquid, cold cheese, or stirring too vigorously. First, make sure all cheeses are room temperature before adding. Second, add the cheese gradually while stirring on low heat—don't dump it all in at once. Finally, if it gets too thick, whisk in 1-2 tablespoons of milk or beef broth to restore creaminess.
How can I make this dish spicier?
For a kick of heat, add ½ teaspoon smoked paprika and ¼ teaspoon cayenne pepper to the beef mixture. You can also stir ½ teaspoon hot sauce into the cheese sauce or sprinkle chopped jalapeños on top before baking. If you love spice, try adding 1 teaspoon chipotle powder to the roux for a smoky, spicy depth that pairs perfectly with the creamy cheese.
Can I make this ahead of time for meal prep?
This dish actually tastes better the next day! Assemble it completely (even the topping) and refrigerate uncovered for 1-2 hours to let the flavors meld. Cover and refrigerate for up to 5 days or freeze for 3 months. To reheat, bake at 350°F for 20-25 minutes until heated through. The breadcrumb topping will crisp up again beautifully when reheated.
What’s the best way to make it extra crispy on top?
For maximum crispiness, use panko breadcrumbs mixed with 2 tablespoons melted butter before pressing them onto the top. Broil for 1-2 minutes at the very end of baking (watch closely!) to get a golden, almost toasted finish. Another pro tip: Let the dish cool slightly after baking before slicing—this helps the top set and stay crispy when serving.