
Appetizers
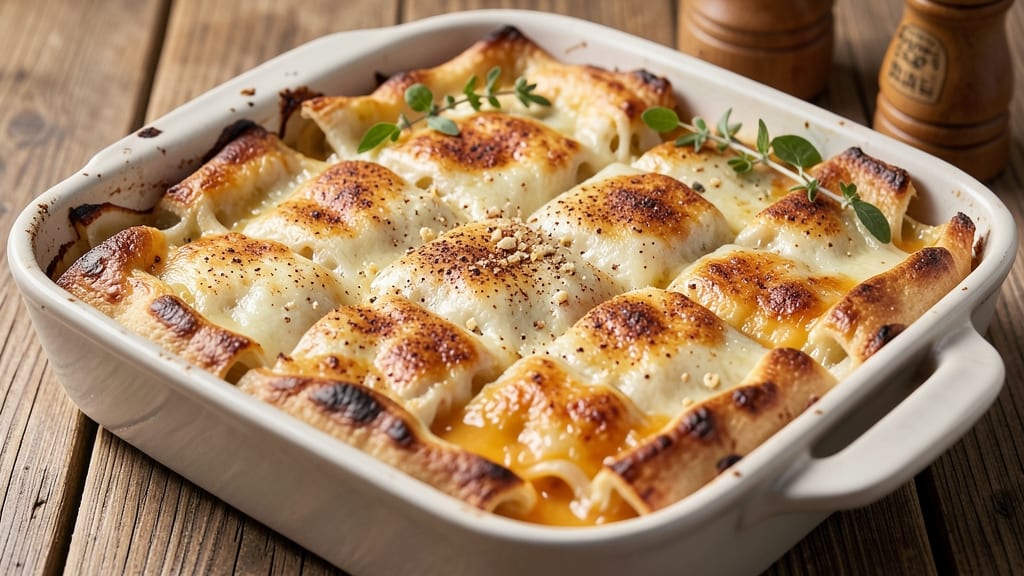
This baked cheese squares recipe delivers the perfect balance of crispy crust and gooey cheese pulls—a crowd-pleasing appetizer that’s easier to make than you’d think. The secret lies in the right cheese blend (sharp cheddar and mozzarella) and a buttery, flaky top layer that turns golden under the broiler.
After years of perfecting this recipe, I’ve found the ideal oven temperature and baking time to ensure every bite is crispy outside and melty inside.
The process is surprisingly simple: mix shredded cheese with a touch of flour and butter, press into a square pan, then bake until bubbly. The crispy crust forms when you broil briefly at the end, while the cheese inside stretches into those addictive, pull-apart strands.
This dish is foolproof for parties, game day, or a satisfying snack—just be prepared to disappear before the last square is gone.
What makes these cheese squares stand out is their versatility. Serve them warm as an appetizer with marinara for dipping, or let them cool slightly for a crunchy snack.
The combination of sharp cheddar and mild mozzarella creates a flavor that’s rich but not overpowering, with just enough saltiness to keep everyone reaching for more. Once you try this recipe, you’ll never buy store-bought cheese squares again.
For extra flavor, try adding a sprinkle of garlic powder, smoked paprika, or fresh herbs before baking. The possibilities are endless, but the core technique remains the same: crispy, cheesy perfection in every bite. Let’s get started—your taste buds will thank you.
Ingredients for baked cheese squares
Sharp cheddar, melty mozzarella, and crispy butter crust—these nine ingredients create the perfect crowd-pleaser.
| Ingredient | Amount | Notes |
|---|---|---|
| Sharp Cheddar Cheese 🧀 | 2 cups | Shredded, block preferred |
| Mozzarella Cheese 🧀 | 1 ½ cups | Shredded, low-moisture |
| All-Purpose Flour 🌾 | ½ cup | For crispy crust texture |
| Unsalted Butter 🧈 | ½ cup | Cold, cubed for flakiness |
| Garlic Powder 🧄 | 1 tsp | For subtle depth |
| Smoked Paprika 🌶️ | ½ tsp | Optional smoky touch |
| Salt 🧂 | ½ tsp | Kosher or sea salt |
| Fresh Parsley 🌿 | ¼ cup | Chopped, for garnish |
| Marinara Sauce 🍅 | ½ cup | For dipping, optional |
The cheeses are non-negotiable here. Block cheddar shreds best (pre-shredded gets gummy), and low-moisture mozzarella prevents soggy squares. I grab mine from Whole Foods or the deli counter—both have better quality than the bagged stuff. For the butter, Plugrá or Land O'Lakes work well, but keep it cold until mixing. The garlic powder and smoked paprika? Penzeys spices are my go-to for consistent flavor, but any good brand will do. Fresh parsley brightens everything up—skip it if you're in a hurry, but trust me, it makes a difference.
No sharp cheddar? Extra-sharp white cheddar works in a pinch, or swap half for Gruyère for a nutty twist. Short on mozzarella? Fontina or provolone both melt beautifully. The butter can be substituted with vegetable shortening if you're worried about browning, but butter gives that unmatched flaky crust. For extra crunch, sprinkle crushed cornflakes on top before baking. And if you're out of parsley, dried oregano at half the amount gives a similar earthy note. The marinara is totally optional—just serve it on the side if you want dipping.
These reheat perfectly in the oven at 350°F for 5-7 minutes—great for leftovers. Store in an airtight container for 3-4 days in the fridge, or freeze for up to 3 months by wrapping tightly in foil. I always make a double batch because they disappear fast. For parties, arrange them on a platter with the marinara in a bowl—everyone will be asking for the recipe.
Why You'll Love This Recipe
- No-Fuss Assembly: I swear by this recipe because it’s the kind of thing you can make while scrolling through your phone. Just shred the cheeses, mix in a handful of flour and garlic powder, dot with butter, and bake—no rolling, no fuss, no stress.
- Cheese Overload: That sharp cheddar and melty mozzarella combo is chef’s kiss—crispy edges, gooey center, and just enough garlic powder to make it feel like a restaurant bite. Honestly, I’ve never met a cheese square I didn’t want seconds of.
- Party in a Pan: These disappear at gatherings, and the best part? They’re just as happy as a snack board as they are on a charcuterie tray. Cut into squares, serve with crackers, or toss them into a lunchbox—no one will question why you made so many.
- Budget-Friendly Staples: Sharp cheddar and flour last forever, butter is always in my pantry, and mozzarella stretches further than you’d think. I’ve fed a crowd of six for under $10 with this recipe—leftovers? Even better.
Step-by-step instructions for baked cheese squares
Here's how to make these irresistible cheese squares with a perfect crispy crust and gooey center every time.
Preheat and Prepare the Baking Dish
Preheat your oven to 375°F—this is the ideal temperature for achieving that perfect crispy crust while keeping the cheese melty inside. While the oven heats, grab an 8x8-inch baking dish and lightly grease it with nonstick spray or a thin layer of butter. This prevents the cheese from sticking and makes removal much easier later.
I like to use a glass baking dish for this recipe because it conducts heat evenly and helps create that beautiful golden-brown crust. If you don't have one, a metal dish works too, but you might need to adjust the baking time slightly. Line the dish with parchment paper for even easier cleanup, leaving an overhang on the sides so you can lift the squares out later.
Mix the Cheese Filling
In a large bowl, combine the 2 cups of shredded sharp cheddar cheese and 1.5 cups of shredded mozzarella cheese. I always use a mix of cheeses because the sharp cheddar adds flavor while the mozzarella provides that perfect meltiness. Add the 0.5 cup of cold cubed unsalted butter—the cold butter is key for creating flaky layers in the crust.
Next, sprinkle in the 0.5 cup of all-purpose flour, 1 teaspoon of garlic powder, 0.5 teaspoon of smoked paprika, and 0.5 teaspoon of salt. Use your hands to gently mix everything together until the butter starts to soften slightly and the mixture comes together. Don't overwork it—just combine until everything is evenly distributed. The texture should be crumbly but hold together when pressed.
Press the Mixture into the Pan
Transfer the cheese mixture to your prepared baking dish and press it down firmly and evenly with your hands or the bottom of a glass. You want to create a smooth, even layer that's about ½-inch thick. Press gently but firmly—this helps create that crispy crust we're after. If you notice any gaps, simply press those areas again until the surface is completely smooth.
Here's a pro tip: I like to run my fingers over the surface one last time to smooth out any imperfections. This step is important because any lumps or uneven spots can lead to uneven browning in the oven. Once you're satisfied with the smooth surface, sprinkle the 0.25 cup of chopped fresh parsley evenly over the top. The parsley adds a pop of color and a fresh finish that makes these squares look even more appetizing.
Bake Until Golden and Bubbly
Place the baking dish in the preheated oven and bake for 20-25 minutes. You're looking for the edges to turn a beautiful golden brown while the center remains slightly soft and gooey. The cheese should be bubbling around the edges, but it's okay if the center still looks a bit underdone—it'll finish cooking as it sits.
I know it's tempting to peek, but try to resist opening the oven door during the first 15 minutes of baking. Every time you open the oven, you lose heat and can cause the cheese to sink or develop a less crispy crust. When the top looks golden brown and the edges are starting to crisp up, you're getting close to being done. The cheese should pull slightly when you gently tug on a corner—this is your signal that it's ready.
Cool and Cut into Squares
Remove the baking dish from the oven and let the cheese squares cool for 5-10 minutes before attempting to cut them. This resting time allows the cheese to set slightly, making it easier to slice into perfect squares. While they're cooling, you'll notice the top becomes even crispier as it firms up.
Use a sharp knife to cut the cheese into 4 equal squares (or 16 smaller squares if you prefer). For the cleanest cuts, dip your knife in warm water between each cut—this helps prevent the cheese from sticking to the blade. Serve warm with the optional 0.5 cup of marinara sauce for dipping, or enjoy them as-is while they're still gooey and delicious.
Pro Tips For Making Baked Cheese Squares
- Preheat Like It’s Hot: Your oven should hit 375°F and stay there for 10 minutes before baking—no exceptions. I learned this the hard way when my first batch came out greasy and undercooked. That extra heat jumpstarts the butter and cheese, giving you that perfect golden crust instead of a sad, soggy mess.
- Grate the Cheddar Fine: Sharp cheddar loses its edge when chunky—grate it as fine as you can, almost like powdered sugar. Mozzarella can stay in small cubes, but cheddar’s flavor gets lost if it’s not fully integrated. (Yes, even if you’re impatient like me.)
- Skip the Overmixing: Once the dough comes together, stop stirring the second it holds—no need to knead or overwork it. Overmixing develops gluten, and your squares will turn out tough instead of melt-in-your-mouth tender. Just fold it a couple of times until it’s cohesive.
- Press the Dough Firm: Pack the dough into your pan tightly—no gaps, no air pockets. I used to slap it in and wonder why my squares wouldn’t hold shape. A firm press (use your hands or a spatula) ensures they slice cleanly and bake evenly. (Your future self will thank you.)
Essential equipment for baked cheese squares
Baking Dish Essentials
An 8x8-inch glass baking dish is my top recommendation for this recipe—it conducts heat evenly and creates that perfect golden crust. I use Pyrex because it’s durable and handles temperature changes without cracking.
For a nonstick option, Ceramic-coated metal dishes work well too, though you might need to adjust baking time slightly. 🔥
Nonstick Spray or Butter
Greasing your dish is non-negotiable to prevent sticking. I prefer Misto nonstick spray for quick, even coverage, but a thin layer of unsalted butter works too.
Avoid butter if you’re watching fat content—vegetable oil spray is a lighter alternative. Always grease the dish before adding parchment paper for maximum release.
Parchment Paper Pro Tip
Line your baking dish with parchment paper (cut to fit) for effortless removal and cleanup. Leave an overhang on the sides to easily lift the cheese squares out.
I use Reynolds parchment paper because it’s sturdy and doesn’t tear when pressing the cheese mixture. This trick saves time and frustration when serving.
Broiler for Extra Crisp
For that restaurant-quality crispy top, finish with 2-3 minutes under the broiler on high. Place the dish on the middle rack and watch closely—cheese burns fast! I recommend Oster broilers for even heat distribution.
Turn off the broiler if the edges start to brown too quickly, and let the residual heat finish the job. ✨
Cutting Tools Matter
A sharp chef’s knife (like Mercer Culinary Genesis) is essential for clean cuts. Dip the blade in warm water between slices to prevent cheese from sticking.
For smaller squares, use a pizza cutter—it’s faster and ensures even portions. A bench scraper also works well for crispy edges without tearing.
Optional: Crumb Topping
For extra crunch, sprinkle crushed cornflakes or panko breadcrumbs on top before baking. I like Annie’s Organic cornflakes for a lighter texture. Press them gently into the cheese mixture before the final bake—they’ll toast beautifully and add a satisfying crunch to every bite.
Nutrition facts
Frequently asked questions
Why do my cheese squares get greasy instead of crispy?
Greasy squares usually mean the cheese melted too much before the crust formed. To fix this, press the mixture firmly into the pan and bake at 375°F for exactly 20-25 minutes—don't overbake. Cold butter in the mixture also helps create flaky layers. For extra crispiness, finish with 2-3 minutes under the broiler on high.
Can I make these cheese squares ahead of time?
These keep well for 3-4 days in an airtight container in the fridge. For parties, bake them the day before and reheat at 350°F for 5-7 minutes until warmed through. They also freeze beautifully—wrap tightly in foil and freeze for up to 3 months. Thaw overnight in the fridge before reheating.
What's the best cheese substitute if I don't have sharp cheddar?
Try extra-sharp white cheddar or Gruyère for a nutty twist. You can also use fontina or provolone for extra meltiness, but reduce the mozzarella slightly to maintain the right texture. Avoid pre-shredded cheese—it contains anti-caking agents that make the squares gummy.
How do I get perfectly even squares every time?
Press the cheese mixture firmly and evenly into the pan using your hands or the bottom of a glass. For clean cuts, use a sharp knife and dip it in warm water between slices. Chill the squares for 10 minutes after baking to firm up before cutting. A pizza cutter also works well for consistent portions.
Can I make these without flour for a gluten-free version?
Yes! Replace the 0.5 cup flour with 0.5 cup gluten-free all-purpose flour blend or crushed gluten-free crackers for texture. The key is maintaining the same crumbly consistency—just mix until the butter starts to soften. You may need to press the mixture slightly firmer to prevent crumbling during baking.