
Main Courses
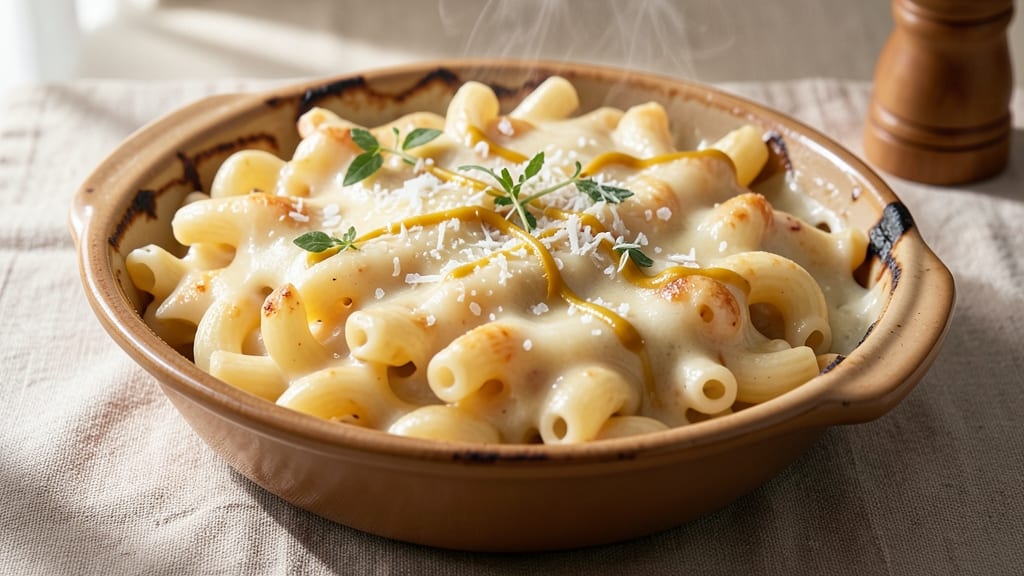
This baked cheddar mac and cheese recipe delivers the ultimate comfort food experience with crispy breadcrumb topping and rivers of melty cheddar. The secret lies in a perfectly balanced cheese sauce that clings to every noodle while developing a golden, crackly crust.
I've perfected this technique over years of testing, ensuring each bite offers the perfect harmony of textures and flavors.
The recipe begins with al dente pasta cooked in salted water, then tossed with a velvety cheese sauce made from sharp cheddar, cream, and a touch of mustard for depth. A buttery breadcrumb topping transforms the dish into restaurant-quality comfort food.
The key is baking at the right temperature—375°F—to create that irresistible contrast between crispy top and creamy interior.
What you'll achieve is a dish that's rich, indulgent, and impossible to resist—each forkful offering tender pasta, gooey cheese, and that satisfying crunch from the breadcrumbs.
The aroma alone will have everyone gathering at the table, while the visual appeal of golden-brown perfection makes it ideal for special occasions or weeknight dinners.
For those who love customization, this recipe easily adapts to dietary preferences. Add jalapeños for heat, bacon for smokiness, or even lobster for a luxurious twist. The base remains the same, proving that great comfort food doesn't require complicated techniques—just attention to detail and quality ingredients.
Ingredients for baked cheddar mac and cheese
Twelve essential ingredients transform into restaurant-quality baked mac and cheese with crispy topping and ultra-melty cheese rivers.
| Ingredient | Amount | Notes |
|---|---|---|
| Elbow Macaroni 🍝 | 12 oz | Uncooked, medium or short cut |
| Sharp White Cheddar Cheese 🧀 | 2 cups | Shredded, aged 12+ months preferred |
| Heavy Whipping Cream 🥛 | ½ cup | Full-fat for optimal richness |
| Unsalted Butter 🧈 | ½ cup | Cold, cubed for even melting |
| Diamond Crystal Kosher Salt 🧂 | 1 ½ tsp | For pasta water and seasoning |
| Dijon Mustard 🍯 | 1 tsp | For depth of flavor |
| Freshly Ground Black Pepper 🌶️ | ½ tsp | Cracked peppercorns preferred |
| Panko Breadcrumbs 🍞 | ½ cup | Japanese-style for extra crisp |
| Extra-Virgin Olive Oil 🫒 | 1 tbsp | For breadcrumb topping |
| Garlic Cloves 🧄 | 2 cloves | Minced, for breadcrumb topping |
| Fresh Parsley 🌿 | 2 tbsp | Chopped, for garnish |
| Whole Milk 🥛 | ¼ cup | For cheese sauce texture |
The cheese selection is non-negotiable—Sharp White Cheddar aged 12+ months delivers that signature tang and melt. Whole Foods or specialty cheese shops carry the best options, but any aged cheddar works in a pinch. For the pasta, elbow macaroni holds its shape perfectly during baking, though cavatappi or penne are excellent alternatives. The Panko breadcrumbs are critical for that signature crunch; Japanese-style stays crisp longer than regular breadcrumbs. Pre-shredded cheese contains anti-caking agents that prevent proper melting, so shred your own using a box grater for the best texture. The butter should be cold and cubed when added to the cheese sauce to prevent premature melting.
Out of sharp cheddar? Monterey Jack or Gruyère provide excellent melt and flavor, though the tang will differ. No heavy cream? Full-fat Greek yogurt or sour cream adds richness, though texture will vary slightly. The Dijon mustard is essential for depth—substitute with Dijon-style prepared mustard if needed. For the breadcrumb topping, crushed cornflakes or matzo meal work in a bind, though texture will be less crisp. The olive oil** in the topping prevents sogginess and enhances browning. If you're adding customizations like jalapeños or bacon, fold them into the cheese sauce at the end to maintain even distribution. For a vegan adaptation, cashew cream and nutritional yeast** replace dairy perfectly while maintaining that signature cheesy flavor.
This dish reheats beautifully—4-5 days in the fridge with the topping sealed tightly to maintain crispness. For longer storage, freeze portions in airtight containers for up to 3 months. To reheat, cover with foil and bake at 350°F until bubbly and golden. The breadcrumb topping can be pre-baked separately and stored for 2 days if you're prepping ahead. For special occasions, serve in a cast-iron skillet and broil for 2-3 minutes** at the end for an extra-crispy finish. The aroma alone will draw everyone to the table, making it perfect for holiday gatherings or cozy weeknight dinners.
Why You'll Love This Recipe
- No-Fuss Bake: I swear by this method—just toss the cooked pasta with melted butter, cream, and that sharp cheddar until it’s almost boring. Then bake until the edges turn golden and the top gets that irresistible crisp. Honestly, the hardest part is waiting for the oven timer.
- Cheddar Overload: That sharp white cheddar? It’s the star here. The recipe calls for enough to make every bite rich and tangy, but not so heavy it’s a chore to eat. (Yes, even the kids will fight over the last forkful.)
- Leftovers That Win: This dish actually tastes better the next day—crispier edges, creamier filling. I make a double batch on Sundays because reheating it is just dumping into a skillet with a splash of milk. Zero guilt, all satisfaction.
- Budget Comfort: Five ingredients, one pan, and a cost that won’t make you flinch. The heavy cream and butter make it feel fancy, but the cheddar and pasta keep it honest. It’s my go-to when I want to feel spoiled without breaking the bank.
Step-by-step instructions for baked cheddar mac and cheese
Here's the method that delivers restaurant-quality mac and cheese with crispy breadcrumbs and ultra-melty cheese rivers.
Cook the Elbow Macaroni to Perfect Al Dente
Bring a large pot of water to a rolling boil and add the 12 oz elbow macaroni. Stir immediately to prevent sticking. Add all 1.5 tsp diamond crystal kosher salt to the boiling water—it should taste like seawater. Cook until al dente, which should take about 8-10 minutes for elbow macaroni. I test by cutting a piece in half—it should have a pale center with a slight resistance when bitten.
Drain the pasta in a colander, but don't rinse it. The starch on the pasta helps create that creamy sauce we're after. Transfer the drained macaroni to a large mixing bowl and set aside. This step ensures your pasta won't turn mushy when baked later.
Prepare the Ultra-Creamy Cheese Sauce
In a medium saucepan, melt the 0.5 cup unsalted butter over medium heat until completely liquid. Add the 2 cups sharp white cheddar cheese, stirring constantly until fully melted and smooth. The cheese should create a thick, velvety sauce—this is where the magic happens. Reduce heat to low to prevent scorching.
Whisk in the 0.5 cup heavy whipping cream and 0.25 cup whole milk, then add the 1 tsp dijon mustard and 0.5 tsp freshly ground black pepper. The mustard adds subtle depth while the pepper enhances the cheddar's sharpness. Taste and adjust seasoning if needed—this is your flavor foundation.
Combine Pasta and Cheese Mixture
Pour the cheese sauce over the cooked macaroni in the mixing bowl. Using a wooden spoon or rubber spatula, gently fold everything together until fully coated. The pasta should be completely enveloped in the creamy cheese sauce with no dry spots. If the mixture seems too thick, add 1-2 tablespoons of hot pasta water to loosen it to a thick but pourable consistency.
This is where the texture comes together. You want a sauce that clings to the pasta but still flows slightly when poured. The combination of cream and milk creates that perfect balance between richness and smoothness that defines great mac and cheese.
Assemble and Bake for Crispy Topping
Preheat your oven to 375°F. Transfer the macaroni and cheese mixture to a 9x9-inch baking dish, spreading it evenly. In a small bowl, combine the 0.5 cup panko breadcrumbs, 1 tbsp extra-virgin olive oil, minced 2 cloves garlic, and an additional pinch of salt. Sprinkle this mixture evenly over the top of the macaroni.
Bake for 20-25 minutes until the edges are bubbling and the breadcrumb topping is golden brown. The cheese should be fully melted with rivers forming on top—this is what we're after. If the top browns too quickly, tent loosely with aluminum foil for the last 5 minutes of baking.
Rest and Garnish for Perfect Presentation
Remove the baking dish from the oven and let it rest for 5-10 minutes before serving. This resting period allows the cheese to set slightly, making it easier to slice and serve without losing all the gooey goodness. The internal temperature should reach 165°F at this point.
Garnish with chopped 2 tbsp fresh parsley just before serving. The parsley adds a fresh contrast to the rich, cheesy dish and makes it look especially appealing. Serve immediately while the breadcrumbs are still crispy and the cheese is ultra-melty—this dish doesn't wait well.
Pro Tips For Making Baked Cheddar Mac And Cheese
- Preheat That Pan: Get your baking dish into the oven right after you preheat it—no waiting. I learned this the hard way when my first batch came out with a sad, lukewarm center because the dish was still cold. A hot pan means faster melting cheese and a golden crust that actually forms.
- Grate the Cheese Fine: Skip the food processor—your hands and a box grater are your friends here. Sharp white cheddar needs to melt smoothly, and anything larger than fine crumbs will sit like awkward lumps in your sauce. (Yes, even if you’re impatient like me.)
- Don’t Rush the Butter: Melt the butter low and slow until it’s just foam, not brown. I used to crank the heat, and the sauce would split or taste burnt. Foamy butter blends better with the cream and won’t make your mac taste like a campfire.
- Salt in Layers: Toss the cooked pasta with a pinch of kosher salt before mixing it into the cheese sauce. Then, season the sauce itself with another pinch—cheddar’s sharpness needs balancing, and dry pasta soaks up salt like a sponge. (Your future self will notice the difference.)
Perfect pairings for this dish
Crispy Sides
Pair your baked mac and cheese with crispy roasted Brussels sprouts tossed in 1 tbsp olive oil, ½ tsp smoked paprika, and a pinch of salt. Roast at 425°F for 20 minutes until caramelized—this adds a satisfying crunch that balances the creamy dish. 🥦
Fresh Greens
A simple arugula salad with 2 tbsp lemon juice, 1 tbsp olive oil, and ½ tsp honey provides a peppery contrast to the richness. Toss with ¼ cup shaved Parmesan and 2 tbsp toasted pine nuts for extra texture. The bright acidity cuts through the cheesy indulgence beautifully.
Protein Additions
For a heartier meal, serve alongside crispy bacon or grilled chicken tenders. The smoky, salty notes of bacon complement the cheddar perfectly, while chicken adds lean protein. I love applewood-smoked bacon from Oscar Mayer for that extra depth of flavor.
Beverage Pairings
A crisp white wine like Sauvignon Blanc from New Zealand enhances the dish with its citrusy brightness. For beer lovers, a hoppy IPA (like New Belgium Fat Tire) balances the richness. If you prefer something lighter, sparkling apple cider adds a refreshing contrast. 🍷
Sweet Contrasts
Finish the meal with warm apple crisp or vanilla ice cream to cleanse the palate. The sweetness of Honeycrisp apples baked with ½ cup oats and 2 tbsp brown sugar pairs surprisingly well with the savory mac and cheese.
A scoop of Ben & Jerry’s Vanilla Bean adds a creamy, indulgent finish.
Nutrition facts
Frequently asked questions
Why does my baked mac and cheese turn out greasy?
Overmixing the cheese sauce or using too much butter creates excess oil. The key is to melt the butter and cheese together gently, then fold in the cream and milk. If your sauce looks too thick, add just 1-2 tablespoons of hot pasta water to loosen it—never extra cream or butter. Also, avoid pre-shredded cheese (it contains anti-caking agents that prevent proper melting).
Can I make this ahead of time?
Yes, but with a few tricks! Assemble the dish in the baking dish and refrigerate for up to 24 hours before baking. When ready to bake, cover with foil and bake at 375°F for 30-35 minutes (the extra time compensates for the cold start). For the crispy topping, sprinkle fresh breadcrumbs after baking. The texture won't be quite as crisp as fresh, but it's still delicious!
What's the best cheese for ultra-melty texture?
Sharp White Cheddar aged 12+ months is ideal—it melts perfectly and has that signature tang. For extra richness, blend it with ½ cup Gruyère or Monterey Jack. Avoid pre-shredded cheese (it contains starches that prevent proper melting). Pro tip: Grate your own cheese using a box grater for the best texture!
How do I fix a soggy breadcrumb topping?
Prevent soggy topping by mixing 1 tbsp olive oil into the breadcrumbs before adding them. If it's already soggy, broil for 2-3 minutes at the end to crisp it up. For extra insurance, bake the breadcrumb mixture separately on a parchment-lined tray at 350°F for 5 minutes before placing it on top of the mac and cheese.
Can I make this in a different dish shape?
Try a cast-iron skillet for individual servings or a lasagna pan for larger gatherings. For skillet versions, reduce baking time to 15-20 minutes and broil for 2 minutes at the end. The key is maintaining the 375°F temperature—just adjust time based on your dish's size and material.