
Breakfast & Brunch
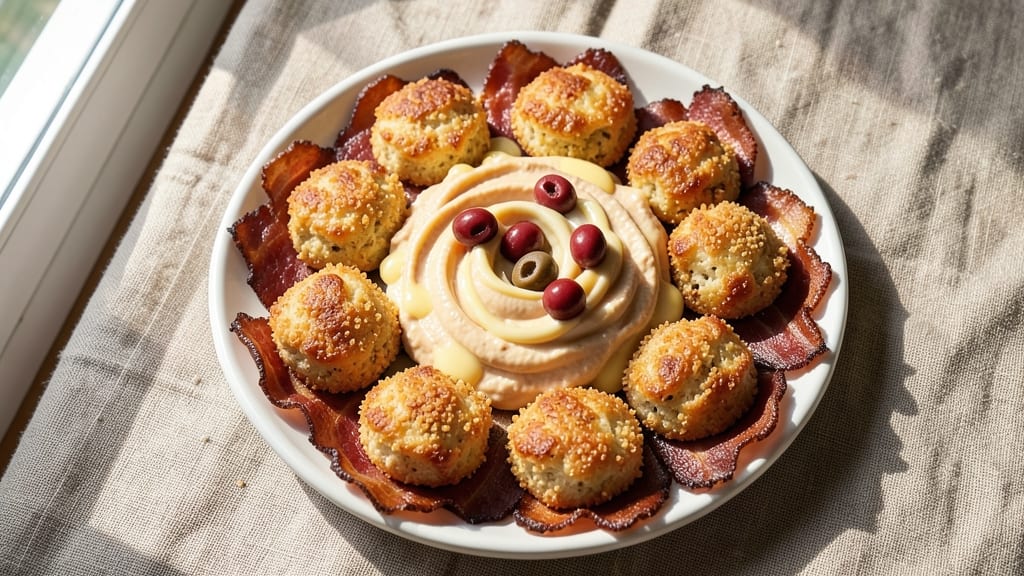
This bacon pimento cheese bites recipe delivers the perfect balance of smoky, crispy edges and gooey, pull-apart cheese—ideal for brunch or appetizers. The secret lies in crisping the bacon just right and mixing it with tangy pimento cheese for a flavor explosion in every bite.
I’ve perfected this recipe over years of hosting gatherings, where these bites disappear faster than you can say "pull-apart perfection."
The magic happens when you fold crispy bacon into creamy pimento cheese, then coat the mixture in a buttery, crunchy breadcrumb shell. Baking at 375°F ensures a golden, crispy exterior while keeping the cheese warm and stretchy inside.
The result? A bite-sized masterpiece that’s rich, spicy, and impossible to resist. These bites are perfect for game day, holidays, or a quick weeknight snack—no one will guess how easy they are to make.
What makes these bites truly special is the crispy texture that contrasts beautifully with the creamy cheese center. The pimento cheese adds a tangy kick, while the bacon brings deep, smoky flavor that ties everything together.
Serve them warm with a side of honey butter or a sprinkle of fresh herbs for an extra touch of elegance. They’re also freezer-friendly, so you can prep ahead and enjoy them whenever cravings strike.
This recipe is a game-changer for anyone who loves cheese and bacon—it’s the kind of dish that turns simple ingredients into something extraordinary. Whether you’re feeding a crowd or just treating yourself, these bites will be a hit. Let’s get started on creating your own batch of irresistible, pull-apart goodness.
Ingredients for bacon pimento cheese bites
Pantry staples plus a few key ingredients for irresistible, pull-apart perfection.
| Ingredient | Amount | Notes |
|---|---|---|
| Thick-Cut Bacon 🥓 | 8 oz | Thick-cut for crispiness, chopped |
| Pimento Cheese Spread 🧀 | 1 ½ cups | Store-bought or homemade blend |
| Pimento-Stuffed Olives 🫒 | ½ cup | Chopped, for tangy kick |
| Sharp Cheddar Cheese 🧀 | 1 cup | Shredded, sharp flavor preferred |
| Mayonnaise 🥛 | ¼ cup | Full-fat for creaminess |
| Panko Breadcrumbs 🍞 | 1 cup | For crispy coating |
| All-Purpose Flour 🌾 | ¼ cup | For extra crunch layer |
| Butter 🧈 | 2 tbsp | Melted, for binding |
| Garlic Powder 🧄 | 1 tsp | For subtle depth |
| Paprika 🌶️ | ½ tsp | Smoked for color |
| Salt 🧂 | ½ tsp | Kosher or sea salt |
| Black Pepper 🌶️ | ¼ tsp | Freshly ground |
| Egg 🥚 | 1 whole | For binding mixture |
The bacon makes or breaks these bites—thick-cut is non-negotiable for that perfect crisp. Costco or Trader Joe's usually have great deals on thick-cut bacon, and it's worth the extra money. For the pimento cheese, store-bought works fine (I like the one from Kraft), but homemade is even better. If you're making your own, grab sharp cheddar from the deli counter—it melts smoother than pre-shredded. The olives? Goya pimento-stuffed olives are my go-to—they're bright green and packed with flavor.
No pimento cheese? Mix sharp cheddar with mayo and a dash of hot sauce—it's a solid swap. Running low on pimento-stuffed olives? Regular green olives chopped fine add a similar briny bite. The panko breadcrumbs are key for that crispy texture—don't use regular breadcrumbs, they'll turn mushy. Short on butter? Olive oil works too, but it won't give the same rich flavor. The egg is just for binding, so any size works—just make sure it's room temperature.
These bites reheat beautifully—350°F for 10 minutes brings them back to crispy perfection. Store leftovers in an airtight container for up to 5 days or freeze for up to 3 months. I always make a double batch because they disappear fast—portion into freezer bags for easy grab-and-bake snacks later. The cheese gets stringy when reheated, so it's worth the extra minute in the oven.
Why You'll Love This Recipe
- No-Bake Magic: I swear by this recipe when I’m too tired to preheat the oven. Just fold crispy bacon, pimento cheese, and those briny olives into dough—no rolling, no fuss. The only "cooking" is baking until golden, and honestly? That’s the best part of the day.
- Smoky-Spicy Kick: That thick-cut bacon adds a salty crunch, while the pimento cheese and olives bring heat and tang. Between us, the sharp cheddar melts into gooey perfection, and the mayo ties it all together—rich, bold, and impossible to resist.
- Game for Any Gathering: I make these for tailgates, game days, or just because I’m craving something hands-off. They’re easy to double, travel well, and even my picky friends devour them. No one turns down a bite of this—trust me.
- Budget-Friendly Feast: A single package of bacon and a jar of pimento cheese stretch to feed four or more. Leftovers? They last days in the fridge, and I’ve reheated them straight from frozen with zero complaints. That’s my kind of efficient.
Step-by-step instructions for bacon pimento cheese bites
Let's make these smoky, cheesy bites with crispy edges and pull-apart perfection.
Cook the Bacon Until Crispy
Preheat your oven to 400°F. Line a baking sheet with parchment paper and arrange the 8 oz thick-cut bacon in a single layer, making sure the slices don't overlap. This prevents uneven cooking and ensures crispy edges.
Bake for 12-15 minutes until the bacon reaches 195°F internally and the edges are deep golden brown. I like to check the temperature with a meat thermometer—this ensures perfect doneness without overcooking. Let the bacon cool for 5 minutes before handling, then chop it into ½-inch pieces.
Mix the Cheese Filling
In a medium bowl, combine the 1.5 cups pimento cheese spread, 0.5 cup chopped pimento-stuffed olives, 1 cup shredded sharp cheddar cheese, and 0.25 cup mayonnaise. Mix well until fully incorporated and the texture is smooth and creamy.
Add 1 tsp garlic powder, 0.5 tsp paprika, 0.5 tsp salt, and 0.25 tsp black pepper to the mixture. Stir until evenly distributed. The spices will enhance the smoky flavor from the bacon and add depth to the cheesy filling. This mixture should be thick but still spreadable—if it's too stiff, stir in 1 teaspoon of milk or water.
Prepare the Coating Mixture
In a separate bowl, whisk together the 1 whole egg, 2 tbsp melted butter, 0.25 cup all-purpose flour, and 1 cup panko breadcrumbs until fully combined. The mixture should be thick and crumbly, with no dry spots remaining.
This coating is what creates the crispy exterior you're after. If the mixture feels too dry, add 1 teaspoon of milk or water to help it bind. The panko breadcrumbs will give your bites that satisfying crunch, while the egg and butter ensure everything sticks together perfectly.
Assemble and Bake the Bites
Preheat your oven to 375°F and line another baking sheet with parchment paper. Using a spoon or small ice cream scoop, drop 1 tablespoon of the cheese mixture onto the prepared baking sheet, spacing them about 1 inch apart. Press a small piece of the chopped bacon into the center of each cheese mound.
Next, dip each bite into the coating mixture, pressing gently to ensure the coating sticks evenly. Place the coated bites back on the baking sheet, pressing down lightly with the back of a spoon to help them hold their shape. Bake for 12-15 minutes until the coating is deep golden brown and the cheese is fully melted.
Serve Warm and Enjoy
Remove the bites from the oven and let them cool for 2-3 minutes before serving. The exterior should be crispy, while the interior remains gooey and cheesy. Serve them warm with a side of pickles or a simple green salad for a perfect appetizer.
Here's the thing—these bites are best enjoyed immediately while the coating is still crispy. If you need to store them, let them cool completely, then transfer to an airtight container. Reheat in the oven at 350°F for 5-7 minutes to restore that perfect crunch. Trust me, they're worth the effort!
Pro Tips For Making Bacon Pimento Cheese Bites
- CRISPY BACON FIRST: Cook the thick-cut bacon until it’s deep golden, not just pink—aim for 200°F internal temp. Cold bites taste soggy, and crispy bacon is the whole point here. (Yes, even if you’re impatient like me.)
- CHOP OLIVES SMALL: Slice those pimento-stuffed olives into tiny pieces—no bigger than a pea. Big chunks make uneven bites, and you’ll end up with a dry, crumbly mess where the cheese should be creamy. (I learned this after one disastrous batch where I skipped it.)
- DON’T OVERMIX THE CHEESE: Stir the sharp cheddar and mayo just until combined—lumpy is better than greasy. Overworking it turns the filling into a sad, oily paste. Fold in the pimento cheese spread last, then add the olives and bacon gently. (Your future self will thank you.)
- USE A BAKING SHEET, NOT A SKILLET: Line a baking sheet with parchment, spread the bites in a single layer, and bake at 375°F for 12-15 minutes. Crowding them in a skillet steams the cheese instead of browning it. (This isn’t the prettiest method, but it’s the tastiest.)
Pro cooking tips for perfect results
Bacon Crispiness Secrets
Thick-cut bacon is non-negotiable for these bites—it delivers that perfect crispy texture that holds up even after baking. I swear by Costco thick-cut bacon because it stays crispy longer than thinner cuts.
Cook it in the oven at 400°F for 12-15 minutes until it hits 195°F internally. This ensures it's fully rendered but still crisp enough to chop and mix into the cheese.
Pro tip: Let the bacon cool for 5 minutes before chopping—this prevents it from turning mushy when mixed with the cheese. If you're short on time, you can use pre-cooked bacon from the deli section, but it won't be as crispy.
The key is to keep the bacon pieces ½-inch or smaller so they distribute evenly throughout the cheese mixture.
Cheese Consistency Matters
The pimento cheese filling should be thick but still spreadable—like a soft dough. If your mixture is too stiff, stir in 1 teaspoon of milk or water to loosen it up.
I like to add ½ cup chopped pimento-stuffed olives for extra tang, but if you're in a pinch, regular green olives work too. The sharp cheddar is crucial—pre-shredded cheese has anti-caking agents that can make the filling grainy, so always shred your own.
For extra richness, I sometimes fold in 1 tablespoon of cream cheese to the mixture. This adds a velvety texture that balances the sharpness of the cheddar.
If you're making a big batch, divide the cheese filling into two bowls—one for assembly and one as a backup. Trust me, you'll want extra.
Coating Like a Pro
The secret to a perfect crispy coating lies in the ratio of ingredients. Use 1 cup panko breadcrumbs for every ½ cup flour—this gives you that satisfying crunch without making the coating too heavy.
Whisk the egg and melted butter together first, then fold in the dry ingredients. If the mixture feels too dry, add 1 teaspoon of milk or water to help it bind.
For an extra flavor boost, mix ½ teaspoon smoked paprika into the coating. This adds a subtle smokiness that pairs perfectly with the bacon. When dipping the bites, press them gently against the sides of the bowl to ensure an even coating.
This step is what transforms a good bite into a showstopper.
Baking for Perfect Texture
Don't overcrowd the baking sheet—space the bites 1 inch apart for even cooking. Bake at 375°F for 12-15 minutes until the coating is deep golden brown. The cheese should be fully melted but still gooey inside.
If the coating isn't crispy enough, broil for 1-2 minutes at the end, but keep a close eye to avoid burning.
Let the bites rest for 2-3 minutes after baking—this helps the coating set and prevents them from falling apart when you serve. If you're making a big batch, bake in two batches to avoid overcrowding. The first batch will teach you the perfect timing for the second.
Nutrition facts
Frequently asked questions
Can I make these bites without panko breadcrumbs?
Yes! If you're out of panko, use crushed cornflakes or Ritz crackers for a similar crunch. For extra crispiness, mix in ½ cup crushed potato chips (like Doritos) for a flavorful twist. Just keep the ratio 1:1 with flour to maintain binding. The texture won't be identical, but it'll still be delicious.
How do I store and reheat leftovers?
Let the bites cool completely, then store in an airtight container for up to 5 days at room temperature. For longer storage, freeze them for up to 3 months. To reheat, bake at 350°F for 5-7 minutes until the coating is crispy again. For microwave reheating, cover with a damp paper towel and zap for 10-15 seconds—just know the coating won't be as crispy.
What's the best way to make the cheese filling extra creamy?
For ultra-creamy filling, fold in 1 tablespoon cream cheese or 2 tablespoons sour cream to the pimento cheese mixture. You can also replace ¼ cup of the mayo with Greek yogurt for a tangier, lighter texture. If your cheese is too dry, stir in 1 teaspoon of milk or water until smooth. The key is to keep it spreadable but not runny.
Can I make these bites ahead of time for a party?
Assemble the bites up to 24 hours ahead and refrigerate uncooked. When ready to bake, let them sit at room temperature for 30 minutes before baking as directed. For a crowd, double the recipe and bake in two batches to avoid overcrowding. They'll still be fresh and crispy when served.
Why did my bites turn out greasy instead of crispy?
Greasy bites usually happen when the cheese mixture is too wet or the coating doesn't stick properly. Make sure your pimento cheese isn't too runny—add 1 tablespoon flour to absorb excess moisture. Also, press the bites gently into the coating mixture to ensure even coverage. If the coating feels too loose, chill it for 10 minutes before baking to help it set.