
Breakfast & Brunch
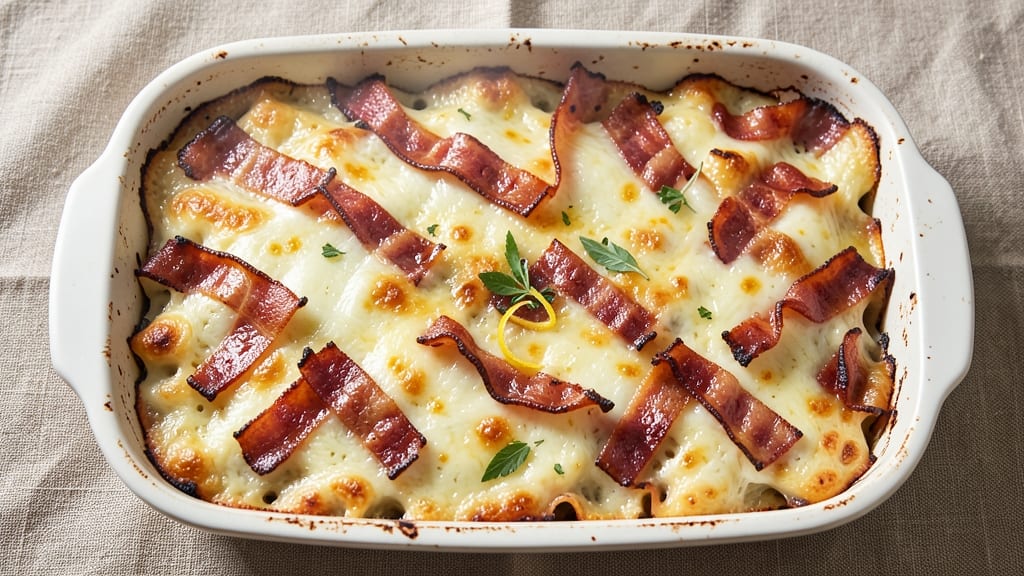
This bacon cheese casserole recipe delivers the ultimate comfort food experience—smoky, crispy edges and rivers of melted cheese that pull apart with every bite. I’ve perfected this version over years of testing, balancing rich cheddar with crispy bacon for a dish that’s both hearty and foolproof.
The secret lies in layering ingredients just right and baking until golden perfection.
The beauty of this casserole is its versatility—whether you’re feeding a crowd or meal prepping for the week, it comes together in one baking dish with minimal effort. A crispy bacon topping adds texture, while the creamy cheese filling ensures every forkful is indulgent.
It’s the kind of dish that transforms a simple weeknight dinner into a standout meal without requiring advanced skills.
What makes this recipe special is how it balances tradition with modern twists. You can keep it classic with sharp cheddar and crispy bacon, or elevate it with add-ins like spinach, jalapeños, or even a swirl of caramelized onions.
The result? A restaurant-quality dish that’s easy to customize and always delivers on flavor.
Ready in 40 minutes with just 15 minutes of prep, this casserole is perfect for breakfast, brunch, or a cozy dinner. Serve with a side salad or crusty bread to soak up every last bit of that cheesy goodness. Let’s get baking!
Ingredients for bacon cheese casserole
Six ingredients create the smoky, crispy, cheesy layers that make this casserole legendary.
| Ingredient | Amount | Notes |
|---|---|---|
| Thick-Cut Bacon 🥓 | 12 oz | Cooked crispy, chopped |
| Sharp White Cheddar Cheese 🧀 | 2 cups | Shredded, block preferred |
| Heavy Cream 🥛 | 1 cup | Full-fat for creaminess |
| Milk 🥛 | ½ cup | Whole milk preferred |
| All-Purpose Flour 🌾 | ¼ cup | For roux base |
| Butter 🧈 | ½ cup | Unsalted, melted |
| Large Eggs 🥚 | 2 whole | Room temperature |
| Salt 🧂 | ½ tsp | Kosher or sea salt |
| Black Pepper 🌶️ | ¼ tsp | Freshly ground |
| Garlic Powder 🧄 | ½ tsp | For depth of flavor |
| Onion Powder 🧅 | ½ tsp | For savory balance |
| Baking Dish 🍳 | 1 whole | 9x13-inch glass or ceramic |
The bacon is non-negotiable here—thick-cut gives you the best crispy edges. Costco or Trader Joe's sell it pre-chopped for convenience, but if you're cooking from scratch, look for slices with good marbling. The cheese should be sharp white cheddar—avoid pre-shredded (it has anti-caking agents that prevent proper melting). For the best flavor, Kraft Natural or Cabot are my go-to brands. The heavy cream and milk need to be full-fat for that rich, velvety texture—skip the skim versions, trust me on this.
No thick-cut bacon? Regular bacon works in a pinch, but you'll lose that perfect crisp. Short on sharp cheddar? Pepper jack or smoked Gouda add different but delicious flavors. The flour and butter form the roux, so don't substitute with self-rising flour—it's already got salt and leavening. For the baking dish, glass or ceramic conducts heat best, but avoid dark metal pans (they can over-brown). If you're baking for a crowd, use a 9x13-inch dish—it's the perfect size for this recipe.
This casserole reheats beautifully—5 minutes at 350°F brings it back to life. Store leftovers covered in the fridge for 4-5 days or freeze portions for up to 3 months. I always make an extra batch and freeze half—perfect for lazy weeknights. The bacon topping stays crispy when reheated, but if it gets soggy, broil for 2-3 minutes at the end to restore the crunch.
Why You'll Love This Recipe
- One-Pan Magic: I swear by this recipe when I’m too tired to scrub pots—just crisp the bacon, toss everything in one dish, and bake. The bacon fat melts right into the creamy cheese sauce, so you don’t even need to preheat the oven for long.
- Crispy-Creamy Obsession: That thick-cut bacon stays perfectly crunchy on top while the sharp cheddar and heavy cream create a velvety, stretchy sauce underneath. Honestly, the contrast is what makes it dangerous—one bite and you’ll forget about takeout.
- Leftovers for Days: This casserole actually improves the next day, if you can believe it. The flavors meld even more, and reheating it in the microwave (or oven) gives you that same crispy-cheesy magic. My kids beg for it at lunch, and I’m not complaining.
- Budget Breakfast Hack: Here’s what sold me—this recipe uses pantry staples and stretches further than you’d think. Swap in breakfast potatoes or hash browns, and suddenly you’ve got a filling brunch for half the cost of diner prices. (Yes, even on a Tuesday night.)
Step-by-step instructions for bacon cheese casserole
Here's how to create that perfect balance of crispy bacon edges and gooey cheese rivers in your baking dish.
Cook and Prepare the Bacon
Preheat your oven to 400°F and line a baking sheet with parchment paper. In a large skillet over medium heat, cook the 12 oz thick-cut bacon until it reaches crispy perfection, about 12-15 minutes. I like to flip the bacon halfway through cooking for even crispiness.
Once fully cooked, use a slotted spoon to transfer the bacon to the prepared baking sheet. Let it cool for 5 minutes before carefully chopping it into ½-inch pieces. The bacon should be crisp but not brittle—this ensures it maintains its texture when mixed with the cheese. Reserve any rendered bacon fat in the skillet for later use.
Make the Creamy Cheese Sauce
In the same skillet with the reserved bacon fat, melt the 0.5 cup butter over medium heat. Whisk in the 0.25 cup all-purpose flour to create a roux, cooking for 1-2 minutes until it turns a light golden color and smells nutty. This step is crucial—it forms the base for your creamy sauce.
Gradually whisk in the 1 cup heavy cream and 0.5 cup milk, stirring constantly to prevent lumps from forming. Let the mixture simmer for 3-4 minutes until it begins to thicken. Remove from heat and stir in the 2 cups shredded sharp white cheddar cheese until completely melted and smooth. The sauce should be velvety and coat the back of a spoon.
Combine Ingredients in the Baking Dish
In a large bowl, whisk together the 2 whole large eggs, 0.5 tsp salt, 0.25 tsp black pepper, 0.5 tsp garlic powder, and 0.5 tsp onion powder until well combined. This mixture will help bind all the ingredients together for that perfect pull-apart texture.
Add the chopped bacon and the creamy cheese sauce to the egg mixture, stirring gently but thoroughly to distribute everything evenly. Pour the entire mixture into your prepared 9x13-inch baking dish, spreading it out evenly with a spatula. The dish should be filled about ¾ full—this allows for proper browning and expansion during baking.
Bake Until Golden and Bubbly
Place the baking dish in the preheated 400°F oven and bake for 25-30 minutes until the edges are golden brown and the center is just set. You'll know it's ready when the top has a beautiful crust and the cheese has begun to pull apart slightly, forming those coveted rivers.
For the final touch, broil the casserole for 1-2 minutes to achieve a deeper golden color on top. Watch it closely during this time—broilers can be intense and can burn quickly. Once you see those beautiful crispy edges, remove it from the oven and let it rest for 10 minutes before serving. This resting period allows the casserole to set properly and makes serving easier.
Serve Warm with Fresh Bread
Slice the casserole into 6 equal portions and serve immediately while still warm. The contrast of crispy bacon edges, creamy cheese rivers, and the pull-apart texture makes this dish truly special. I like to serve it with a side of crusty bread to soak up any extra cheese sauce.
This casserole tastes even better the next day, so consider making it ahead and reheating in the oven at 350°F for 15-20 minutes until warmed through. The flavors will continue to meld and deepen, making every bite even more delicious.
Pro Tips For Making Bacon Cheese Casserole
- CRISP THE BACON LOW: Cook thick-cut bacon at 275°F (135°C) until the fat renders but the meat stays tender—about 20 minutes. I learned this the hard way: high heat turns it chewy, and this casserole needs that melt-in-your-mouth texture to shine.
- GRATE CHEESE FINE: Use a box grater for sharp white cheddar, not a food processor—it packs too tightly and clumps. My first attempt with pre-shredded cheese ended in a greasy, uneven bake. Freshly grated melts smoother and browns better.
- DON’T SKIP THE ROUX: Cook the flour and milk into a proper roux (thick, creamy, and glossy) before adding heavy cream—this prevents a watery, gluey topping. I used to rush it, and the casserole always ended up tasting more like paste than cheese sauce.
- BAKE UNTIL GOLDEN: Cover with foil for the first 30 minutes, then uncover and broil for 3–5 minutes at the end. This ensures the top crisps without burning. I used to forget the broil step, and the cheese just sat there, sad and unappetizing.
Essential equipment for great bacon cheese casserole
Baking Dish Essentials
A 9x13-inch glass or ceramic baking dish is non-negotiable for this casserole. Glass conducts heat evenly, preventing hot spots that can cause uneven browning. I recommend Pyrex or CorningWare—both handle temperature shifts beautifully without cracking.
Avoid dark metal pans, which can over-brown the edges and make the cheese taste bitter. 🍳
Skillet for the Roux
Use a 10-inch cast-iron skillet for the roux—its heavy base distributes heat perfectly. If you don’t own cast iron, a stainless steel skillet (like All-Clad) works well. Avoid nonstick—it can’t handle the high heat needed for a proper roux.
I keep my cast iron seasoned to prevent sticking, especially when cooking bacon fat and butter together.
Slotted Spoon
A long-handled slotted spoon is your best friend for transferring crispy bacon. Look for one with silicone tips (like OXO Good Grips) to protect your hands from hot skillets. This tool also helps drain excess bacon fat while keeping the bacon intact.
I use mine to transfer bacon to a wire rack for cooling before chopping—this keeps it crispy longer.
Mixing Bowls
Grab a large mixing bowl (preferably stainless steel) for combining eggs and cheese sauce. The depth helps prevent spills, and stainless steel won’t retain odors like plastic. I like Libbey or Pyrex bowls—they’re sturdy and easy to clean. For smaller tasks (like whisking eggs), a medium-sized bowl works too.
Whisk and Spatula
A balloon whisk (like OXO’s) ensures your roux and cheese sauce are lump-free. Pair it with a heat-resistant silicone spatula (such as EcoWare) to scrape every last bit of sauce from the skillet. The silicone won’t melt or scratch your cookware, and it’s dishwasher-safe. 💡
Oven Thermometer
Your oven’s temperature display isn’t always accurate. A digital oven thermometer (like Thermoworks) ensures your 400°F setting is precise—critical for even baking. I’ve seen ovens run 25°F hotter or cooler than set, which can ruin the texture. Place it near the casserole while baking to monitor real-time temps.
Nutrition facts
Frequently asked questions
Can I make this casserole ahead of time?
This dish actually tastes better the next day as the flavors meld. Assemble it completely, cover tightly with foil, and refrigerate for up to 24 hours before baking. For make-ahead freezing, bake the casserole first, then cool completely and wrap tightly in plastic wrap plus foil. Freeze for up to 3 months. Thaw overnight in the fridge before reheating at 350°F for 15-20 minutes.
What if I don't have thick-cut bacon?
Regular bacon will work, but you'll lose that perfect crispy texture. For best results, bake the bacon on a wire rack over a baking sheet at 400°F for 10-12 minutes to maximize crispiness. If using pre-cooked bacon, microwave it for 30 seconds to restore some crunch before chopping. The flavor will still be great, just slightly less dramatic.
Can I add other ingredients like spinach or jalapeños?
Yes! This casserole is incredibly versatile. For spinach, sauté 2 cups chopped until wilted and add to the egg mixture. For heat, add ½ cup diced jalapeños (seeds removed for mild heat) or a pinch of cayenne. You can also stir in ½ cup cooked breakfast potatoes for extra heartiness. Just don't exceed 25% additional volume or the texture may suffer.
Why did my casserole come out too runny?
This usually happens from one of three issues: overmixed eggs (whisk just until combined), not enough baking time, or too much liquid. For next time, bake 5-10 minutes longer and consider reducing the milk by 2 tablespoons. Also ensure your oven is properly calibrated—use an oven thermometer to verify the 400°F setting. The cheese should pull slightly when you shake the dish gently before serving.
What's the best way to serve leftovers?
Reheat leftovers in the oven at 350°F for 15-20 minutes covered with foil to prevent drying. For extra crispiness, broil for 2-3 minutes at the end. Serve with a simple side salad, crusty bread, or roasted vegetables. This casserole also makes fantastic breakfast hash—crumbled into eggs or served with toast points for a hearty morning meal.