
Main Courses
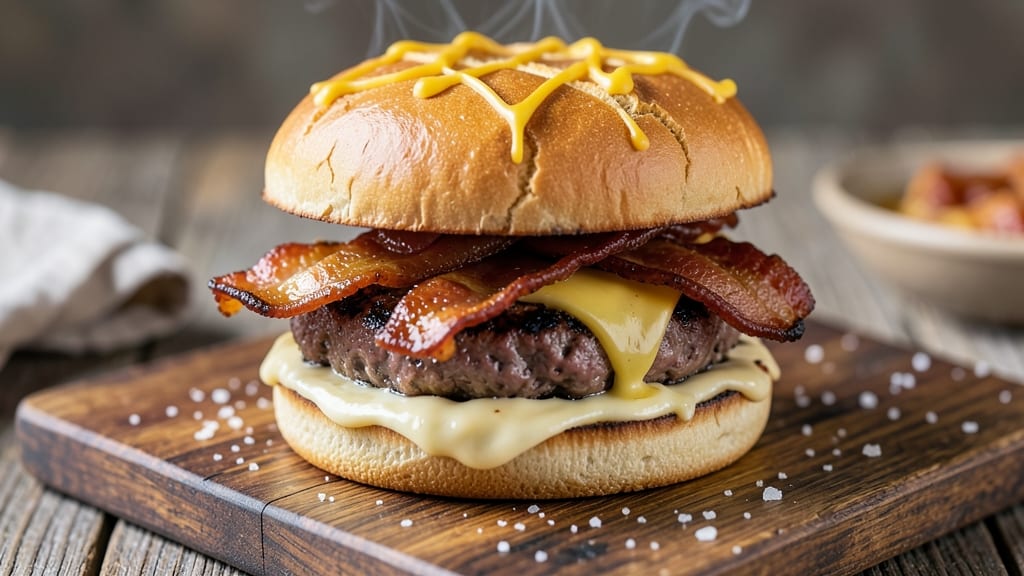
Bacon and cheese stuffed burgers deliver the ultimate burger experience—crispy edges that crackle with every bite and gooey, pull-apart centers that ooze melted cheese and smoky bacon. This recipe transforms a classic burger into a decadent, restaurant-quality meal that's surprisingly simple to master at home. The secret lies in layering the patty with bacon and cheese before cooking, creating pockets of flavor that burst with each bite.
What sets these burgers apart is the perfect balance of textures: a crispy crust from searing the patty, tender bacon that renders just enough fat to baste the cheese, and a melty center that pulls apart dramatically.
I've perfected this technique over countless grill sessions, ensuring the cheese stays gooey while the bacon achieves that ideal smoky crispness. The result? A burger so satisfying, it becomes the star of any meal.
To achieve this level of perfection, we'll start with high-quality ground beef that holds together during cooking, then carefully layer the bacon and cheese before searing to create that coveted crust.
The key is patience—letting the patty cook slowly to develop flavor while maintaining a juicy interior. Once you try this method, you'll never go back to plain burgers again.
Serve these stuffed burgers on toasted buns with your favorite toppings and sides to complete the experience. Whether you're grilling outdoors or cooking on the stovetop, this recipe delivers restaurant-quality results with minimal effort. Let's get cooking!
Ingredients for bacon and cheese stuffed burger
High-quality beef, smoky bacon, and melty cheese transform a classic burger into a decadent masterpiece.
| Ingredient | Amount | Notes |
|---|---|---|
| Ground Beef (80/20) 🥩 | 1 ½ lb | High-quality, freshly ground preferred |
| Center-Cut Bacon 🥓 | 8 oz | Thick-cut for best flavor |
| Sharp Cheddar Cheese 🧀 | 8 oz | Block form, freshly grated |
| Large Hamburger Buns 🍞 | 4 whole | Toasted before serving |
| Mayonnaise 🥫 | ¼ cup | For spreading on buns |
| Yellow Mustard 🍯 | 2 tbsp | Classic burger condiment |
| Kosher Salt 🧂 | 1 ½ tsp | For seasoning beef |
| Ground Black Pepper 🌶️ | 1 tsp | Freshly cracked preferred |
| Garlic Powder 🧄 | ½ tsp | Enhances flavor profile |
| Vegetable Oil 🫒 | 2 tbsp | For cooking patties |
| Fresh Lettuce Leaves 🥬 | 4 whole | Iceberg or romaine |
| Tomato Slices 🍅 | 4 slices | Fresh, ripe tomatoes |
| Red Onion 🧅 | ¼ whole | Thinly sliced for crunch |
The beef makes all the difference here. 80/20 ground chuck from the butcher section (not pre-packaged) holds together perfectly and adds that juicy richness. Costco or Whole Foods usually have the best quality—look for bright red color and good marbling. The bacon? Thick-cut center-cut is non-negotiable. It renders slower, keeping the patty juicy while creating that perfect smoky crust. I always buy Applewood-smoked if available—it adds an extra layer of flavor. For the cheese, sharp cheddar from a block melts best. Pre-shredded gets clumpy and won't give you that perfect pull-apart texture.
No thick-cut bacon? Regular bacon cut into strips works in a pinch, but it'll render faster. Running short on sharp cheddar? Pepper jack or Gouda both melt beautifully. The beef ratio is crucial—80/20 fat content ensures juiciness, but if you only have lean ground beef, add 1 tbsp mayo or mustard to help bind it. For the buns, toasted until golden is key—use a mix of butter and oil for that perfect crunch. The lettuce and tomato can be swapped for whatever you've got on hand, but the red onion adds that essential bite. Pro tip: Toast your buns while the patties cook—they'll be warm and crispy by the time your burgers are ready.
Bacon and cheese prep ahead saves time. Wrap the bacon and cheese in plastic wrap and store in the fridge for up to 2 days. The ground beef can be shaped into patties and refrigerated for 1 day before cooking. These burgers reheat beautifully—wrap in foil and warm in a 350°F oven for 5 minutes. For maximum flavor, assemble and serve immediately, but they keep well on a warming tray for 20-30 minutes if you're serving a crowd. The leftovers? Freeze for up to 1 month—just thaw and reheat gently.
Why You'll Love This Recipe
- Here’s what sold me: the crispy bacon edge paired with that sharp cheddar oozing out when you bite in. The 80/20 beef keeps it juicy, but the real magic? The way the bacon fat renders into the cheese—it’s like a flavor bomb in every bite.
- No Fuss, Big Payoff: I’ll be real—this burger takes five steps max. You mix the beef with salt, shape it around the bacon and cheese, and let the grill or pan do the rest. That’s it. No fancy prep, no stress, just melty perfection waiting to happen.
- Smoky Cheese Overload: Here’s what sold me: the crispy bacon edge paired with that sharp cheddar oozing out when you bite in. The 80/20 beef keeps it juicy, but the real magic? The way the bacon fat renders into the cheese—it’s like a flavor bomb in every bite.
- Tailgate to Tuesday Night: Between us, this burger works everywhere. Pack it for a summer picnic, throw it on the grill for game day, or make a double batch for lazy weeknights. Honestly, I’ve even turned it into a breakfast sandwich with a fried egg—no judgment.
Step-by-step instructions for bacon and cheese stuffed burgers
Here's how to build smoky, crispy burgers with melty cheese centers that pull apart perfectly.
Cook the Bacon Until Crispy
Cut the 8 oz center-cut bacon into ½-inch thick strips—thicker than usual so they stay juicy inside the burgers. Place them in a cold skillet over medium heat (no oil needed). Cook for 8-10 minutes, flipping occasionally, until the edges are deep golden brown and the bacon releases easily from the pan.
Real talk: Don't rush this step. The bacon should be crispy but not burnt, with fat rendering out but still holding its shape. Transfer the bacon to a paper towel-lined plate to drain excess fat, leaving the rendered fat in the pan—this is flavor gold for your patties.
Season and Shape the Stuffed Patties
In a large bowl, combine the 1.5 lb ground beef (80/20) with 1.5 tsp kosher salt, 1 tsp ground black pepper, and 0.5 tsp garlic powder. Mix gently with your hands until just combined—overworking develops gluten, which makes burgers tough.
Divide the beef into 4 equal portions (about 5 oz each). Flatten each portion into a 3-inch circle, then create a well in the center. Add 2 oz of the crispy bacon and 2 oz of freshly grated sharp cheddar cheese to each well. Gently fold the beef over the filling, pressing lightly to seal but not compact too tightly—this ensures a pull-apart texture.
Sear the Patties in Bacon Fat
Heat the skillet with bacon fat over medium-high heat until shimmering. Add the patties and cook for 3-4 minutes per side, pressing down gently with a spatula during the first minute to prevent curling. The cheese should start melting inside, and the edges should form a deep golden-brown crust.
Here's the thing—don't move the patties too soon. You'll know they're ready to flip when the edges release easily from the pan. If the cheese starts oozing out the sides, that's perfect—it means the filling is hot and gooey inside.
Toast the Buns and Assemble
While the patties cook, lightly toast the 4 large hamburger buns in a dry skillet over medium heat for 30 seconds per side until golden. Spread each bun with 1 tbsp mayonnaise and ½ tbsp yellow mustard, then layer with 1 whole fresh lettuce leaf, 1 tomato slice, and ¼ of the thinly sliced red onion.
Place a seared patty on the bottom bun and top with the second bun. Press down gently—this helps the cheese melt together and creates that classic burger hug. The cheese should be gooey and slightly oozing when you cut into it, with crispy bacon peeking out in every bite.
Serve Immediately for Maximum Juiciness
Let the burgers rest for 1-2 minutes before serving—just enough time for the cheese to set slightly but still stay melty inside. Cut each burger in half if you're feeling fancy (the cheese will pull apart beautifully), and serve with extra thinly sliced red onion and lettuce on the side.
This is the moment that matters: the first bite should deliver crispy edges, smoky bacon, and melty cheese all at once, with juices running down your fingers. And if someone asks for ketchup? Just smile and say, "We don't do that here."
Pro Tips For Making Bacon And Cheese Stuffed Burger
- CRANK THE HEAT FOR CRUST: Use a screaming-hot cast-iron or griddle—no half-measures. The beef needs to sear fast (2-3 minutes per side) to lock in juices before the cheese melts, or you’ll end up with a sad, greasy patty instead of a crispy, flavor-packed center. I learned this the hard way when my first batch turned out like overcooked meatloaf.
- SALT THE BACON BEFORE COOKING: Skip the pre-cooked salted bacon—it’s already briny. Instead, pat dry center-cut slices and sprinkle generously with kosher salt (about ½ tsp per 4 slices) 10 minutes before cooking. This guarantees a deep, smoky flavor that cuts through the richness of the cheese and beef.
- WRAP THE BURGER TIGHT (AND LOW): After stuffing the cheese into the patty, wrap it snugly in foil and let it rest on the counter for 5 minutes before grilling. This keeps the cheese from oozing out when you flip, and the low-and-slow finish (350°F for 2-3 minutes) melts it evenly without burning the exterior.
- TOAST BUNS WITH BUTTER (NOT MAYO): Slather the inside of the buns with softened butter (not mayo) and toast them on the same grill for 30 seconds. The butter adds richness, and the toasted texture holds up to the juicy filling—no soggy buns here. I was skeptical until I tried it, and now it’s non-negotiable.
Essential equipment for bacon and cheese stuffed burger
Skillet Essentials
Start with a 10-inch cast iron skillet—it retains heat beautifully and creates that perfect crust. I swear by my Lodge Pre-Seasoned Cast Iron because it develops a natural non-stick surface over time. For bacon, use a cold skillet to render fat slowly—this prevents burning while keeping the bacon crispy.
After cooking the bacon, leave the fat in the pan for searing the patties—it adds incredible depth of flavor. 🔥
Bacon Prep Tools
Invest in a sharp chef's knife (like Victorinox 8-inch) to cut bacon into ½-inch strips cleanly. Thicker strips stay juicier inside the burgers. A bacon press (like OXO Good Grips) is optional but helps create even, crispy slices.
For easy cleanup, line your cutting board with parchment paper—it prevents bacon grease from sticking and makes transfer simple.
Cheese Handling
Use a fine grater (like Microplane) for your sharp cheddar—it melts more smoothly than pre-shredded. Keep the cheese cold until ready to use, and grate it fresh right before assembling the patties. A small offset spatula helps transfer cheese into the patty wells without making a mess.
For extra meltiness, I like to sprinkle a pinch of cornstarch (about ¼ tsp) over the cheese—it prevents clumping.
Burger Press
A burger press (like OXO Good Grips) ensures perfectly shaped patties every time. Press your 5 oz portions to ¾-inch thickness—this prevents them from spreading too much on the grill or skillet.
If you don’t have one, use a soup can (like 15 oz Campbell’s) as a makeshift guide. Pressing also helps create those even sear marks that make burgers look restaurant-worthy. 💪
Bun Toaster
Toast your hamburger buns in a dry skillet over medium heat for 30 seconds per side—this gives them a crispy exterior while keeping the interior soft. For extra flavor, brush the insides with melted butter before toasting.
A bun warmer (like Norpro Electric) keeps them fresh if you're serving a crowd, but toasting fresh is always best. The right toasted bun makes all the difference in texture contrast.
Cleanup Must-Haves
Keep a paper towel roll nearby for quick fat absorption between patties. A long-handled silicone spatula (like OXO Good Grips) helps flip patties without burning your hands. For easy cheese transfer, use a small metal scoop (like Melamine Ice Cream Scoop).
And always have a heat-resistant glove handy—those skillets stay scorching hot! A small trash bin by the stove catches bacon wrappers and parchment paper efficiently. 🧹
Nutrition facts
Frequently asked questions
Why does my stuffed burger fall apart when cooking?
Overmixing the beef develops gluten, making patties tough. Handle the meat gently and press the stuffed patties too firmly—they need to stay slightly loose for that pull-apart texture. Also, don't skip the 1-2 minute rest after cooking to let the filling set slightly.
Can I use ground turkey instead of beef?
Yes, but expect different results. Ground turkey (especially lean) will be less juicy and may not hold the stuffing as well. If using turkey, add 1 tbsp mayo or mustard to help bind it, and cook at medium-low heat to prevent drying. The flavor will be lighter but still delicious.
How do I prevent the cheese from leaking out the sides?
Seal the cheese inside by pressing the beef edges firmly around the filling, but don't overpack it. Use 2 oz cheese per patty (not more) and cook on medium-high heat for 3-4 minutes per side—this creates a crust that contains the filling. A light sprinkle of cornstarch on the cheese also helps it melt more cleanly.
What's the best way to reheat leftovers?
Wrap stuffed burgers in foil and warm in a 350°F oven for 5-7 minutes—this keeps them juicy. Avoid microwaving as it makes the cheese rubbery. For crispy edges, finish under a broiler for 30 seconds if needed. Leftovers stay fresh for 3-4 days in the fridge.
Can I make these burgers ahead of time?
Prep the stuffed patties up to 1 day ahead and refrigerate uncooked. Cook them fresh for best texture, but you can assemble the burgers (without cooking) and refrigerate for 4 hours before serving. For freezing, wrap cooked burgers tightly in foil and freeze for up to 1 month—reheat gently.