
Salads
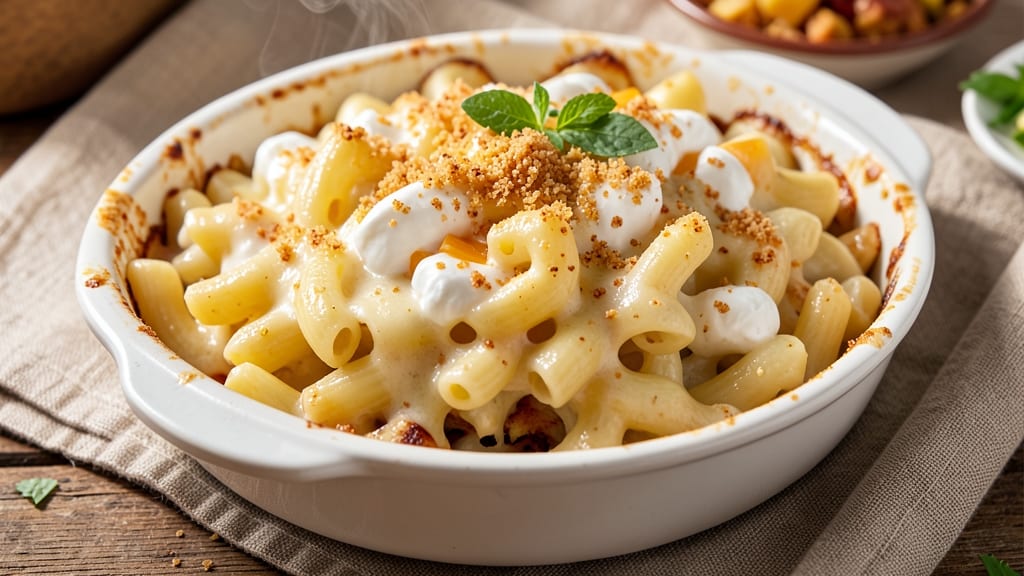
This authentic macaroni and cheese recipe delivers that iconic Southern comfort—crispy golden breadcrumbs on top and a cheesy pull so gooey it stretches like melted dreams. 💛 The secret lies in a proper roux and layering cheeses for that perfect balance of tangy sharpness and creamy richness. After years of perfecting this dish, I've cracked the code for restaurant-quality results at home, where every bite feels like a warm hug from a Sunday dinner table.
What sets this recipe apart is the technique: cooking the pasta al dente, building a velvety cheese sauce from scratch, and topping it with buttery, crispy breadcrumbs that contrast beautifully against the creamy base.
No shortcuts here—just the time-honored method that makes this dish legendary. The combination of sharp cheddar, creamy Gruyère, and a touch of cream cheese creates depth that store-bought versions can't match.
By the time you pull that first forkful, you'll taste the difference—crispy breadcrumbs giving way to a sauce so rich it coats every noodle, with a pull so satisfying it's almost sinful.
This isn't just mac and cheese; it's a dish that carries generations of Southern tradition, made easier for your home kitchen without sacrificing authenticity.
Perfect for family dinners, holiday gatherings, or when you just need comfort food that hits the spot. The best part? Leftovers reheat beautifully, making this the ultimate meal-prep-friendly dish. Let's get started on creating your own version of this classic.
Ingredients for authentic macaroni and cheese
These classic ingredients transform into Southern-style mac and cheese with that legendary crispy-cheesy pull.
| Ingredient | Amount | Notes |
|---|---|---|
| Elbow Macaroni 🍝 | 12 oz | Cooked al dente, drained well |
| Unsalted Butter 🧈 | ½ cup | Cold, cubed for roux |
| All-Purpose Flour 🌾 | ¼ cup | For perfect roux texture |
| Sharp Cheddar Cheese 🧀 | 2 cups | Shredded, block preferred |
| Gruyère Cheese 🧀 | 1 cup | Shredded, nutty flavor |
| Cream Cheese 🧀 | 4 oz | Full-fat for creaminess |
| Heavy Cream 🥛 | ½ cup | Full-fat for richness |
| Whole Milk 🥛 | ½ cup | Warmed for smooth sauce |
| Garlic Cloves 🧄 | 2 cloves | Minced for subtle flavor |
| Diamond Crystal Kosher Salt 🧂 | 1 ½ tsp | Adjust to taste |
| Freshly Ground Black Pepper 🌶️ | ½ tsp | Freshly cracked preferred |
| Panko Breadcrumbs 🍞 | ½ cup | For crispy topping |
| Extra-Virgin Olive Oil 🫒 | 2 tbsp | For crispy breadcrumbs |
The cheeses are non-negotiable here. Sharp cheddar brings the tang, while Gruyère adds nutty depth—don't substitute with mild cheddar or pre-shredded (it's full of anti-caking agents). Whole Foods or Wegmans carry great blocks, or grab the pre-shredded Kraft Sharp Cheddar if you're in a pinch. For the cream cheese, Philadelphia is the gold standard—full-fat only, none of that low-fat nonsense. The butter matters too: Plugrá or Land O'Lakes work, but European-style unsalted gives the best flavor. Toast your flour and butter slowly for that perfect roux—no rushing, or you'll end up with a beurre manié.
No Gruyère? Parmesan works in a bind, but it's not the same. Pre-shredded cheese? Shred it yourself—it melts better. The panko should be light and dry—if it's clumping, spread it on a tray and bake at 350°F for 5 minutes to dry it out. For extra richness, swap half the milk for half-and-half. Want more heat? Add a pinch of cayenne to the sauce. The garlic can be fresh or powdered—just don't skip it. And if you're making this ahead, assemble it but don't bake until serving day—the flavors meld beautifully overnight.
This reheats like a dream—just cover with foil and warm in the oven for 15 minutes. Keeps 4-5 days in the fridge, but honestly, it won't last that long. For meal prep, bake it in a 9x13-inch dish so you can portion it easily. The breadcrumbs stay crispy if you reheat them separately—just pop them in the oven for 2-3 minutes. Freezes beautifully too: 3 months in a sealed container. Pro tip: Make a double batch—the leftovers are even better the next day.
Why You'll Love This Recipe
- No-Fuss Pantry Staples: I swear by this recipe because it uses what’s already in my cupboard—no fancy shopping trips. The moment I mix melted butter, flour, and those two cheeses (sharp cheddar for punch, Gruyère for depth), I know I’m onto something solid. Even my picky husband doesn’t question the ingredients.
- Creamy-Crisp Magic: That golden crust? It’s all about the roux—cook the butter and flour low and slow until it’s nutty, then layer it with shredded cheese until it’s silky but still holds its shape. The Gruyère adds this nutty richness that makes it taste like a restaurant dish, not a weeknight hack.
- Lunchbox Hero: Between us, this is my go-to for meal prep. I’ll make a big batch on Sundays, portion it into containers, and it stays creamy for days—no soggy pasta here. My kids grab it for school lunches, and honestly? They eat it faster than anything else I pack.
- Budget-Friendly Luxury: Sharp cheddar and Gruyère might sound fancy, but they stretch further than you’d think. A block of each goes a long way, and I always have elbow macaroni on hand. It’s the kind of dish that feels indulgent but won’t break the bank—especially when I stretch it with a little milk for extra richness.
Step-by-step instructions for Southern-style macaroni and cheese
Here's how to make the ultimate mac and cheese with that perfect crispy breadcrumb topping and gooey cheese pull.
🍳 Step 1: Make the Perfect Roux
Melt the 0.5 cup unsalted butter in a large, heavy-bottomed saucepan over medium heat. Once fully melted, reduce heat to medium-low and whisk in the 0.25 cup all-purpose flour all at once. This is where the magic happens—stir constantly for 3-4 minutes until the mixture turns a rich, golden brown color. You're looking for a nutty aroma and a color that's deeper than pale blond but not burnt. This roux forms the creamy base of our sauce.
Here's the thing—I press down on the roux with a wooden spoon to check its readiness. When it leaves a clean, smooth mark that stays put, it's perfect. If it's too light, you'll end up with a thin sauce. If it's too dark, you'll get a bitter flavor. Aim for that perfect medium-brown color that's almost like peanut butter.
🍳 Step 2: Build the Cheese Sauce
Slowly whisk in the 0.5 cup heavy cream and 0.5 cup whole milk to the roux, letting each liquid incorporate completely before adding the next. Then, gradually add the 2 cups sharp cheddar cheese, 1 cup gruyère cheese, and 4 oz cream cheese in small batches, whisking vigorously after each addition. The sauce will thicken dramatically—this is where all that melted cheese transforms into velvety goodness.
Keep the heat at medium-low and continue whisking for 5-7 minutes until the sauce is completely smooth with no lumps. If you notice any cheese clumps that won't dissolve, remove the pan from heat for 30 seconds to let the residual heat work its magic. The sauce should coat the back of a spoon and be thick enough to hold its shape when drizzled. This is the moment that matters: a perfectly emulsified cheese sauce that's rich, smooth, and ready to coat every strand of pasta.
🥘 Step 3: Cook and Combine with Pasta
While the sauce simmers, cook the 12 oz elbow macaroni in salted boiling water until al dente—about 1 minute less than package instructions. Drain well, reserving ½ cup pasta water, then immediately add the cooked pasta to the cheese sauce. Stir gently but thoroughly to coat every noodle. If the sauce looks too thick, add reserved pasta water 1 tablespoon at a time until it reaches a creamy consistency that clings beautifully to the pasta.
Season generously with the 1.5 teaspoons diamond crystal kosher salt and 0.5 teaspoon freshly ground black pepper. I like to add the 2 cloves minced garlic at this stage too—it mellows out nicely in the warm sauce. Give everything one final stir and taste. This is your chance to adjust seasoning before we move to the crispy topping. The sauce should be rich, cheesy, and perfectly balanced—not too salty, not too bland.
🔥 Step 4: Create the Crispy Breadcrumb Topping
Preheat your broiler to high. In a small bowl, toss the 0.5 cup panko breadcrumbs with the 2 tablespoons extra-virgin olive oil until evenly coated. Spread the breadcrumb mixture evenly over the top of the macaroni and cheese in your baking dish. Here's where it gets fun—place the dish under the broiler for 2-3 minutes, watching carefully. You want the breadcrumbs to turn golden brown and crispy, not burnt. Real talk: don't walk away. This happens fast!
If your oven runs hot, start checking at the 1-minute mark. The perfect topping should be crispy enough to crunch but not so dark it's bitter. As soon as you see those golden spots appearing, remove from the broiler immediately. The breadcrumbs should hold their shape and provide that satisfying crunch contrast to the creamy cheese underneath.
Pro Tips For Making Authentic Macaroni And Cheese
- Cook Pasta Al Dente: DESCRIPTION: Mac and cheese starts with the pasta—don’t overcook it. Pull elbow macaroni when it’s just firm to the bite (about 1 minute less than the package says), then drain and rinse with cold water. This keeps it from turning mushy when mixed with the heavy cheese sauce.
- Melt Cheese Slowly: DESCRIPTION: After making your roux (butter + flour), add the cheeses gradually—start with half the sharp cheddar, stir until fully melted, then add the Gruyère. Gruyère melts differently and can seize if dumped in all at once. I learned this the hard way after scrapping a lumpy batch.
- Salt the Water: DESCRIPTION: Yes, even if your pasta is salted. Use 1 tablespoon salt per 4 quarts of water—this ensures the pasta absorbs flavor before it hits the sauce. Trust me, the difference in the final dish is noticeable.
- Rest Before Serving: DESCRIPTION: Let the finished mac and cheese sit, covered, for 5–10 minutes. This lets the sauce thicken slightly and the cheeses meld. Skipping this step means a runny dish—no one wants that, even if you’re starving.
Essential equipment for great authentic macaroni and cheese
Heavy-Bottomed Saucepan
This is your secret weapon for building the perfect roux. I swear by my All-Clad Stainless Steel Saucepan—it distributes heat evenly and prevents scorching. A 3-quart capacity is ideal for this recipe, giving you enough room to whisk without splattering.
If you're on a budget, a Cuisinart MultiClad Pro or even a Lodge Pre-Seasoned Cast Iron Skillet works beautifully for roux-making. Just remember: a heavy-bottomed pan prevents hot spots that can burn your roux. 🔥
Whisk with Precision
Your whisk isn't just for stirring—it's your tool for creating an emulsified cheese sauce. A Balloon Whisk with its wide head is perfect for this recipe. I keep a OXO Good Grips Balloon Whisk in my kitchen because it's sturdy and comfortable to hold.
For the roux stage, use a wooden spoon to check doneness—it leaves a clean mark when ready. Pro tip: Keep one hand on the whisk handle at all times to prevent sauce splatters when adding cheese.
Baking Dish Essentials
For that perfect bake, use a 9x13-inch baking dish—it's the standard size for mac and cheese and gives you even browning. I prefer Ceramic-coated steel dishes like Calphalon Classic because they conduct heat well and are easy to clean.
If you're baking in a glass dish, place it on a baking sheet to catch any potential spills. For extra crispiness, I sometimes use a small cast iron skillet for individual servings—it gets beautifully browned and retains heat longer.
Broiler Pan Protection
When broiling your breadcrumb topping, protect your oven racks with a baking sheet or broiler pan. I keep a half-sheet pan lined with aluminum foil handy for this purpose. The foil makes cleanup a breeze and prevents crumbs from falling into your oven.
For extra insurance, I place a wire cooling rack over the baking dish before adding breadcrumbs—this creates air circulation for even browning. Never leave your breadcrumbs unattended under the broiler; they go from perfect to burnt in seconds. ✨
Measuring Tools
Precision matters with cheese quantities. Use a digital kitchen scale for accurate measurements of cheese—OXO Good Grips is my go-to. For liquids, a liquid measuring cup with clear markings ensures you add the exact 0.5 cup heavy cream.
A microplane is essential for grating cheese yourself—pre-shredded cheese contains anti-caking agents that prevent proper melting. For the panko breadcrumbs, a standard measuring cup works fine, but I like to press them down gently for a more accurate measurement.
Optional Extras
Want to take your mac and cheese to the next level? A mandoline helps create even pasta slices if you're adding a baked pasta layer. For serving, I love using a slotted spoon to portion out the crispy-topped mac and cheese.
If you're making this ahead, a vacuum sealer preserves freshness for up to 5 days in the fridge. And for that final touch, keep a small offset spatula handy to spread the breadcrumbs evenly before broiling.
Nutrition facts
Frequently asked questions
Why does my mac and cheese sauce get grainy?
Grainy texture usually means cheese didn't melt properly. Always shred your own cheese (pre-shredded contains anti-caking agents) and add it gradually while whisking vigorously over medium-low heat. If clumps form, remove from heat for 30 seconds to let residual heat work. Using a mix of sharp cheddar and Gruyère helps create a smoother sauce than relying on just one type.
Can I make this ahead of time?
Assemble the dish (pasta + sauce) in a baking dish, cover tightly with foil, and refrigerate for up to 24 hours. When ready to bake, add the breadcrumb topping and broil for 2-3 minutes. The flavors actually improve overnight as the cheeses meld. For freezing, assemble completely (including breadcrumbs) and freeze for up to 3 months. Thaw overnight in the fridge before reheating.
What's the best pasta shape for this recipe?
Elbow macaroni is classic, but any short pasta shape works—penne, cavatappi, or even small shells. For a twist, try farfalle or rotini. The key is small shapes that hold sauce well. Avoid long pasta like spaghetti—it won't coat properly. Pro tip: Cook pasta 1 minute less than package instructions for perfect al dente texture.
How do I fix a watery sauce?
Watery sauce happens when you add too much liquid or overcook the pasta. First, remove from heat and let it sit for 5 minutes—it often thickens as it cools. If still too thin, make a quick roux: melt 1 tablespoon butter in a small pan, whisk in 1 teaspoon flour, then stir into the sauce. For immediate results, simmer uncovered for 2-3 minutes to evaporate excess moisture.
Can I make this vegetarian?
This recipe is already vegetarian-friendly! Just ensure your butter is dairy-free if needed. For extra richness, add 2 tablespoons nutritional yeast to the sauce for a cheesy flavor boost. The Gruyère and sharp cheddar provide plenty of umami without any animal products. The breadcrumb topping stays the same—just use vegetable oil instead of butter if avoiding dairy completely.