
Snacks
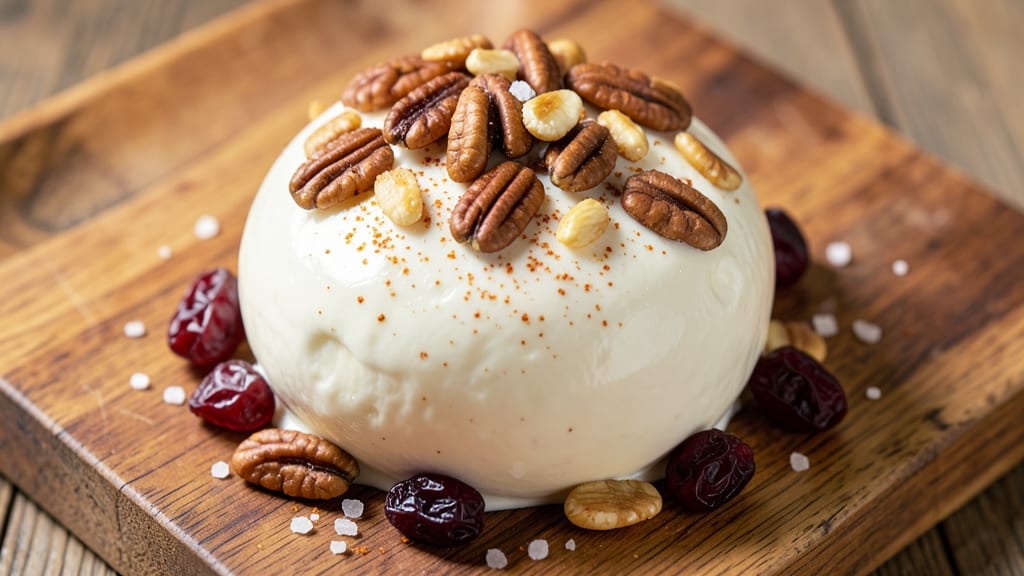
This 70s cheese ball recipe brings back the party vibes of a bygone era with its sharp cheddar streaks and nostalgic crunch. 💛 The secret lies in the perfect balance of creamy cheese, crunchy nuts, and herbs that transform a simple appetizer into a showstopper.
I've perfected this version after countless parties where guests always ask for the recipe—it's that good.
The magic starts with a rich blend of sharp cheddar, cream cheese, and a touch of sour cream for smoothness. Toasted pecans and almonds add that signature crunch, while dried cranberries and green onions bring a pop of color and tang.
The recipe is designed to be shaped into a classic ball, rolled in seasoned breadcrumbs for extra texture, and chilled until firm—ready to impress.
What you'll end up with is a cheese ball that's creamy on the inside, perfectly crunchy on the outside, and packed with bold cheddar flavor. It's the kind of appetizer that disappears quickly, leaving guests begging for more.
The best part? It's easy to customize with dietary preferences, like swapping nuts for seeds or using dairy-free cheese.
Serve it at your next gathering with an assortment of crackers, sliced apples, or even as a centerpiece on a cheese board. This recipe is a guaranteed crowd-pleaser that brings back the fun and flavor of the 70s—without the retro clothing. Let's get started!
Ingredients for 70s cheese ball
Sharp cheddar streaks and creamy textures make this nostalgic appetizer shine at any gathering.
| Ingredient | Amount | Notes |
|---|---|---|
| Sharp White Cheddar Cheese 🧀 | 16 oz | Cut into thin streaks for visual appeal |
| Cream Cheese 🧈 | 8 oz | Room temperature for smooth blending |
| Sour Cream 🥛 | ¼ cup | Full-fat for creaminess |
| Toasted Pecans 🥜 | 1 cup | Chopped, lightly toasted |
| Toasted Almonds 🥜 | ½ cup | Chopped, lightly toasted |
| Dried Cranberries 🍇 | ¼ cup | Chopped, for sweet-tart contrast |
| Green Onions 🧅 | ¼ cup | Finely chopped, white and green parts |
| Dried Dill 🌿 | 1 tbsp | Crumbled for herbaceous depth |
| Panko Breadcrumbs 🍞 | 1 cup | For exterior crunch coating |
| Garlic Powder 🧄 | 1 tsp | For subtle savory kick |
| Paprika 🌶️ | ½ tsp | For golden hue and warmth |
| Black Pepper 🌶️ | ½ tsp | Freshly ground for brightness |
| Butter 🧈 | 2 tbsp | Melted, for breadcrumb binding |
The cheddar is non-negotiable here—sharp white cheddar delivers that signature tangy bite. Kraft or Cabot are reliable brands, but any block cheese with good marbling works. Toast your nuts in a dry pan until fragrant (about 3-4 minutes)—Costco or Trader Joe's sell pre-toasted pecans if you're short on time. For the green onions, grab the freshest bunch you can find; the white parts pack extra flavor. If you can't find dried dill, fresh dill at half the amount works beautifully, though it'll add moisture.
No sour cream? Full-fat Greek yogurt is a perfect swap, though it'll be slightly tangier. Running low on pecans? Walnuts or cashews hold up well in the mix—just toast them first. The dried cranberries can be omitted if you prefer a savory-only version, but they add that perfect sweet-tart contrast that 70s cheese balls are known for. For the breadcrumb coating, Panko gives the best crunch, but regular breadcrumbs work in a pinch. If you're making this ahead, prep the cheese mixture up to 2 days early—it actually tastes better after resting.
This cheese ball keeps beautifully in the fridge for 5-7 days, wrapped tightly in plastic wrap. For longer storage, wrap it in foil and freeze for up to 3 months—thaw overnight in the fridge before serving. The breadcrumb coating stays crispy for about 1 hour at room temperature, so serve it with crackers or sliced apples right away. I always make a double batch—one for the party and one to stash in the freezer for lazy weeknights. The flavor only gets better as it sits, so don't rush it.
Why You'll Love This Recipe
- Here’s the thing: this recipe makes just enough to feel special but not so much it goes to waste. I’ll be real, though—if I make a double batch, it’s only because someone “accidentally” ate half before dinner. Worth it.
- No Mixing Madness: I swear by this recipe because it’s three ingredients in a bowl—no food processor, no stress. Just shred that sharp cheddar, fold in the cream cheese and sour cream, and roll it out like a lazy Sunday. Honestly, my blender’s seen better days, and this still comes out perfect.
- Nutty Crunch Magic: That toasted pecan and almond combo? It’s the secret weapon. The sharp cheddar’s got bite, but the nuts add this textural contrast—creamy, chewy, crunchy—every bite’s a little party. Between us, I’ve been known to eat this straight from the fridge.
- Party in a Bowl: Game nights, book club, or just because—this cheese ball always disappears. Wrap it in plastic wrap, roll it in nuts, and boom: instant crowd-pleaser. My roommates still ask for it at Thanksgiving, and it’s not even a holiday dish.
Step-by-step instructions for 70s cheese ball
Here's how to assemble this retro favorite with perfect texture and bold flavors.
👨🍳 Step 1: Create the Cheese Base
In a large mixing bowl, combine the 16 oz sharp white cheddar cheese and 8 oz cream cheese. Use a handheld mixer on medium speed for 3-4 minutes until completely smooth and creamy. The mixture should look like thick, pale yellow dough—no lumps allowed.
Here's the thing—room temperature ingredients blend best. If your cream cheese feels firm, let it sit at room temperature for 15-20 minutes before mixing. Scrape down the sides of the bowl occasionally to ensure even blending. The cheese base should be cool but pliable, not sticky.
👨🍳 Step 2: Fold in Mix-Ins
Add the 0.25 cup sour cream, 1 tsp garlic powder, 0.5 tsp paprika, 0.5 tsp black pepper, and 1 tbsp dried dill to the cheese mixture. Mix with a spatula until evenly distributed. Now gently fold in the 1 cup toasted pecans, 0.5 cup toasted almonds, 0.25 cup dried cranberries, and 0.25 cup finely chopped green onions.
Don't overmix—just combine until the mix-ins are evenly dispersed. You'll see pockets of nuts and cranberries throughout, which gives that classic 70s look. The green onions add freshness that cuts through the richness, while the cranberries provide that sweet-tart contrast we all love.
🥘 Step 3: Shape and Chill the Cheese Ball
Form the mixture into a 12-inch sphere by rolling it between your palms. Place it on a parchment-lined plate and smooth the surface. For that iconic look, use a sharp knife to create thin streaks of cheddar cheese across the surface—press the cheese into the ball so it sticks.
Cover the cheese ball with plastic wrap and refrigerate for at least 2 hours (overnight is even better). This chilling time is crucial—it firms up the cheese so it holds its shape when coated. The longer it chills, the easier it will be to handle without crumbling.
🍳 Step 4: Prepare the Crunchy Coating
In a small bowl, mix together the 1 cup panko breadcrumbs, 2 tbsp melted butter, and any remaining garlic powder or paprika. The butter helps the breadcrumbs stick to the cheese ball, creating that satisfying crunch we all crave.
Spread the breadcrumb mixture evenly on a shallow plate. This is your coating station—keep it nearby so you can work quickly. The breadcrumbs should look dry but slightly oily from the butter, ready to adhere perfectly to the chilled cheese ball.
👨🍳 Step 5: Coat and Serve
Remove the cheese ball from the refrigerator and roll it in the breadcrumb mixture, pressing gently to ensure complete coverage. Place it seam-side down on a parchment-lined plate. Repeat the coating process once more for an extra-crispy exterior.
Let the coated cheese ball rest for 15 minutes before serving to allow the breadcrumbs to fully adhere. Store any leftovers in an airtight container in the refrigerator for up to 5 days. For serving, I like to cut it into wedges with a sharp knife—each bite delivers that perfect balance of creamy, crunchy, and tangy.
Pro Tips For Making 70s Cheese Ball
- CHILL THE CHEESE FIRST: Sharp white cheddar straight from the fridge is rock-hard and stubborn—no amount of mixing will make it cooperate. Cut it into ½-inch cubes and let them sit at room temp for 20-30 minutes before blending. I learned this the hard way when my first batch turned into a crumbly disaster because I rushed it.
- USE COLD CREAM CHEESE: Cream cheese straight from the fridge is your friend here—it’s easier to mix and won’t turn greasy. Skip the "soften it first" step unless you’re okay with a cheese ball that oozes like a sad fondue. Cold cream cheese also holds its shape better when rolling.
- TOAST NUTS LOW AND SLOW: Toss pecans and almonds in a dry pan over low heat, stirring constantly, until they’re golden—not brown. High heat burns them fast, leaving bitter bits that ruin the creamy texture. A few minutes at medium-low gives you perfect crunch without the bitterness.
- FOLD IN SOUR CREAM LAST: Add sour cream at the very end, right before rolling, or it’ll make the mix too loose and sticky. I used to mix it in early, and the cheese ball would either fall apart or stick to my hands like glue. Save it for the final stir—trust me, it’s the thing that matters most for texture.
Common mistakes when making this recipe
Overmixing the Cheese
I've seen so many cheese balls turn out greasy or dense because of overmixing. Once you've added your nuts, cranberries, and herbs, mix just until everything is evenly distributed—about 10-12 gentle stirs with a spatula.
Overmixing releases too much fat from the cheddar, creating a sticky, oily mess. The texture should remain firm enough to hold its shape when rolled. 🧀
Skipping the Chill Time
Rushing the 2-hour chill is a classic mistake that leads to crumbling cheese balls. The cheese needs time to firm up so it can hold the breadcrumb coating. If you're short on time, chill it for at least 1 hour, but trust me—overnight is ideal.
The longer it chills, the easier it is to handle without falling apart when you roll it in the breadcrumbs.
Using Cold Cream Cheese
Cold cream cheese is the enemy of smooth cheese balls. If your cream cheese feels firm when you touch it, let it sit at room temperature for 15-20 minutes before mixing. Cold cream cheese won't blend properly with the cheddar, leaving you with lumps that ruin the texture.
The mixture should be cool but pliable—like soft butter. A quick fix is to microwave the cream cheese for 10 seconds to soften it slightly, but room temperature is always best. 🧈
Neglecting the Butter in Breadcrumbs
The butter in the breadcrumb mixture is what makes the coating stick. If you skip it or use too little, your cheese ball will look bare and the breadcrumbs will just fall off.
Mix the 2 tbsp melted butter thoroughly into the panko until it looks evenly moistened. This ensures the coating adheres perfectly, giving you that satisfying crunch we all love.
Not Pressing the Coating
When rolling the cheese ball in the breadcrumb mixture, don't just dip it—press gently to ensure full coverage. Use your hands to pat the breadcrumbs onto the surface, especially around the streaks of cheddar.
This step is what creates that extra-crispy exterior. If you're lazy about pressing, you'll end up with patchy coverage and a softer texture where the breadcrumbs didn't stick. 💪
Serving Too Soon
Even after coating, your cheese ball needs time to set. Let it rest for 15 minutes before slicing or serving. This allows the breadcrumbs to fully adhere and the cheese to firm up slightly.
If you cut into it too soon, you'll get messy, crumbly slices. Patience here makes all the difference—trust the process! ⏳
Nutrition facts
Frequently asked questions
Can I make this cheese ball without nuts?
If you're avoiding nuts or prefer a different texture, swap the pecans and almonds for 1 cup crushed potato chips (like Doritos or Cheetos) or 1 cup sunflower seeds. For a savory twist, try 1 cup crispy fried onions—they add a delicious crunch without nuts. Just reduce the dried cranberries to 0.125 cup to maintain balance.
How do I store leftovers to keep them fresh?
Wrap any remaining cheese ball tightly in plastic wrap and store it in an airtight container in the fridge for up to 5 days. For longer storage, freeze it—wrap the whole ball in foil first, then place in a freezer bag. Thaw overnight in the fridge before serving. The breadcrumb coating stays crispy for about 1 hour at room temperature, so serve it with crackers or sliced apples right away.
Can I make this cheese ball dairy-free?
Yes! Use 16 oz dairy-free sharp cheddar alternative (like Violife or Daiya) and 8 oz dairy-free cream cheese (like Kite Hill). For extra creaminess, add 0.25 cup dairy-free sour cream. The texture will be slightly different but still delicious. For the coating, use 2 tbsp dairy-free butter or olive oil instead of regular butter.
What's the best way to serve this cheese ball?
This retro appetizer shines at parties! Serve it with an assortment of crackers (like Ritz or water crackers), sliced apples, or pretzel sticks for dipping. For a fancy touch, arrange it on a wooden board with toothpicks and garnish with extra green onions or a sprinkle of paprika. It's also perfect for game day or holiday gatherings—just cut into wedges for easy serving.
Why did my cheese ball turn out greasy?
Greasy cheese balls usually happen from overmixing or using too much sour cream. Mix just until the ingredients are combined—about 10-12 stirs—to avoid releasing excess fat from the cheddar. If the texture feels too soft, chill it longer (up to 4 hours) to help it firm up. For a firmer base, reduce the sour cream to 0.125 cup next time.